Category: Recipes

  • Tulip’s Baking School: Checkerboard Cake

    Let’s Bake!

    Last December, I bought a stand mixer and have been busily learning to bake ever since. Unfortunately, my decorating ambitions exceed my skill. I made a peppermint cake using ground candy canes. I wanted to make it look like a peppermint candy.

    Peppermint Cake by Tulip
    Peppermint Cake by Tulip

    I think if you squint and tilt your head, it sorta looks like a candy.

    Anyway, even if your decorating skills are like mine (or Sloopy’s) you can still make an impressive cake using the checkerboard technique. Of course, the most important thing to remember is: IT’S CAKE! People want to eat it no matter what it looks like.

    But she loves her Daddy anyway!
    Libby’s Birthday Cake by Sloopy

    I’m making a red velvet and devil’s food checkerboard cake. I like making a checkerboard cake because it has a high impact to work ratio. I am using the recipes from Diva’s Can Cook: Red Velvet Cake and Devil’s Food Cake. I am making half recipes of each type of cake because I don’t want to make a four layer cake. I am not going to show you how to make the cakes; I believe Glibs can follow recipes and UCS has already provided a great demonstration of how to make a cake. I want to show how to turn the layers into a cool looking checkerboard cake.

    A few basic tips. Make sure your eggs have come to room temperature. Also, regardless of what a recipe says, I prepare my pans by buttering and flouring the pan. Don’t try to use cooking spray. It leads to flour lumps.

    After you have baked the cakes and they have cooled*, make frosting. I made cream cheese frosting to go with the red velvet cake.

    Baked Cakes by Tulip
    Baked Cakes

    I have pie/biscuit cutters, but you can do this by making a template to cut around as well, or just use a bowl or lid and cut around that. I used a 9 inch cake pan and 6 and 3 inch cutters.

    Cutting Tools by Tulip
    Cutting Tools

    Center the cutters over the cake and cut it out – you should have two rings and a small round.

    Cut the Rings by Tulip
    Cut the Rings

    Separate the pieces.

    Separated Rings by Tulip
    Separated Rings

    These cakes are both made using oil instead of butter. That results in a very tender and fragile cake, so I need to be careful when separating and assembling the cakes. Normally, I would re-assemble the cakes and then stack, but with these cakes, I will assemble it on the cake plate.

    When both cakes are separated, you’re ready to assemble the checkerboard. Put a ring of red velvet on the cake plate. Put frosting on the inside piece, then add a ring of devil’s food, add frosting and then put the round of red velvet.

    First Layer Assembled by Tulip
    First Layer Assembled

    Now do the second layer.

    Assembling Second Layer by Tulip
    Assembling Second Layer

    Once it is assembled, it’s ready to frost.

    Finished Assembly by Tulip
    Finished Assembly
    Iced Cake by Tulip
    Iced Cake

    On the outside, it looks like your basic cake, but when it is sliced open Voila!

    Cut Cake by Tulip

    As a variation, you could make a vanilla cake. Pour out the first layer of cake batter into one pan, then add food coloring to the mixing bowl and pour the second layer in the other pan. I only cut one ring for this cake.

    Vanilla Checkerboard by Tulip
    Vanilla Checkerboard

    You could also skip the cutting and assembling, and just make each layer different. If you make each layer a little darker, you have an ombre cake. This one is white chocolate, milk chocolate and dark chocolate. I put raspberry jam between the layers.

    Chocolate Ombre Cake by Tulip
    Chocolate Ombre Cake

    * these are both soft moist cakes, so I refrigerated them before cutting.

  • CPRM’s [REDACTED] Barbecue Recipe

    By CPRM

    Okay, a good barbecue starts with the meat. Pork is great because it’s cheap and takes on flavor. The best cut of pork for this recipe is [REDACTED]. This cut comes out moist with a crispy exterior.

    Ingredients:

    8 pounds of pork [REDACTED]
    2 22oz bottles of [REDACTED] mustard
    1.5 bottles of [REDACTED] mustard
    1 pound of [REDACTED] [REDACTED]
    16 oz of [REDACTED]
    1 Can of [REDACTED] [REDACTED] [REDACTED]
    2 [REDACTED] [REDACTED] peppers
    2 [REDACTED] Onions
    molasses
    A smoker grill
    [REDACTED] wood chips
    16 pounds of charcoal

    We’ll start off with meat. I’m assuming you bought it in a store. So take your 8 pounds of [REDACTED] and microwave 8 minutes/until par cooked. (sounds nuts, but it works). Use a fork to poke holes in it and set aside.

    In The Large Yellow Tupperware bowl add one pound of [REDACTED] [REDACTED]. Pour in 2 22oz bottles of [REDACTED] mustard, followed by 1.5 bottles of [REDACTED] mustard.

    Add 16 oz of [REDACTED]. Stir.

    Next, take the molasses and pour around the Yellow Tupperware bowl in a Fibonacci sequence from the center out.

    It should taste disgustingly sweet. The taste will temper as the sauce caramelizes on the grill.

    Use ½ the can of [REDACTED] [REDACTED] [REDACTED]

    Now, in a food processor, liquefy 2 [REDACTED] [REDACTED] peppers, and 2 [REDACTED] onions.

    Add the peppers and onions to the sauce.

    The flavor should be coming together.

    Now, use the other half of the can of [REDACTED] [REDACTED] [REDACTED] to clean out the mustard bottles and food processor. Pour that into the sauce.

    Submerge the par-cooked permeated pork [REDACTED] in the sauce. (If you are someone worried about food contamination, set aside ¼ of the sauce for cooking before adding the pork). The par-cooked pork will draw the sauce in as it chills.

    Seal and store in the fridge for 16-24hrs.


    THE NEXT DAY

    Put 16 pounds of charcoal into your smoker grill and light by your preferred method.

    In the smoker chamber add [REDACTED] wood chips or if you prefer, use [REDACTED] wood logs.

    After the grill has reached temperature, fill it with as many [REDACTED] pork pieces as will fit. Close the grill, and close the chimney ¾.

    Have a cigarette. Then open the chimney to full, this will prevent getting smoke in your eyes. Turn over all the pieces, add sauce to the part that was flamed. Close the grill, and turn the chimney back to ¾ closed.

    Have a cigarette. Repeat the last step.

    Have a cigarette. Repeat the step from before.

    Have a cigarette. Repeat again.

    The first round should be done.

    Now repeat again, check to see if you need to add more [REDACTED]wood.

    Do so until all the pork is cooked.

    Place the cooked pork in an oven-safe container and cover with extra sauce. Place in the oven at 200 degrees adding the rest of the pieces as they cook.

    When the pork is fully cooked, the outside should appear burnt, while the inside is moist.

    If I do another article, we’ll add a side with my [REDACTED] salad!

  • Spontaneous Cooking for One: Chicken Adobo

    Previously, I promised to explain how I translate a dish into my cooking method. I made a Chicken Adobo inspired dish using a chicken thigh. It deviates from the general steps I outlined because I don’t reduce, then extend the sauce before returning the chicken thigh to the pan. Instead, I return the chicken right away and bring the liquid to a boil, then let it reduce while the chicken cooks. I also don’t add extra vegetables. I serve the chicken and sauce with some rice. When the rice is done, I added a drizzle of olive oil, some chopped parsley and squeezed a lime over it.

    This is good example of how to come up with a sauce. I saw a Chicken Adobo challenge on “Eat Your Words” a Netflix show. It looked good and I thought I would give it a try. So I went online and searched for Chicken Adobo recipes. I flipped through quickly because I wasn’t going to make any of the actual recipes. Instead, I was looking for what they had in common. I found that they all used vinegar, garlic, and soy sauce. Some used white vinegar and some used apple cider vinegar. They all used LOTS of garlic. A very few (and mostly the ones that had low ratings) used onions. Almost all used black peppercorns, although a few used ground black pepper. All had bay leaves. Some used red pepper flakes or added a habanero. I was surprised that none used ginger. The majority of the recipes boiled the chicken in the sauce, and some broiled them at the end to crisp the skin. I thought about what I had found and came up with a plan.

    I decided to use apple cider vinegar and soy sauce. I used a rough proportion of 2:1 vinegar to soy sauce. I used three garlic cloves (the recipes call for a LOT of garlic). I used two green onions and chopped the white part and put it with the garlic. I chopped the green part and set it aside for a garnish with some chopped parsley.

    Mise en Place
    Mise en Place

    My method was as follows: I put a little oil in the pan. I seasoned a chicken thigh and added it to the pan skin side down. I wanted that skin really crispy. When it was brown and crispy, I set it aside and added the garlic and green onions to the pan.

    Add garlic and green onions
    Add garlic and green onions

    Once I could really smell the garlic and before it got brown, I added apple cider vinegar and soy sauce. I added a bay leaf, a pinch of red pepper and some peppercorns.

    Vinegar, soy and bay leaf
    Vinegar, soy and bay leaf

    The liquid came to a boil almost immediately and I turned it down, returned the chicken thigh to the pan and covered it loosely. A loose lid helped the thigh to cook through and still allowed the sauce to reduce.

    Return thigh to pan
    Return thigh to pan

    By the time the chicken was cooked, (as always, use a meat thermometer – 165 degrees F) the sauce had reduced to a syrupy consistency. I plated it with some rice and sprinkled the remaining green onions and some chopped parsley over it.

    Done!
    Done!
  • Spontaneous Cooking for One: Pan Sauces

    Last time I explained the brown and bake method which is so simple it doesn’t even feel like cooking. Another simple dinner method is to saute a protein and then make a pan sauce. This is one of the most versatile methods I know, and is perfect for chicken breasts or thin pork chops. Both can become dry and tasteless. This method adds flavor and moisture.

    One thing I like about spontaneous cooking is that I am not tied to a specific recipe, I can buy whatever looks good at the store. This week, the asparagus at the market looked sad, but the green beans looked good, so that’s what I bought.

    The method follows a general set of steps, but they are not hard and fast. The steps are:

    • Brown the protein and set aside.
    • Add aromatics to the pan. Aromatics are things like garlic, ginger, shallots, onions, celery and carrots.
    • Deglaze the pan and reduce the sauce by half
    • Extend the sauce
    • Finish (braise) the protein and vegetables.

    Babs: Laziest Line Cook
    Babs: Laziest Line Cook
    I am playing a little loose with the definition of a pan sauce by finishing the protein and vegetables in the sauce. A classic pan sauce stops at step 3, then adds cream or butter. But this is how I cook and it shows the versatility. I will demonstrate the method by making a pork chop with mushrooms and green beans in a mustard cream sauce.

    Start with your mise en place (French for put in place). I have a bunch of small glass bowls that I got at the dollar store. They are really useful, and I recommend that anyone who loves to cook get some. First, I wash and trim the green beans I think I will eat. I get some salted water boiling while I prepare the rest of the mise en place.

    Take a shallot and chop some fine and set aside. You’re cooking for one – so you don’t need much. The shallot you don’t use will be ok covered in the fridge for a few days. Mince a clove of garlic and set aside*. Next clean and slice a few mushrooms. By now the water should be boiling and I add the green beans and just cook until they are bright green. I then remove them and add to a bowl with ice water to stop the cooking. I will finish them in my sauce.

    Mise en place
    Mise en place

    Brown the pork chop on both sides but don’t cook it all the way through. Remove it from the pan and set aside. Add the shallots to the pan and let brown. Shallots brown much more quickly than onions which is why I am using them here. When the shallots are browned, add the mushrooms and garlic and cook until the mushrooms are browned and softened.

    Add Shallots and Mushrooms
    Add Shallots and Mushrooms

    Now start the sauce. Add a little white wine to the pan and swirl it around to deglaze the pan. Next, I add a little dijon mustard and some stock. Because I want this to be a cream sauce, I will add the chop and beans back to the pan now. Normally, I would wait until I extended the sauce, but I don’t want to curdle the cream.

    Deglaze and reduce
    Deglaze and reduce

    Once I add the chop and beans back to the pan, let the sauce simmer and reduce by at least half. Watch the beans and chop carefully and remove when they are done. You don’t want to overcook.

    Finish meat and beans
    Finish meat and beans

    Once the sauce is reduced to a syrup – if you coat the back of a spoon you should be able to draw a finger through it and leave a clean streak- it is ready. Add a dollop of cream, swirl and plate over the chop and beans. Garnish with a few slivered almonds.

    Add cream
    Add cream

    Done!
    Done!

    This type of sauce – wine, mushrooms, dijon mustard, is flexible. Swirl in a little butter instead of cream to create a classic sauce. You could also pan fry a steak and make the sauce with red wine and serve with mashed cauliflower.

    Other Variations:

    Another classic is a piccata sauce and it works well with pork, chicken or fish. Deglaze with white wine and add lemon juice. Reduce, then add some broth before returning the protein to the pan. Garnish with capers. I like to do that with chicken and asparagus.

    Chicken and Asparagus
    Chicken and Asparagus

    Another classic is the sauce for coq au vin. That uses a little bacon (when done, remove from the pan and crumble), add onions and mushrooms and deglaze with red wine.

    Chicken cacciatore uses wine, onions, peppers and tomatoes. Add onions and peppers as your aromatics, deglaze with wine and extend with tomatoes and their juice.

    Next time I’ll break down how I translate a recipe to my cooking method.

    * This is a LOT of garlic for a single serving, so I set some of the minced garlic aside for a dressing.

  • Cocktail of the Week: Pink Pirate


    Avast!


    The Pink Pirate was born of a combination of intolerance and boredom. The intolerance part comes from Mrs. Dean: there is a fairly short list of liquors that she can tolerate without headaches and just kinda weird side-effects. Tequila fell off of her short list a few months ago, so she’s basically down to rum, rye whiskey, and beer. Effin’ tragic, I tells ya.

    Thus, the boredom: Her cocktail rotation was down to three or four drinks. I needed a new recipe, and for some reason was fixated on working cranberry juice into a cocktail. After surprisingly little experimentation, the Pink Pirate was born.

    This is a summer drink for getting people hammered in a hurry – the dry of the cranberry juice, the tart of the lime juice, and the heat/sweet of the ginger beer syrup all work together to make a dangerously drinkable libation. Since we invented this one, we get to name it, and between the party-pink color of the final product and the rum, the Pink Pirate was born.

    Pink Pirate

    3 oz. white rum (Flor de Cana)
    1 ¼ oz. cranberry juice (unsweetened, not the cranberry juice cocktail)
    ¾ ounce lime juice
    Ginger beer (Maine Root or Cock and Bull preferred)

    This one can also be made with 1 oz. Pickett’s No. 1 Medium Ginger Beer Syrup and club soda/seltzer instead of ginger beer.

    Ginger Beer Recipe:

    Pour the rum, cranberry juice, and lime juice over rocks in a highball glass. Top with @ 6 oz. ginger beer. Stir.

    Ginger Beer Syrup Recipe:

    Pour the rum, cranberry juice, ginger beer syrup, and lime juice into a mixing glass. Mix well – the syrup will need to be stirred or it will separate out. Top with club soda/seltzer to @ 11 oz. total. Pour over rocks in a highball glass.

    You could probably throw a lime garnish on it if you want to dress it up a little. Hell, one of those little umbrellas would look right at home on this one.

    The kind of white rum you use isn’t terribly important – the rum is backgrounded by the all the other flavors. I did try making this with dark rum, but it just wasn’t as crisp and refreshing.

    As ever, cocktailing is all about proportions and balances – feel free to adjust any of the amounts to dial it in to your preference.


    And ye better be rememberin’, no drinking and navigating!
  • An Artisanal Hawai’ian Style Deep Dish Pizza


    Pizza is widely understood to have originated on the Italian peninsula over 1000 years ago according to Wikipedia. A lot time elapsed until the 1940s when American GIs went to Europe during World War II and brought back home with them a taste for pizza. In more modern times, pizza has exploded onto the world food scene, both as a go-to fast snack to be enjoyed when time is of the essence, as well as having gained acceptance as highly regarded haute cuisine.

    In the last 70 years or so, considerable innovation has occurred in pizza technology. This article will focus specifically on a treasured pizza style: deep dish pizza of the Hawai’ian type. Deep dish pizza is made by means of baking pizza in a deep pan, and is thought to have originated in Chicago around the middle of the 20th century. The famous Pizzeria Uno claims to have produced the first. Deep dish pizza consists of an inverted topping layer scheme: cheese, then protein and vegetable ingredients, then the tomato sauce, and finally a dusting of some sort of a pulverized cheese product. In this article, we will take it to the next level by laying out the optimal process for you to create a perfect artisanal, Hawai’ian-style, deep dish pizza.

    The crust

    It is important that, in order to make the highest quality, artisanal pizza, one must start with the finest ingredients. The pizza dough is no exception. If you do not feel up to the task of making your own high quality pizza dough, you can just skip this section and buy an acceptable pre-made dough. I would recommend the pre-made dough sold by Whole Foods Market, or alternatively, any dough sold by your local trattoria – just ensure that you confirm they use non-GMO flour.

    •Approximately 2 US cups (450 ml) of Vermont’s finest King Arthur low gluten, unbleached white flour
    •Approximately 1 cup (225 ml) of distilled water, Ty Nant mineral water, or other reputable water brand
    •1 heaping tablespoon (15 ml) of Bob’s Red Mill, gluten free, active dry yeast
    •1 heaping tablespoon (15 ml) of Wholesome Sweetener’s Malawian Fair Trade Natural cane sugar
    •Approximately 1 teaspoon (5 ml) of pink Himalayan salt, Fair Trade and Conflict-Free preferable
    •1 bottle of high quality imported extra virgin olive oil (EVOO) – I prefer Fair Trade EVOO from Tunisia, and always avoid oils that include trans-fats

    Warm the water, because it will speed the activation of your yeast, and you will therefore not have to wait days or even weeks for the dough to rise. To warm the water, I would recommend using an electric kettle because electricity is clean power, but make sure you stop warming the water once it gets to a temperature of about 120F/50C. You need to do this to ensure that the yeast is not killed due to excessive temperature, as yeast is a living microorganism. Mix the warm water, the yeast, and sugar in a large mixing bowl until the sugar is completely dissolved. Let the yeast activate for about 10 minutes so as to reduce its toxin content. You will know that it’s time to move on to the next step if the liquid mixture develops a frothy head about fingernail-deep. Add to the liquid mixture a couple glugs of the olive oil, and the salt. Next, gradually stir in the flour until the mixture begins to form a viscous paste and gradually transforms into a ball of dough. Continue to add small amounts of flour and work the mixture with your hands, being careful not to add too much flour. Cease the addition of flour once the dough becomes only a little bit tacky. Knead the dough for about 10 minutes. I like to throw that shit down into the bottom of the bowl and spank the dough. If the dough starts to stick to your fingers whilst kneading, simply dust your hands with a bit of flour, and continue. The purpose of all of this kneading is to begin to further break down the gluten – don’t worry – this process will also continue during fermentation as your dough is made to sit and rise. When the kneading has gone on long enough that the dough isn’t that tacky, form the dough into a ball, and cover with a thin layer of EVOO. Let the dough sit at room temperature covered with a towel. I suggest that you allow it to double in volume, about 1 hour at room temperature, punch it down/kneed a bit more, and let rise again for another hour as it ferments. As the dough sits for an extended period of time, the yeast digests, releasing gas by-products within the dough, resulting in a crust that is fluffy and not so dense.

    Preheat your oven to 425F (or gas setting 7).

    Take your baking pan – in this case I have chosen a Williams-Sonoma lodge cast iron skillet for a more rustic taste – and coat the baking pan with a liberal application of EVOO. If you are on a tighter budget, simply stop off at a Dollar General store (mind the smell – have a handkerchief on hand) and buy a steel baking pan for single use and ask your handyman to recycle it for you after you’re done. The quantity of oil used here is important. It will ensure that the crust becomes crispy, and at the same time, quite buttery and similar in consistency to First Nations Aboriginal People’s fry bread of the American Four Corners region. By using this amount of olive oil, it is ensured that the crust will effectively be fried during the baking process.

    Extract the wad of dough from the bowl, deposit into the middle of the baking pan, and work the dough outward so that it forms raised edges thusly:

    Bake the crust alone for about 15 minutes, when it has begun to develop its first signs of golden brown as illustrated below, not unlike the look of pre-burnt, naan. As the crust is still partially raw at this stage, it is therefore pliable and ready to accept the toppings.

    The toppings

    Now, as this is the recipe for Hawai’ian style deep dish pizza, it must include the two staple ingredients: cured pork product (typically Canadian bacon) and pineapple. As everybody knows that the Polynesian races prefer to pair pork with tropical fruits for all of their meals, it is but a natural and a culturally sensitive choice that this pizza – Canada’s finest gift to the world – includes these toppings.

    For the bottom layer, I have elected to use slices of Mozzarella di Bufala, derived from grass-fed, hand-drawn, free range milk. Press the cheese slices into the crust so that a deeper cavitation is created in the partially inflated crust – more room for toppings!

    For the pineapple, I was able to obtain a rare pre-war, aged tin of pineapple chunks off from an Etsy seller, for its novelty factor. But it is equally acceptable (and even exciting) to use fresh cut pineapple slices. Just make sure that your pineapple is from non-GMO trees. Ensure that you drain off and sufficiently dry out the pineapple using unbleached, single source, fair trade, high thread count Egyptian cotton cheesecloth. I reserved the juice from my aged pineapple chunks for later use in a drink with cachaça, Angostura bitters and macerated mint leaves.

    In terms of cured pork, here is the selection of toppings that I have chosen for this recipe:

    •Enough slices of jamón ibérico to cover the bottom of a 14 inch diameter (about 3.5 decimeters) deep metal pan – I obtained slices at the cost of US$80/lb (don’t balk, the quantity you need is small, so this won’t break the bank!) Because this meat product originates from Europe, it is by definition 100% natural and organic.

    •Applewood smoked bacon – cooked until strips are crispy and wick away excess pork fat with 100% post-consumer recycled paper towels. Discard the rendered fat. Do not undercook the bacon until merely chewy, as the British race is wont to prefer. The applewood smoke is a conscious choice, as apple has a natural synergy with pork. My local butcher sells me gluten-free cuts from free range, locally sourced animals.

    •Free range ham steak – only choose locally sourced ham steak from swine that are massaged twice daily. Cut away the bone and trim away the fat, as you do not want the fat to render on your pizza and make it too greasy. Just throw the trimmings into your compost bin or allow your Salvadorian housekeeper to take them home in lieu of a good performance bonus. Note that I have deviated from the conventional rectangular slices of Canadian bacon, and opted instead to cut the ham steak on the bias to produce attractive parallelogram and diamond shapes which also enhance the flavour and mouth feel.

    Proceed to layer the toppings.

    We’re almost at the end! For my sauce, I slow cooked sun-ripened, non-GMO, organic San Marzano tomatoes along with pulverised fresh garlic clove and fresh chopped basil from my window sill terrarium, a pea-sized amount of anchovy paste to enhance umami, freshly ground Indonesian Fair Trade black pepper from Aceh, a splash of Amarone for sweetness and body, love, and just a kiss of organic smoked Oaxacan red chili flakes. Ensure that you produce a thick sauce and boil off much of the water, otherwise the end result will be ham, pineapple, and tomato soup in a bread bowl! Deposit the tomato sauce to cover all of the other toppings.

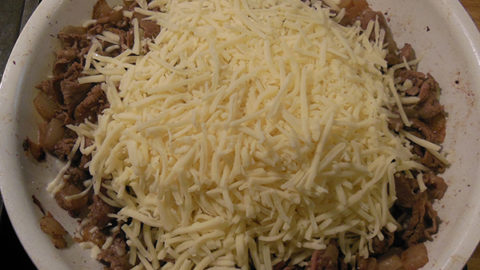
    Lastly, before baking, you will want to use Parmagiano-Reggiano from Parma to liberally dust over the top of the pizza, along with a handsome amount of all natural Bottarga of your choice for additional umami.

    Place the pizza into the oven to bake for another 35-40 minutes, or as needed to yield a beautiful golden brown deep dish crust.

    Buon appetito!

  • UnCivil Cooks – Phaildelphia Cheese Steak

    UnCivil Cooks – Phaildelphia Cheese Steak

    I’ve heard a rumor that there was something sportsball related that happened in Philadelphia. I think the Phillies won Fifa or something. So to celebrate, I’ll be bastardizing their one claim to culinary fame – tossing beef, cheese and aromatic veggies on a roll. I’m just not in the mood for bread, so the first change will be to replace the roll with an absurdist substitution. Okay, maybe not as absurd as I could have, but we’re going with portabello mushrooms. Since mushroom caps don’t fold too well, they’ll be more in the role of trenchers for the goop.

    Being within the limits of the culinary talents of the residents of Philadelphia, it is a fairly straightforward process. We need to start by greasing a cooking surface. You could use butter, but I decided to go a different way. While collecting ingredients, I spotted salt pork on the grocery shelf. I figured I could use it in much the same was as bacon. I did make one oversight, I didn’t realize they sold salt pork with the skin still attached. This is mainly an inconvenience that made cubing it a bit more of a hassle than it otherwise would have been. I should have got bacon, it’d be easier. But, once chopped up, I tossed it into the pan and started rendering out the pork fat.

    Not the prettiest pig.

    This part is simple, don’t let the pork stick to the pan, and keep it on medium heat until it lets the lard out. Once it does that and you have a nice, sizzling puddle of grease, it’s time to add the onions. Sliced or diced, doesn’t matter, we’re not being faithful to the original, but we need the onions browned or even caramelized for flavor. Even though you can probably guess what onions in a pan look like, I still took a picture anyway.

    Aromatic veggies.

    I’m too impatient to wait for the onions to caramelize, so I got out the shaved beef. They claim it’s shaved steak, but the consistency is more like that of a brisket. Doesn’t matter, it’s a brick of beef that has been frozen and fed through a deli slicer. I start piling this in with the onions.

    The beef joins the piggy party.

    Now, beef this thin cooks really fast, I mean it was less than half a minute between the time I put it in and this next picture.

    Some people would call this ‘done’

    So I needed to prep my trenchers, and I realized I had far too much beef for the amount of mushroom I had. So I needed plates. When I think of sportsball, I think of food slopped onto cheapass paper plates, so I dropped the ugly mushroom tops onto some of the cheapest I had at my disposal while the beef finished cooking. It was a suitably cheapass looking sight.

    It looks so sad.

    Now the key thing with the choice of cheese is how easily it melts. Since everything else is completely cooked at this point (except the mushrooms, which won’t be cooked at all), we want something that melts readily. I went with Monterrey Jack, because it will melt if you look at it harshly. I just heaped it on there…

    Most things can be improved with cheese.

    And stirred it in. Before you know it, we get the goop we’re looking for.

    Ready to plate.

    We scoop the goop onto our fungal trenchers and… we get something that looks like a Philly street after a sportsball game…

    “Splat”

    Perhaps I should go and look for inspiration somewhere with a better culinary track record.