Category: Pastimes

  • What Are We Reading

    What Are We Reading

    OMWC

    One of the few benefits of the pain-in-the-ass called “relocation” is the occasional discovery of something one possesses but had forgotten. In my case, it was one of my favorite books from my childhood, covers missing, pages yellowed and tattered, thumbed through to nearly the point of collapse, but still readable and delightful. Curtis MacDougall‘s Hoaxes is a classic, ranking with Mackay’s Extraordinary Popular Delusions and Randi’s Flim-Flam in the category of “books to help you develop a healthy cynicism.” Put aside MacDougall’s idiot politics, the guy could write and do real research.


    SugarFree

    The menu that Cracker Barrel Typhoid Mary handed me. Ugh.


    Riven

    Ah, so when we last left off, I was just fixing to read Grave Peril, the third book in the Dresden Files by Jim Butcher. Since then, I’ve finished that book–and Summer Knight, Death Masks, Blood Rites, Dead BeatSomething BorrowedI Was a Teenage Bigfoot, and Proven Guilty. I’m currently about hip-deep in White Night, which isn’t as Christmasy as the title had initially led me to believe, but then I’ve had Christmas on the brain since Halloween, so… Maybe that’s not on Butcher. Also reads but timeline-ambiguous: Vignette, A Fistful of Warlocks, B is for Bigfoot, and A Restoration of Faith. Clearly very easy and whimsical stories to read, they’re entertaining and just-distinct-enough from each other that I will likely read the entire series right into the dirt. As long as Butcher keeps writing them, I’ll keep reading them, and I think I’m about halfway through the entire catalog at this point, if I include all the sundry shorts. … So he’s got another month or so to write the next one before I get to the current end of the series.


    mexican sharpshooter

    My reading once again, has been limited by what I read my four year old.

    This month’s entry is Shel Silverstein’s classic, The Giving Tree.  It is a touching story on the surface, but upon closer examination is a cautionary tale about the moral hazard of the welfare state.  The story begins with a boy playing with a tree but inevitably, time plays its terrible curse upon the boy and the tree.  The boy grows and no longer has interest in the tree.  The tree notices the boy coming by less often, but when he does, she finds the boy is missing something.  The boy first has no money, but the tree offers the boy her apples.  Now this is act of pure kindness on the tree’s part, and also an important lesson missed by the boy.  The apples you see, were meant to be sold in the market for a profit so the boy was able to have spending money.  Given the utter lack of overhead costs incurred by the boy, any apple sold was sold for a profit.  The boy then makes the mistake of spending all his money foolishly.

    His mismanagement of the tree’s gift is evident because the next time the boy comes to the tree for help, he is in need of a house.  Perhaps he knocked up some girl and needed a house.  Who knows?  Ultimately, if he had been a better steward of the tree’s gift of her apples, he would have used the profits from the apple sales, and applied those towards the startup for another, more profitable venture.  At the very least, the profits could have been used towards a down payment on a house. Given he had no money tells me it was spent on women and booze, because he now had a family and was once again asking the tree for help.  She offers her branches to build a home, and probably a shabby one at that.  Apple trees aren’t exactly known for their high strength wood, unless this was some kind of magic tree.

    Clearly, the boy made a mistake in who he married, because the next time he comes to the tree for help he wants to get away and have an adventure.  Between his debts and his dilapidated home, I would want to get away from everything too.  The tree once again offers the boy help by allowing him to chop down her trunk, and use it to make a boat.  Boats are nothing more than a hole in the water filled with money if you ask me.  The tree apparently was happy, but not really.

    Behold! The Welfare King upon his throne.

    The story concludes with the boy comeing back to the tree as an old man.  Surly, broken down—he can’t even chew on apples anymore out of disgust for his poor decision making.  The tree inevitably offers the only thing left she can as a stump, and offers the boy a place to sit his lazy ass down.

    The lesson here is the moral hazard of the welfare state.  The tree gives selflessly, and the boy takes advantage of her generosity by stealing everything she is worth—even in death.  A better course of action would have been to give the boy the apples as a loan.  How do you pay back a loan to a tree?  I don’t know, maybe the tree could’ve loaned the apples with the stipulation the boy plant a dozen of those apples somewhere.  Something, anything really to instill upon the boy the apples he is selling to spend on hookers and booze was not his to begin with.  The smartest course of action, being that he could clearly sell apples, is to plant more trees. Then the tree wouldn’t be so damn lonely for one, being surrouded by other trees, but the boy would have a larger supply of apples to bring to market.  Perhaps even plant a few more trees, and entire orchard of trees, and become de facto king of the magical apple tree forest. That never occurred to the creepy bearded, bare-footed Silversteen.  Obviously, because he wanted you to believe it was better to give everything to everyone, especially the undeserving.

    Ayn Rand would’ve had an epic, 96 page field day with this.


    jesse.in.mb

    Coming off a rough few months and finally getting a chance to do some reading. I finally finished the Lies of Locke Lamorra which I mentioned a quarter ago. It got better after where I was at before, but I’m not sure I’m going to pick up the next book in the series. There were open questions, but the tale itself comes to a satisfying close.

    Jeff Wheeler’s Storm Glass is another first book in a series. I *might* pick up the next one. The blurb made it sound like an impressively hamfisted parable for modern socioeconomic disparities set in a roughly steampunk (English, not wild-west) setting, but it was more enjoyable than the blurb made it sound.

    The Shadow & Bone trilogy (also apparently called the Grisha trilogy) is again a vaguely steampunk set of novels reminiscent of The Legend of Kora. The setting is overtly Russian and at about the end of the tsarist era, but in this universe some people are born to manipulate aspects of the world around them and some people are just fodder for the constant wars at play. There were a few points in the series where the story faltered, but the cadence kept me reading and I put down 2.5 of the books in a day-and-a-half.

    Currently reading Roadside Picnic, but I’m barely through the foreward so it’ll have to wait until next time.


    SP

    I have been reading self-help and how-to books this month.

    ”How to Relocate AGAIN and Stay Married”

    ”Creative Arson: When You REALLY Can’t Pack One More Box”

    ”Toss It! (Grandma’s dead, she’ll never know you gave her ‘heirlooms’ away)”

    “How to Get Moving Quotes Without Talking to Humans”

    “Nobody Needs 23 Kinds of Wine: Throwing Packing Parties to Reduce Your Cellar”

    ”Do the Math, Or Is it Cheaper to Replace All Your Household Goods Than Move Them?”

    “Ikea is Everywhere: Why Move Your Furniture?”


    Brett L

    I read to unwind, and after a hell of a month of November, I dove into a whole crapload of books this month. Not all of them great, but several pretty quality reads.

    I started with Gears of the City by Felix Gilman. I’ve had a pretty serious literary crush on Felix since reading The Half-Made World. Gears is a sequel to his 2007 book Thunderer. in the first book, a man named Arjun came to The City looking for his God, who had left Arjun’s monastery quiet and empty. The City contains hundreds of gods, and Arjun gets tangled up with two in particular, one a god of rot, water, and death; the other a god of flight, wind, and freedom. Many hijinks ensue and we leave the first book with Arjun going to The Mountain to look for his god. But the The City and The Mountain are mystical places, not really fixed or Euclidean in space or time. The second book picks up with Arjun having been spat out by The Mountain with a hazy set of memories. Short version is, the first book is great, the second one’s reach exceeds its grasp. I really wanted to love it, but it tied up too many things too neatly. Still loads of great characters and imaginative encounters, just not as sexy.

    After that came something lighter — the 4th installment of Drew Hayes’s NPC series (officially Spells, Swords, & Stealth series according to Amazon, but the first one was NPCs). Anyhow, this is I guess, LitRPG genre? There are two interwoven stories in the series. One is that the characters in the DnD-style game are actually in existence somewhere and controlled by people in our plane. The other is a group of NPCs who form a party to save their little town. I think its a fun series. Has some original twists and turns. Hayes does a good job between just shrugging his shoulders at some things (adventurers take stupid risks. its what they do.) and really nice world building on the other. Some of the characters include a gnome paladin of the god of minions, a half-orc wizard, and a former player-controlled character who should have died on a natural 1 roll but instead became an NPC.

    I also read the first two books of the Books of Babel series, Senlin Ascends and Arm of the Sphinx. The first book was wonderful steampunk. The second was not as original or lyrical, but moved the story along. A slightly older schoolmaster named Senlin takes his new bride to the Tower of Babel for a honeymoon (think steampunk technology, trains, some electricity, lots of steam engines) and immediately gets separated in the crowd. Thereafter begins his quest to reunite with his wife, in which he discovers that his morality is fluid, and he will do whatever it takes to get back to her. The second book takes Senlin to the mysterious Sphinx who seems to run and repair all of the automation for the tower. Senlin makes a deal to get closer to finding his wife.

    I also read a short story from Mark Lawrence in the Nona Grey universe called Bound. Lawrence continues to be one of my favorite writers, but $3 for 16k words is at the edge of my price range for anybody. Only read it if you are caught up on the Jorg/Red Queen and Nona Grey books and are waiting impatiently for the next book to drop.

    Finally, I started the Expanse books by James SA Corey. I don’t know why I hadn’t read them before, since space opera is absolutely my jam, but I had not. Nor have I watched any of the series on Syfy/Amazon. I really feel cheated that I haven’t been reading this all along. Although given the sheer number of novels and novellas in the series, it would be great if someone could tell me when to pull the ripcord so I don’t become bitter and disillusioned.


  • Enslaving Yeast – All Grain Beer Part 1 – Malts and Adjuncts

    Enslaving Yeast – All Grain Beer Part 1 – Malts and Adjuncts

    At this point, you may have two batches of mead, a batch of wine, a batch of cider, and a batch of beer fermenting away in your basement.  So, let’s take a step away from making something this week and start going over the main ingredients in beer.

    First, what is malt?  Malting is a process to soften the outer husk of a grain, and allow access to enzymes that break down starches into sugars.  This process has several steps which are:

    1. Germination – The grains are mixed into water in a dark room to begin the germination process.
    2. Kilning – At this point the grain is dried and heated.  The heating will change the quality of the grain making different types of malt (we’ll get to those in a bit)
    3. Cleanup – Now they want to break off the little dried out rootlets that have sprouted, test the malt to check the quality and the specs of this batch.

    Many grains can be malted (including corn, wheat, rice, and oats), but barley is the main one for beer.  Malts can be broken down into a couple of broad families:

    • Base Malts [Diastatic Malt] – These malts have enough diastatic power (measurement of the amount of enzymes present in the malts) to convert the starches in themselves and a certain amount of other malts.  The main ones used in beer are referred to as 2-row and 6-row (based on the structure of the head of barley) with many regional ones being used for specialty beers (Marris Otter – British, Munich – German, Pils – Pilsners).  These can add biscuit and bready notes to the beer.
    • Crystal/Caramel Malts – While the process to make Crystal and Caramel malts is different, the end result is very similar and at the homebrew level the two terms are generally used interchangeable.  These are malts that have been roasted and to force the sugars to be modified into a non-fermentable state. These are referred to by their Lovibond rating (this is a measure of the color, the higher the number, the darker).  These malts will add body, some caramel notes, some sweetness, and (for the darker ones) some roasted notes.
    • Specialty Malts – These are used in small amounts for specific characteristics they can impart to the beer.  Carapils is a popular one that’s said to increase head retention and body, smoked malts have been smoked and add that flavor, chocolate malt will add chocolate notes, roasted barley is non-malted and will add a dark color and roasted flavors.  Technically all Crystal/Caramel malts could be considered specialty malts as well.

    A beer recipe will generally have between 50-75% of the grist (crushed malts) made up of base malts, with the rest being crystal/caramel or specialty malts.  You can also make a beer with nothing but base malts or just a single base malt. The vast majority of the time, you can also freely swap between base malts (although it will change the flavor) in a recipe, unless it’s using a large amount of specialty malts or adjuncts.

    Now that I’ve mentioned adjuncts, I should probably explain them.  When talking about an adjunct in the brewing world, you’re referring to anything that isn’t malted barley (or wheat in some cases), hops, water, and yeast.  So rice, corn, oats, and rye are all adjuncts, as are Candi syrup, table sugar, or fruit juice. Spices, vegetables, fruits, and herbs also qualify. Do adjuncts make a beer bad?  No, forget the Reinheitsgebot.  It was passed to protect the income of nobility who were making wheat beers.  It sets price controls!

    So why use adjuncts?  The main reason is for different qualities that the grain and sugar additions can make.  You want that creamy mouthfeel of an oatmeal stout? You need to use some oats. Want to make a milk stout?  You’ll need to include some lactose (milk sugar). The other is flavor, there’s nothing wrong with a good fruit beer, or a nice spiced porter.  According to a couple of books I’ve read, some of the Belgian breweries (if you drink good beer, you’ve probably had their stuff) use flour as an adjunct in the mash.  And you can’t say the Belgians don’t make good beer.

  • Working Your Wood with McGinty – Picnic Table

    Working Your Wood with McGinty – Picnic Table

    It’s time for another woodworking project. Back in the spring a coworker and I headed up to his family farm to cut some cedar planks with his chainsaw sawmill. Apparently the mold or something from the cedar trees affects the apple trees they are growing so they have been cutting down the cedars. They had a nice big tree and I was able to get 5 planks that are 2 inches thick. You would never be able to find this at a lumber mill, and I got it for free so I am grateful for their generosity. I wanted to make a picnic table with the 3 planks pictured below, but I settled for two planks that I cut to 15 inches wide.


    Planks


    The plan was to have a live edge on the table, but due to how the slabs milled up I settled for a part live/straight edge combination, with other parts of the edge being sanded down cuts from the chainsaw. The 80 grit paper really smoothed these out so it looks like a live edge.


    Edge


    These planks are fairly heavy so running them through my table saw would have been difficult. I ended up buying a Makita track saw with an extra track to cut boards like this or to break down full sheets of plywood. The tracks connect fairly easily and I found that they were in a straight line when I placed my 6 foot level against them:


    Level


    Side note: if you are doing any framing, hanging doors, or leveling cabinets, I highly recommend getting a 6 foot level. I think I bought this model by Johnson to help with building a deck at a previous house, but never got around to it. So yeah, I have a 6 foot Johnson…level.

    The tops only needed a little bit of sanding to knock down the milling marks, and the result is a nice rustic look. The right side is a single pass with 80 grit paper on my orbital sander, and the left side is what it looked like before.


    Sanding


    Since the table will be outdoors I used pressure treated pine to make the frame. I wanted the table to be 30 inches high, and with 2 inches being the cedar, a simple X frame that is 28 inches high and 28 inches wide will suffice. Enter geometry and trigonometry:


    After about 2 hours of trying to remember this shit from 20 years ago, and messing up the cuts on the 2×6’s – not once but twice, I figured I would just draw the dimensions on my workbench and get the angles and measurements from there:


    It’s a little hard to see but I just used my chalk line to draw out the 12×16 inch bases for the benches, and the 28×28 inch bases for the table. Once I had the board lined up how I wanted, I drew a line along the edge of my workbench and then used a sliding bevel to figure out the angle. This then comes in handy for aligning the miter saw as the angle worked out to be in between 25 and 26 degrees.


    Sliding bevel


    Many cuts later I had the frames for the benches done, and added a couple of supports in the center that make it nice and sturdy. I used deck screws and stainless steel lag bolts to secure everything:


    The tabletop was similar to the benches, but I wanted the slabs to have a floating look to them. Once everything was put together it’s solid with no movement:


    The space in between the slabs is big enough for those plastic flower boxes, which I figure can be used for flowers or to hold ice and drinks (sort of a table top cooler). But if you wanted the slabs closer together there’s only a handful of screws to undo for them to be adjusted. There is also a few inches of room to make them bigger if needed as well.

    After a little more sanding and rounding edges over, here is what they looked like before finishing:


    I decided to try my hand at filling the holes with epoxy resin. After watching a half dozen videos and practicing on a scrap piece I figured it would work – mix it, spread it, and hit it with a blow torch. Kinky. Here is one of the bigger holes close up:

    It took a few rounds of the epoxy to fill the holes…

    And I found a 2018 penny to put in the hole above…


    For the top coat of epoxy I just smeared it all over using my hand (wearing a glove). I tried a 6 inch putty knife, but using a hand allowed me to get the epoxy in the hard to reach places.


    I gave the top a sanding with 120 grit, and then 200 grit sandpaper. Then, I put one additional coat of epoxy on it. The finish is okay, and there are a couple of sticky spots even a couple of weeks later. I’m not sure if it’s a spot where the 2 parts of the epoxy didn’t quite mix together well or what. I decided to put a few coats of spar urethane on the benches, which turned out a little better, even though there are some brush marks. Plus the benches are smooth and slick so it makes moving around on them easier. Here is what the final product looks like:


    I like the epoxy better than the urethane since it leaves a high gloss finish, and more of a contrast between the sapwood and the heartwood. But the urethane is much, much cheaper. Now to finish the Murphy bed.


  • Enslaving Yeast – Extract Beer

    Enslaving Yeast – Extract Beer

    Yes, at long last we’ve stepped through the various ways of making alcohol and have made it to the hardest to make.  Beer. Over the next couple of installments, I’ll be going a bit more in depth on the ingredients used to make beer, but let’s get started with the equipment you’ll need to make a simple extract batch.

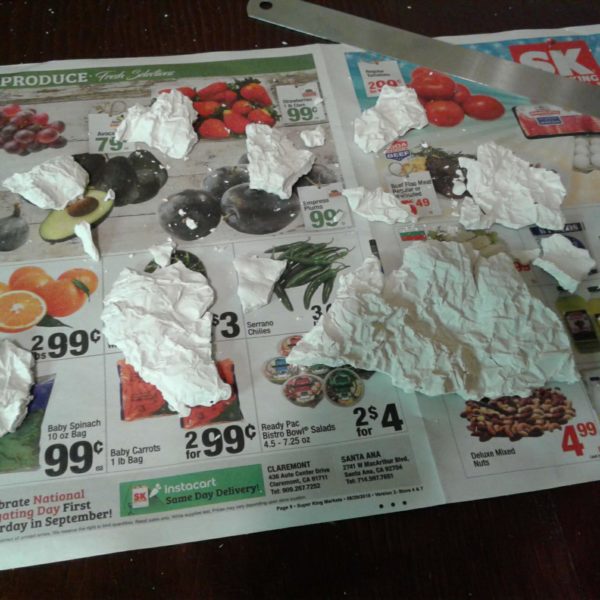
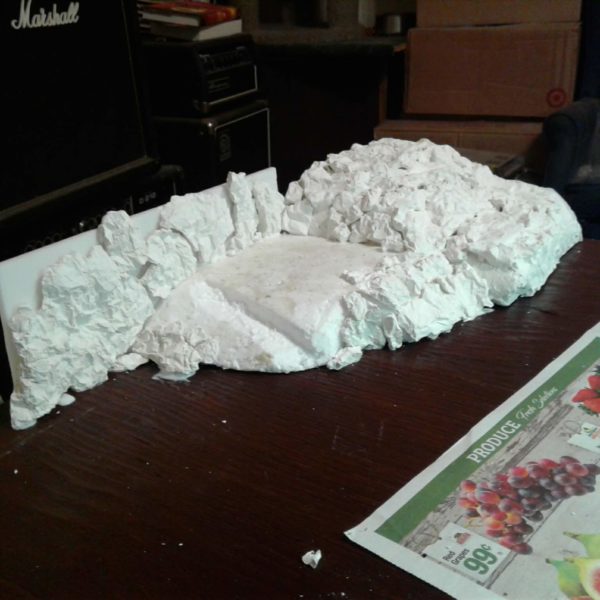
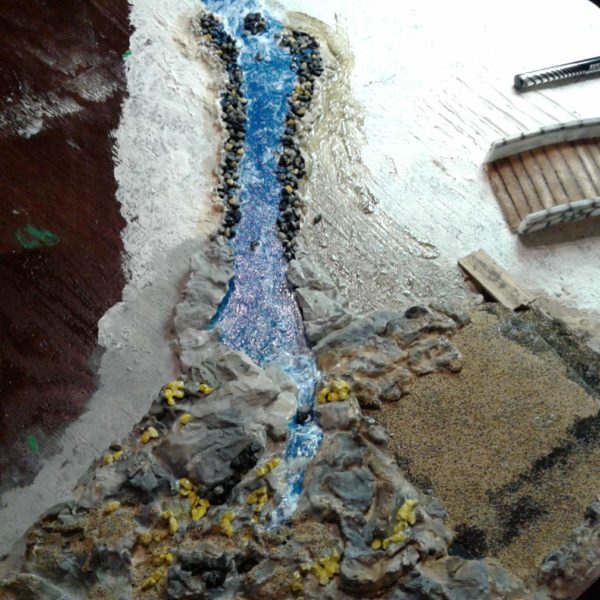
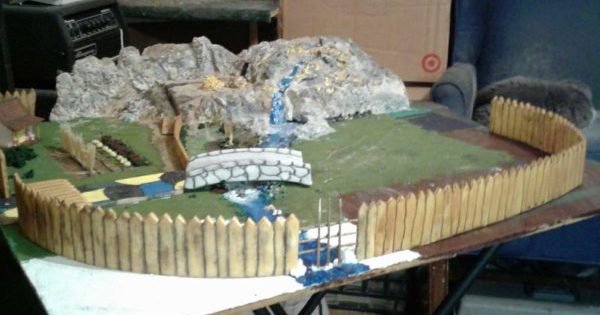
    To begin with, the first thing we’ll need is a brew kettle.  Unlike most other types of fermentation, beer requires being brought up to a boil for a time in order to sterilize it, use the alpha acids in the hops, and to help get a clear beer.  Any kettle can work for a brew kettle, as long as it’s large. Most will also have a spigot put into them to allow you to get your wort (unfermented sweet barley water) into a fermentor more easily.  Now, most beer recipes for homebrewing are written for a 5 gallon batch, that means if you want to do what’s called a full boil (the full volume of beer is boiled at once), you’ll need at least an 8.5 gallon kettle.  Why the extra 3.5 gallons?  Well, first you really don’t want a kettle full of boiling liquid full to the brim.  Second, you’ll be boiling off water as you get the wort up to a boil, and during the time it’s boiling.

    Then, you’ll need a wort chiller.  While wort chillers are technically optional, you’d be hard pressed to find someone telling you they aren’t a worthy investment.  You can make your own fairly easily as long as you have access to copper (or stainless steel) tubing, a way to bend it, and a way to get hose attachments on to it.  Wort chillers are used to bring that boiling pot of wort down to a temperature where it’s safer to move it between vessels, and bring it down to a temperature where you can pitch your yeast.

    But Nephilium, I’ve got this 4 gallon pot, and SWMBO (She Who Must Be Obeyed) has said that I can just put an ice bath in the tub to chill my beer.  If you can’t do the full boil, you’ll be doing what’s called a partial boil. This means you’ll be boiling a partial amount of your total volume, then topping it off with water.  Since the top off water doesn’t have to be boiling it will help with the cooling process. In general, if your tap water is safe to drink, you can just add it directly in for the top off, although that has a risk of infection.  If you want to be safer, boil the water once, let it cool, and put it into a sanitized fermentor a day or so before.

    Finally, we’ll talk about the two different basic types of malt extract.  You can buy it either in a liquid form (LME) or in a dry form (DME). The liquid form will have the consistency of syrup, is slightly easier to mix into hot water, but will spoil faster and is harder to do measurements of.  The dry form will have the consistency of powdered sugar, which means it’ll very easily coat things with a sticky mess, but can be kept around much longer as long as it’s kept in an air tight package and away from humidity.

    So let’s go with a recipe.  This is for a basic Saison, a style that is more descriptive than prescriptive. It is a traditional style brewed in France and Belgium at the time of the harvest, and was used to pay workers in the fields.  I’d recommend following the recipe as written once, but then you can adjust it by adding rose hips and lavender, tart cherries, currants, peach juice, or whatever you would like.

    Base Saison: 90 minute boil; Final volume 5 gallons

    Ingredients:

    2 lb. Wheat Dry Malt Extract
    3 lb. Pilsen Dry Malt Extract
    3 lb. Extra Light Dry Malt Extract
    2 oz. Saaz hops
    1 package Saison yeast (make sure it’s not a bacterial blend), I’ve had great results with the White Labs WLP565.
    ~7.25 gallons water (your amount may differ based on different boil off amounts)

    Note: If you can’t find DME, you can substitute LME for it, just up the amounts by about 10%.

    Method:

    Prepare all of your ingredients, you’ll be separating the hops into two amounts 1.5 oz and .5 oz.  Get your water up to a boil, then we’ll be adding the malt extract. Turn off the heat, add in the extract and stir.  Then stir some more. Make sure the extract is mixed into the water. Get the water back up to a boil, and once it starts boiling put in 1.5 oz of the Saaz hops, and start your timer.  70 minutes into the boil (20 minutes before you turn off the heat) add in the last .5 oz of hops, and your wort chiller (but don’t start the water flow, we want to sanitize it). When your timer runs out, turn off the heat, and turn on the water flow for your wort chiller.  You’ll need to move the wort chiller around every once in a while to help chill it down. It’ll take 20-30 minutes at least to chill your wort. If you want to pull a sample to check your gravity, it should be at about 1.060.  At that point, move it to your fermentor and pitch your yeast.  Let it ferment for 3-4 weeks, as the Saison yeasts can take some time to finish off, and the beer should finish up at around 1.005 (or lower).  Saison yeasts are fairly heat tolerant, so you don’t need to worry so much about fermentation temperatures, but just keep the beer stable.  After it completes fermenting (remember, 2 checks at least three days apart with the same gravity reading) bottle it, let it condition, and enjoy it.

  • Enslaving Yeast – Wine

    Enslaving Yeast – Wine

    wine kit

    Time to move up the level of difficulty to making something that has a couple more steps… wine.  While you can harvest your own grapes, and crush them yourself, in the modern day it’s usually easier to buy a wine kit.  You can find kits for making 1 gallon batches or 6 gallon batches.  These kits will come with everything you need to make a batch of wine (including a dry yeast packet).  The kits will come with a plastic bladder full of grape juice concentrate, which you’ll put into a bucket (or carboy), and mix with warm water to get up to your total volume.  Then you stir, and stir some more, and keep stirring to make sure that everything is mixed well. Your kit may come with some packets of items to be added in at this time (wood chips are common), follow your kit instructions here.  At this point, you can take a sample and measure your gravity (if you want to know the starting gravity), check the temperature (to make sure the yeast won’t die), and pitch the yeast.

    After a couple of weeks, the primary fermentation is done.  At this point we want to minimize contact with oxygen, so we’ll move it from the bucket into a 6 gallon carboy.  Use a sanitized siphon to move it over, and add any additions that your wine kit say to add. Then put on an airlock, and let it sit for another couple of weeks.  Once fermentation is done (check this with your hydrometer), the final gravity will generally be below 1.000.

    Now, fermentation should be complete, but we’re not done yet.  Next we need to clarify it and degas it. Yeast breaks down sugar into alcohol and CO2, depending on the ambient temperature, some amount of that CO2 will have been absorbed by your wine.  Most styles of wine do not have carbonation, so we need to do something to get that gas out. You can either take up more stirring (over 5 minutes, go ahead, count it out) or you can use a degassing wand.  These labor saving tools go into your drill, and make degassing much easier.  For clarifying, your kit will most likely have a couple of packets that need to be added in a certain order.  Follow the instructions (or if you’re really patient, you can wait and the wine will eventually drop clear) with your kit (side note for those who are vegetarian, keep in mind the clarifying agent is where you may find animal products).

    Back to waiting for a couple of weeks (or as your kit says) for the clarifying agents to work their magic.  Now, you just need to carefully siphon of the wine into bottles (without stirring up that layer of sediment at the bottom), and cork or cap them.  If you corked them, stand them up for 3-4 days for the corks to seal, then you can store them on their side. At this point, you’re done and will have around 30 bottles of wine (assuming a 6 gallon batch and standard 750 mL bottles).

    Sorry for the lack of recipes this time around.  The only non-kit wine I’ve made is beyond the level that I’ve gotten to in these tales.  But if you want to follow it, you can find it here.

  • UnCivil Learns From Glibs

    After the previous article from Leap regarding putting a handle on a knife blank, and some ongoing discussions in the comments, I wondered if it was within my capacity to do likewise. I asked a lot of questions of the Glibertariat, trying to harvest knowledge for the project. The first big problem I saw was that the example from the original article was a single-edged hidden tang blade. Since I have heaps of utility knives, I am making something for a more artistic goal. Aesthetically, I like the shape of a double-edged blade. Structurally, I prefer a fully tang – which is where the shape of the handle and the shape of the metal within the handle are identical. Unfortunately, the unsharpened knife blank I found had a tang of a shape I didn’t like and would be too small to be comfortable in my oversized mitts.

    So, I sank a lot of disposable income into buying tools and parts. In terms of cash outlay, it would have been cheaper to buy a knife. But part of that was because my toolbox was geared towards the problems I’ve had to deal with. But tools are a capital investment, and if I keep doing this as a hobby, the amortized costs would head towards negligable. But, that is neither here nor there. The question is, could I learn enough to make a decent piece?
    First off, I discarded the idea of making the blade myself. That was just way too far out of my skill reach at the moment. So I’ll be trying to put a handle on the blank. This process stretched out over a couple of days in the evening after the day job.

    Day 1 – The blank is here

    The first box

    While I technically started the project when I ordered the parts, but I couldn’t do anything until the parts arrived. The pieces that showed up in that first box were the blade blank proper, the handle scales and four Corby bolts. The blade blank is hardened high carbon steel, but not sharpened. This is good, because it’s easier to handle while working on it. Plus, without an edge, it’s not a dagger, it’s a letter opener. Thus this is not an elaborate confession to weapons possession. The handle scales are Resin Ivory, basically an imitation Ivory made of synthetic materials. So the only piece of hardware that might need elaboration are the Corboy bolts. Traditionally, handles would be held with solid pins. There are a lot of downsides to that, however. You either don’t have a mechanical lock, or you have to manually peen the ends. Corby bolts are one of several options that use threaded shafts to bridge two thicker ends. These provide a more secure connection, which is good for newbies like me. The trade-off is that the holes need to be coutnersunk. Luckily, I have a standing drill press, and know how to work with it.

    So, after excitedly telling the Glibertariat that the parts were here, I set about assembling the remaining materials. Because the tang is smaller than my intended handle, I need to fill in the rest of the space around the tang on the same layer. If I was masochistic, I could try to cut out spaces in the resin ivory to rest the tang in. I’m not. I’ll be adding some spacers in which it is easier to cut the shape. The material I decided to use was leather. I have stores of leather scrap from various crafting projects. I picked some brown oil-tanned scraps and a bright red suede split. The oil-tanned leather I never got around to using before, as it was stiffer than I’d expected. The red pigskin suede I’d used to line my toolbox. Only the harder oil-tanned leathers would be cut to shape around the tang. The suede was too thin and elastic, and is there for decorative purposes.

    Parts stacked and trimmed to size, I prepared to drill the holes. Since there were already holes in the tang, I decided to use that as my guide. Taped together to keep them from moving around, I brought the lot to my drill press. Resin ivory has an… interesting aroma when being worked. It wasn’t strong enough to drive me away, but something to note if you decide to use the material in one of your projects. On the plus side, it is easy to work. On the down side, it is easy to work. With one slip while drilling the last countersink, I suddenly had a three-sixteenths inch hole all the way through the scale instead of halfway through as intended. So, I was going to have a pin instead of a bolt holding that spot. Oh well, I’ll still have two bolts.

    Putting holes in things

    Holes drilled, it did my first test fit. It was a real pain to work corby bolts with one screwdriver. This is because they’re intended to be driven by two screwdrivers at once. Still, I got it together and it seemed to work. I chose not to do any more work that day, since it was getting late, and the only task I could do was trimming the oil-tanned leather.

    Day 2 – The Epoxy

    After I ordered the blank, I realized I’d ordered four Corby bolts for a blank with five holes. After some thought, I realized I didn’t want to have two countersinks on the holes by the base of the blade. That would seriously weaken the resin ivory. These holes are there for a bolster to be attached. I decided to pin them. I didn’t have copper pin stock, but that is easily rectified with a visit to the internet. My pin rod and epoxy arrived a day ahead of schedule, and one day after I started the project. So I set about getting ready to assemble. I trimmed the oil-tanned leather to shape with hobby knives I owned for other expensive passtimes *cough*Warhammer*cough*. Once I had these blanks, I did another test fit of the layers and tried to fit the pin rod through. Here I was reminded of the aforementioned elasticity of the suede. The drill bit didn’t punch a full eighth-inch hole through the material. So I got out my leather punch. It is basically a hole punch like those used for paper, only designed to put holes in leather. I punched out a set of larger holes in the suede to stop snagging things.

    Despite using the holes in the tang as a guide for drilling, the pins didn’t fit, even without the suede. I am tempted to blame mystery causes, but the truth is, it’s my fault. My countersinks were not perfectly centered on the holes, so the corby bolts shifted the scales ever so slightly off. If you remember yesterday, The resin ivory is easy to work. A round file of small enough diameter shaved off enough resin to fit the pin stock through. There was a lot of grumbling through this stage. But it was better to find out these problems before I started with the epoxy. I was still within my margin of error for never having done this before. It could still be brought together. However, the dry-fitting told be something very important – I wanted to make sure I was in clothing I could afford to lose when I started working with the resin. The lack of a table-mounted vice meant the operation of the Corby bolts was awkward, even with two little screwdrivers. So the odds were, I’d spill on myself.

    Having changed, cut two pins off the main pin stock, andassembled my stuff, I decided I hadn’t taken enough precautions. I grabbed a giant trash bag to use as a drop cloth, and a pair of resin-mixing gloves. Okay, they’re disposable nitrile kitchen gloves. Mixing up a quarter ounce each of resin and hardener, I began my assembly, spreading epoxy on before each layer was placed, and coating the pins. Suede is a very porous material, and soaked up epoxy into its structure. After hardening, it should be a composite material akin to fiberglass or carbon fiber rod, only with organic fibers. The oil-tanned leather is less porous, and didn’t soak in as much, but still absorbed enough to have a similar effect. When initially thinking about the process before any of the dry-fits, I wondered if I needed loc-tite, or similar thread glue. But the dry fits told me there was zero chance I wasn’t going to get epoxy in the threads of the Corby bolts. This is not an issue, since I want the handle as solid as I can get it.

    Pins set, layers epoxied, I noticed a problem. The countersink that went all the way through resulted in the end separating, as it didn’t have the mechanical pressure of the other two bolts, and the leather is… squishy. Fortunately, I picked half hour epoxy, so I had time to grab some scrap plastic and a set of clamps. Fitting three clamps about the handle, I got everything back to the proper shape. Clamped up, I left it to cure overnight.

    Sure the heaps of plastic look bad, but it’s better than getting epoxy all over the room.

    Day 3 – Daily Grind

    I get home from the day job, decide to remove the clamps and peel off the plastic. Luckily, the plastic didn’t adhere to the epoxy, but the last clamp was stubborn about letting go. At first I thought I’d ripped the plastic and epoxy had seeped through. Nope, once I detatched it, the plastic was intact. But there was this big round dent. I was mortified, thinking I’d overtightened the clamp and crushed my way into the resin ivory. Finishing the plastic removal I inspected the damage. It was not so dire as my fears. I had so much epoxy that had been pressed out of the middle of the handle that it had pooled around the clamp and shaped to the bevel of the pad. This was why it was so difficult to get the clamp off. Relieved, I set about getting ready to drind down the pins and take off the excess epoxy. For this, I definately wanted a face mask. I don’t care whether or not California thinks it causes cancer, I just don’t want to be breathing that stuff in when I reduce it to dust.

    Not structual Damage

    And it occurs to me at that moment that while I do own a belt grinder, it was still in the box. So I went and opened the Amazon box. Unsurprisingly, there was another box inside, unbranded. So after disentangling this box from the Amazon box, I open it – and find another box inside. They had sent me a Matroyshka Doll in box form. Eventually, I find not more cardboard, but styrafoam. Prying it off, I unveiled a lovely piece of hardware, which I didn’t have a place for. it ended up on top of my table saw. (Fortunately, the sawblade retracts below the level of the table). Finding a breath mask and ear protection, I set about cleaning up the pins and bolts.

    Grinder all set up, I learned a few things, some of which I already knew to some extent. First, when you abraid off material, what is left heats up. Second, copper is an excellent conductor of heat. So, if you were, for example, grinding down a copper Corby bolt and hand your finger on the other end, you’re going to feel it. Third, Resin Ivory grinds easily. Fourth, eoxy-impregnated leather does not. Fifth, a belt grinder is a versitile tool that can do wonders in the hands of a skilled user. Sixth, I am not skilled with a belt grinder. Seventh, grinding produces an epic crapload of dust. I was so glad I put on a respirator mask. My first grind was pretty rough.

    After the first grind

    I realized that the layout of one of the grinder components was preventing me from doing what I needed to in order to have the shape I was looking for. I needed to adjust the location of a guard behind the belt proper. Removing the operation interlock from the power switch I took the side of the machine off. There’s no one to flick the switch, but I was about to stick my hands inside it. I saw that this white enamelled metal piece was just being held in with a paur of bolts which an allen key could operate. After loosening one and accidentally tighening the other, I got both loose and started to lower the guard. At which point I found that it was not white. It was dark blue. There was just so much resin dust coating the surface that I could no longer tell.

    The guard lowered slightly, I got more shape into the handle. I noticed that the composite leather material was by far the harder one to grind. The resin ivory essentially disappeared when subjected to the belt, so all of the resistance preventing me from absolutely wrecking the handle came from that leather/epoxy core. So what had been intended as a decorative element became a key structural one. I’m okay with that. Especially since I’d been expecting the resin ivory to be stronger. After the second grind, it was pretty good. I did have a problem. The respirator mask so essential to not breathing in the particulates also impeded the airflow to my lungs. So, I had to step away from the room and take the mask off.

    Part of me went, that is a pretty good shape for a first ever attempt. But there was another opinion rattling around in my head. It said there were things I could fix, even with my skill level. Flaws that I could remove. So, I got back in there and went for a third grind. I cleaned up a lot of the protests I had, making more refined handle than I’d had. It was still clunky and crude, and I did some hand filing and sanding to deal with areas where the grinder would do more harm than good. I even tried to polish it with beeswax. Only to very quickly discover I had no idea what I was doing. I sanded the wax off and went back to refining it with abrasives.

    After the Third Grind

    Finally, I had something that felt good in my hand. It wouldn’t win any beauty contests, but the handle is in one piece, there are no massive faults, and it will hold up. There was just one problem. There is no edge on the thing.

    It will not cut.

    Click For full Image
  • Outdoor Recreation for Liberty Valuing Individuals – Part 2

    PART THE SECOND

    Sailing (Or- Being wet, cold, sore and sick doesn’t seem like a Jimmy Buffett song.)


    Sailing in “Hawaiian snow”


    In the first part of this tome I advocated for giving a thought towards rock climbing as a possible sport for those seeking an individual freedom recreational activity.  But some of you may live too far from climbable areas and others may go, “Wait, what did you say about bodies and granite blocks?”  For you, I propose another sport with much to offer from an individual freedom aspect- sailing.

    The popular thoughts about sailing bring up images of Judge Smails from “Caddyshack,” Ron Rico from “Captain Ron,” or billionaire sailors burning $1000 bills for lighting cigars while watching the America’s Cup.   The truth about sailing is vastly different.  Young people, old people, rich and poor people can all access the water, enjoy themselves and experience individual freedom while sailing.

    The quotable CPT Ron…


    and an appropriate boat name for this spot.


    What is sailing and why is it better than just messing around in a boat? (Or- Isn’t a sailboat on the water just like a Prius or a bicycle on the Interstate?)

    Sailing encompasses huge areas of activity and the sailors who enjoy their sport widely consider other sailors to be misguided, crazy or boring.  If you are interested in sailing you are quickly confronted with questions like: monohulls, multi-hulls, one design racing, day sailing, cruising, racing inshore or offshore, just getting out on the water, and a mix of some or all of the above.

    You can participate in any or all forms of sailing once you learn the basics on how to more or less safely balance the interactions of two fluids while manipulating a vertically mounted airfoil.  Once you have made headway on that you can then follow activities according to your interests, sailing areas, available cash and potential partners.

    I initially learned to sail while in grade school on a golf course pond in southern AZ.  I didn’t think much about sailing again until I was living in the German Alps with a young family and lots of lakes nearby.  I needed a weekend outdoors activity I could do with my youngun’s while their mother was at work.  Bingo!  We could go sailing.   The challenges and joys were real and it was an activity that they liked as well.

    But back to the question at hand.  Why an ancient method of propulsion like a sail when you can speed around with huge engines and modern speed? Short answer: freedom and relative costs.

    The pointy end is in the front and the stick goes up.  (Or- As Captain Ron said, “Well swab, once you do that job well, you can get a better job, then another and you may become a mate.”)

    Most people learn to sail either by starting on a small and simple boat or by crewing on a bit larger boat and picking up skills.  I think a combination of the two is probably the optimum way, if the option is available.  In a small boat you can learn how to manipulate your sails to achieve a desired result while keeping the costs of error very low and easy to recover from.  My first boat was an open hull with a basic lanteen rig (one triangular sail mounted partway back from a corner).

    Dbl Eagle’s first yacht


    I could sail in small bodies of water near home at speeds that didn’t freak out young kids and if the boat went on its side it was easy to recover from.  That was good since one absolute fact is that if you sail a small boat you will go into the water sometimes.  All these things were great since I had to judge weather, water and could work my way to my goals.

    Many local groups use smaller boats to keep expenses low, and open up sailing instruction to kids as young as seven or eight.  If you get a youngster deciding on a course and learning how to get there and back you breed an independent spirit within them.  As their confidence and skills grow so is their ability to direct their exploration.

    But don’t sell small boats out.  Pretty well all great modern sailors learned on small boats and the Olympics feature only 1-2 person boats.  Your basic Laser class sailboat is found everywhere from local resorts and community sailing classes to the Olympics.  A well-tuned and well sailed Laser goes like a bat out of hell and is great challenge.

    Laser with beginners in light air.


    Laser with US Olympian Anna Tunnclife in more air.


    Sailing with a more experienced crew is another great way to learn.  I didn’t have this opportunity when I was first learning how to sail since there wasn’t a well-developed sailing community where I lived.  That meant I had to learn AND FAST how to make decisions to protect my crew (aka family) but it also left holes in my knowledge.

    After I moved to Hawaii I first joined sailing with others on their boats and I have learned an amazing amount from some incredibly experienced sailors.  I had to take the initiative to introduce myself to a skipper and convince them to take a chance on me.  Luckily, that wasn’t too hard, but to get an invitation to return for another sail I had to show that I was open to instruction and was a good team member.  As I did that I gained more responsibility and then that opened more responsibility.

    There is no government process that says who must let you sail, what responsibilities you get and when you must be promoted.  It is up to you and your crew.  If you aren’t happy you can freely depart and find a new crew that may better agree with you.


    Fast is relative. (Or- Jeebus! We are going 18 knots and it feels like we are flying.)

    Sailboats range the gamut from older boats with traditional sail plans to the new planning boats that actually are above the water and any sailboat can move faster than the apparent wind propelling them.   On a smaller boat that I race we are ecstatic if we can hit and hold 6 knots, on other boats we are feeling down if we dip below 15 knots for any length of time.

    Yeah, a power boat can speed right up with enough engine and a proper sea state, but to get to near a sailboat’s theoretical speed is exciting in and of itself.  Another plus is the wind is free. When I was sailing in Southern California in the 1990s there was a midsized powerboat a few places over.  One time talking with the owner he mentioned how he was happy with the dip in gas prices because he could go to and from the Cali coast to a nearish Channel Island for only $100 in fuel.  I was gobsmacked and asked if he was going at hull speed and he said no, that was a cruising speed.  With my sailboat it cost me a few cents of gas to get out and under sail and a few cents more when having the engine on while anchoring and getting into the slip at the end.  My trip to and from the islands was less than a Quarter.  He got to the island quicker, but it cost me less money for the initial investment, in maintenance costs, in fuel costs and as a bonus no damage to my hearing from engine noise.


    Entropy is supreme at sea. (Or- Why fix it right when we can fix it right now?)

    Boats break, things on boats break, things that hear the word “boat” break and they all need to be fixed.  Sailors get to be handy at making repairs because things don’t like to break when it’s convenient or when a professional is nearby.  Some very rich sailors with the mega yachts have entire crews to make repairs at sea while the owner catches up on binging a Netflix show using the alternate power systems.  The rest of us learn how to make repairs, figure out a jury rig, think up alternates and determine stockage rates of tools, repair parts, fuel and lubricants.

    It doesn’t matter what you sail, be it a small boat like a Laser, a mid-range boat, or a larger boat- ongoing maintenance is key and even then it will not be sufficient.  Every sailor I know with at least a modicum of experience can do some small engine maintenance, rig tuning to keep the mast upright, sail repair, and hundreds of other small tasks.  You need these skills since at some point you’ll be called on to fix something or develop a work around while far away from shore.  Or at worst, you must be able to abandon a boat with all your crew and sufficient supplies to survive while you send out an SOS.

    I know a couple of sailors who could make MacGuyver throw up his hands and exclaim, “How did you do that?”  I’ll discuss it more later, but a good mechanic, computer or radio tech can make more than enough to be able to finance an unlimited time cruising.   The above principle applies to medicine as well.  Sailors know they are the first responder for their vessel and those who travel beyond the horizon often have more medical knowledge than that.  People who are able to keep systems running through their own, or small group, knowledge tend to see beyond the trope that government must take care of us.


    Your horizons while sailing are virtually unlimited. (Or from Captain Ron again- If something is going to happen, it’s going to happen out there.)

    Many sailors decide that they want to venture farther than what can be conveniently sailed when you must get back to your starting point before the day ends.  This doesn’t mean you need a 100 foot long mega yacht.  I started “cruising” with my kids in my first boat with some camping gear and we sailed to a small island in big lake and camped the night.

    Many cruising areas feature passages which never involve leaving the sight of land.  Some of these areas can be explored for your entire life and you’ll never run out of new places to see.  But the common feature of almost all cruising areas is that the vessel crew decides on timing, routes, speeds, what to see and what to skip, where to spend the night(s) and what is your luxury and how you want to accommodate it.

    Poorly named Desolation Sound, BC.

    Passage making is not the government’s responsibility.  Depending on where you go the variables can be easy to very challenging and it is all on the skipper, perhaps with the assistance of the crew.  You are responsible for studying the weather, tides, currents, depths, available daylight, strength of crew, logistics of the boat and any other variables and then you make the call.  The government is not there, it is up to your judgment alone.

    It is wise to let others know of your plans- but there is no governmental requirement.  It is judicious to not be too adventurous for your experience- but it is your call.  If you speak with the skipper and go, “No, I don’t think is wise (or fun)” it is up to you to make the call to not go.  But the water and atmosphere can always throw in an unexpected variable and it is up to crew to deal with it.  People who seek out this responsibility tend to be distrustful of the judgment of government “experts.”

    The first rule is to stay on the boat.


    When I am cruising I like spending the night “on the hook” and am not big on tying up to a dock and dealing with paying and all the hassles of dock life like lights streaming  into cabins and/or lines hitting masts all night.  When we sailed in Puget Sound and the San Juan Islands we rarely spent the night in a marina since there was always a new place to anchor for the night.  Once on the hook I would throw the crab pot out, we might go to shore to go clamming or collect mussels and start enjoying evening cocktails.

    Here in Hawaii it is a rare interisland passage where we don’t catch a fresh mahi mahi or tuna to grill in the evening, again while enjoying a cocktail after a dive to check out the local sea life.  Because of the realities of anchoring and having sufficient space for “swinging around the anchor” it is a rare night to have many boats close to each other.  If you want to have others over or dinghy over to another boat that is great.  If you want to ignore the others, that is great too.  I especially like those nights which the anchorage is mine alone.

    Anchorages sometimes have limits emplaced to protect features or because local knowledge knows some areas are dangerous if the weather turns.  But most anchorages are totally up to the skill and judgment of the skipper and crew.  It is your job to determine the spot (knowing that it your responsibility to stay away from earlier anchored boats), making sure the anchor is set, how long of line should between the anchor and boat (7 to 1 is pretty standard), that the boat will remain safe if a storm blows in/the tide drops or rises etc.

    Then when it is time to leave it is up to you to recover the anchor and make your way safely out of the anchorage to open water.  I have been “trapped” in a small anchorage for almost two days because an unexpected swell closed the entrance to safe passage.  But since provisioning the boat is up to the skipper and crew with no government minimums, we had plenty of food, water and beer, but we did run out of black strap rum.

    Sunset in a “crowded” Maui anchorage.


    Taking the big jump. (Or- When you see the Southern Cross for the first time You know now why you came this way.)

    It doesn’t happen to every sailor, and for others it may only happen once, but many sailors look at a sailboat and go why shouldn’t I just sail to Tahiti? (Or to Hawaii, across the Atlantic, to Iceland, around Cape Horn, to Bermuda, or, or, or, or) Plenty of sailors have crossed oceans on sailboats less than 30 feet and most sailboats crossing oceans are under ~40 feet.

    You know how to keep the boat moving forward, you know (and have hopefully practiced) emergency procedures, the boat is well “found” (maintained and equipped), between you and your crew you have knowledge of repairs, plenty of food, drink and appropriate clothing.  So why not, why the HELL NOT, shouldn’t you just let loose the lines and sail over the ever receding horizon?

    Many sailors do decide to sail away- some for an occasional passage and others for days, years and even decades at a time.  They take advantage of the freedom of the ocean to become worldwide travelers and view the entire globe as a potential port of call.  Thanks to modern communications and transportation these free spirits can stay in contact with loved ones, and for a lucky few their employers.

    I have met people who work editing technical publications, freelance authors, and developing/testing code to keep a regular paycheck coming in.  Others are great with their tools and hands and refill their coffers by performing repairs beyond other sailors’ skills.  Almost without exception none of the people are rich in money and they fully acknowledge the sacrifices in other aspects that they are making to live the life they want.

    Some are poor, very poor, in a material sense.  Everything they own is in their 32 foot long kingdom.  A kingdom that is decades old but lovingly maintained.  But I have never met a cruiser that didn’t have lifetimes of experience and a spirit that valued nothing above freedom.

    Approaching Oahu while returning from Maui. These crew members are working to keep the boat properly healed over.


    The first time I went on an extended passage I was with some experienced people and one other first timer.  A few hours after leaving shore we were far enough out to sea that all you could see was the constantly moving blue water spreading to every horizon; that night’s moonless sky was so full of stars it was hard to make out the constellations and the Andromeda Galaxy (M31) was a clearly distinct smudge in the sky. The sound of the water rushing past a few inches from my head as I tried to sleep and the never ending motion was freedom to me.  To the other first timer……….not so much.  He’s a hard charging inshore and off shore racer who can still be counted on to be there and bust his ass to try and help us win, but he discovered that a day on the boat is enough for him.  He pulled his weight and nobody gave him anything but good natured ribbing for deciding that he would buy a flight home and not return with us.  Like I said at the start of this tome- every sailor has their own way and every way right for them.


    Crew rest is important while cruising.


    Racing. (Or- Don’t kid yourself. If two boats are sailing the same direction there is a race going in in at least one skipper’s mind.)

    At one end of the spectrum of sailboat racing are the round-the-globe races.  These are expensive, grueling tests for a solo sailor or crew and the boat.  At the other end of racing spectrum are two skippers betting on who buys the first round while heading to a location.  (There is much truth to the dictum: sailboats are propelled by the wind but are powered by alcohol.) Wherever your race falls on the spectrum it will probably make you a better sailor.

    There is no self-delusion on how well you are getting speed.  Those other boats are keeping you honest about how good your choice of direction is, how well your sails are set, how balanced your rudder is and a hundred other details.

    I started racing on a regular basis when I moved to Hawaii and have received a constant tutorial on boat speed, sail shape, balancing a vessel, and anticipating wind shifts.  One to two nights a week year round and several weekend days each month I am out there learning.  Plus when we do well, the prize pitchers of Cuba Libres or Margaritas taste extra good.  Since people who make decisions well outside the norms of the fleet can end up winning, most sailors don’t believe in blindly accepting the approved wisdom delivered from on high- they’ll make their own decisions thank you very much.

    Start of a race. Balancing boldness and caution is supreme.


    Downsides to sailing and cruising. (Or-Guerrilla. Gorilla.  Huuuge difference.)

    Well to be frank- you will get seasick at some point.  Everybody does, so the only thing to remember is concentrate on the horizon if you can and go ahead and puke over the leeward (downwind) side of the boat because you’ll feel better after you chum the water.  You will be late at some point for some event important to your spouse/employer because the winds will be either too low or too high.  Sailing is much more work than most people think so you’ll get sore muscles, bruises and “boat bites”; but these are a sign of a life well led.  There is much truth to the saying that the two happiest days of boat ownership are the day you buy it and the day you sell it.

    The final downside I’ll address is the US Coast Guard.  “Coasties” do sometimes perform amazing acts of seamanship or flying to rescue professional seamen or recreational sailors. For that I doff my hat at their skill and bravery.  However, the USCG does not like recreational sailors or boaters because: A) We are too independent on the water and have beat back their every attempt to try and force people to use tracking beacons on their vessels; B) We do not like inspections at sea and regard “safety inspections” (aka snooping for drugs or contraband) of our vessels with at best ill hid contempt. Yep the government is the biggest downside to sailing- imagine that.


    Lasers during World Championships demonstrate the downside of failing to properly balance the interactions of two bodies of fluids.


    When is enough enough? (Or-Swallowing the anchor)

    Sailing can be a lifelong experience.  Multiple times a year I see the local yacht clubs running classes for 7-8 year old boys and girls.  I love watching them getting that first taste of responsibility and freedom.  There are young teens I race against who know how to get speed almost like magic in any wind condition or sea state and understand the Racing Rules like a Supreme Court justice knows the law.  I have met older men who were still racing, and beating our collective asses, at 92 years of age.

    I shared an interisland passage with a couple in their 70s who had full professional lives, grown kids and multiple grandkids.  After they retired they decided to cruise for 3 years.  They are still cruising and said that their original decision was almost old enough to vote, but one year their 3 year cruise would end.

    I hope to have time to cross oceans, see Cape Horn to port under a full moon, gunkhole in deserted bays in Desolation Sound while listening to the sounds of Orcas speaking through my hull as I enjoy a glass of wine and fresh caught Dungeness Crab.  And most of all to continue to enjoy the freedom that sailing offers far from suffocation of government.   My advice is to give sailing a try since it can be experienced all over the Glibertariat.  If a young person is looking for a chance to learn skills, experience the freedom of literally “shaping their own course” and to compete against others- let them learn to sail.  The worst that will happen is that before you know it you’ll read the entire Aubrey/Maturin series of books.

    Out for a sail-or- a bad day on the water beats almost any good day on land.


    ** Except for the Laser photos, I am in or took most of the photos.

  • Enslaving Yeast – Basic Equipment

    It appears a lot of you degenerates are interested in making your own alcohol (or rather, using yeast to do it for you).  Thankfully, this is legal in the US (as long as you’re not making more than 100 gallons). I’m going to start with the basic equipment you’ll need and some starting tips:

    1. Cleanser – Cleanser is needed to clean up all of your items that will be used in the process.  You can buy PBW (Powdered Brewery Wash) or any of the knock offs. Personally, I generally use OxyClean free for my cleaning needs.
    2. Sanitizer – Here, I recommend StarSan.  While you can use bleach or other household products, StarSan is cheap, effective, non-toxic, and no rinse.  Sanitization is a critical item, everything that touches your beverage needs to be sanitized. This will keep the risk of infection low.
    3. Fermentor – This is where the magic happens.  You can use food grade buckets (7 gallons) or carboys (glass or plastic).  You can find fermentors in almost any size you want, but the standard sizes in the US are 1 gallon, 3 gallon, 5 gallon, or 7 gallons.
    4. A siphon – This will be used to move beverages between containers and minimize oxidation.
    5. An Airlock – There’s two basic styles, a three piece and an s-shaped one.  I prefer the s-shaped ones, but if anything gets inside of it, they’re impossible to clean.  Thankfully, they’re cheap. These allow gas to escape the fermentor while preventing outside air (and bugs) from getting in.
    6. Empty bottles – You can buy them, or save up from your other ones.  If you’re planning on capping, realize that you can’t use screw top bottles.  If you like Grolsch, the swing top bottles will mean you don’t need the last item on the list.
    7. Capper/Corker – Depending on what you want to make, and how you want to serve it.  You’ll need to either cap or cork the bottles at the end (yes, you can cork beers, and cap wines if you wish).

    Keep in mind the difference between clean and sanitized.  Items need to be cleaned before they can be sanitized, and cleaned items can still cause infections.  Anything that comes in contact with your must/wort (unfermented wine/cider/beer) needs to be sanitized.  Don’t skimp on this step, follow the instructions on your sanitizer, and understand it.

    Keep notes.  Write down everything.  Almost every brewer has a tale about this really great beer/mead they made where they made a mistake part way through the process, and it made the best beverage they ever had… but they forgot what they changed in the process, and haven’t been able to reproduce it.

    Relax.  People have been accidently making wine and beer long before they knew what they were doing.  The worst you’ll do is make a batch that doesn’t taste good that you’ll have to dump.

    Don’t expect to save money right away.  This is a hobby with large upfront costs.  If you keep doing it, you’ll eventually be making beer/wine whatever for cheap, assuming your time costs nothing.


    It seems a bit of a waste to talk about fermentation without giving a recipe or project, so here’s a great starter recipe:

    Joe’s Ancient Orange Mead

    Makes 1 gallon.

    3.5 lbs honey (clover or a blend)
    1 large orange
    1 small handful of raisins
    1 stick of cinnamon
    1-2 whole cloves
    1 teaspoon Fleishmanns bread yeast
    Water to fill to a gallon.

    Wash the orange, and cut into eighths.  Clean your 1 gallon carboy (glass jug) and dissolve the honey in warm water.  Once it’s dissolved, put it into the carboy, along with the orange (push it right on through the opening), the raisins, the cinnamon, and the cloves.  Fill up to about 3 inches from the top with cold water. Shake it up (with a lid on, or not, but it’ll go better for you with a lid). Once it’s all mixed up and at room temperature, add the yeast and put on an airlock (or a balloon with some holes in it).  Stick it in a cupboard in the kitchen in the dark. After about a week, you can top it off with more tap water. Then just leave it alone for a couple of months, it will eventually drop clear (and the oranges will eventually sink as well). Once it’s clear, it’s done.  Just siphon into bottles and cap or cork them.

  • The Little Mine: Kitbashing ideas

    My extended building project is a series of 2’x2’ dioramas, each with its own theme, add some bridges to join the sections, then let my granddaughters play on them. At the same time, I’m building a nice resume for my infant scenery business, more on that later. The scale is 28mm/ Heroic scale, but this is a bit different, the entire scenario is little people that mine gold and are protected by fairies. So far so good. I was asked to build a castle at the same time, so I did, but the further I went, the more the castle interfered with my view, so I dropped it from the scene. I’ll use it later.

    Here’s where I started. This is just drywall mud in a multilayered foil form, easy and cheap.


    Then I used the pieces to clad some foam to get this shape. A good start.


    Here is after a few washes, and some basic water layout. Not done yet!


    This is after a few water layouts and accents.


    I have an entire castle made, but I can’t see inside! I finally said, “Nope,” and dropped it for some palisade work I had laying around, and it looks like this.


    Much better view, and lots more things to add for coolness, like torches.


    A farm, with Grandma.


    GOLD! With miners.


    Next up are the details, more trimming, drybrushing etc. Enough for another episode, til then…


    Left to Right: Granddaughter #1, Granddaughter #2, Guardian Faeries, 3,4,5.


    And of course, the Gallery, with lots of great stuff this time.

    I’ll be starting up a business around my scenery work soon, so if you have ideas, or potential clients, lemme know. /Shameless Promotion

  • Kitbash: The Wheels on the Wagon

    Now that we’ve assembled a passable Caisson, we can move on to the main body of the scratch build. To start with we need to make sure it can hold the weight of the model. While on the human scale, the main model is light, on the scale of the styrene we’re working with, it has a bit of heft. So the basic chassis is going to be a ladder frame of the thicker box tube. As I measure it out to fit the appropriate width of the model, I make a discovery – I cannot cut the box tube squarely. Every slice has a deviation from perpendicular, and there is a variation in length. Not huge, but enough that they will not all have that great of a contact surface on both ends if the ladder frame is assembled hollow. I found this out when the ladder frame fell apart. So Plan B – I take the ladder frame and assemble it on a sheet of plasticard, gluing it to the flat surface. Once glued down, I take a pair of scissors and cut the ladder framed section off the main card. The particular sheet I used was the same one I’d taken the Caisson parts from, so there was a notch already cut into the board. It was also thin enough to cut with regular scissors and not fail catastrophically. I then took little scraps of plasticard sheeting and reinforced the joints on the side facing away from the sheet.

    Hand crafted by trial and error

    The platform is now very sturdy and will serve as a proper base for the remainder of our work. But it’s ugly, you might say, and I’d agree with you. It is also the underside. People will not be getting a good look at the kludged face of it. They will be seeing the perfectly uniform sheet that we glued the box tubing to. The next step is to position the ‘bearings’. They’re not real bearings, they’re just short sections of box tubing through which the axles will run. But they do fill the important role of attaching the platform to the axles, and thus the wheels. When I first set about planning this, I realized that the slope would be defined by the front and rear wheels, and the middle wheels will be a bit tricky. So I positioned the bearings for the front and rear axles and began brainstorming. I’d initially envisioned short posts which would hold the middle bearings at the proper level below the plane of the platform. This idea got torpedoed by the inability to get precise lengths on the box tubing.

    After going through a couple of possible ideas in my head, I decided that the best move would be one which did not depend upon my precision to keep the middle wheels on the proper level. I was inspired by a leaf spring. With the flexibility of plasticard sheeting (or at least the flexibility of the thickness I was using), I could have the bearing for the middle wheels float, and the weight of the model would hold them against the surface underneath. I could have made independent suspensions for two bearings on the middle axle, but I was worried about the strength of such a structure. I had a panel of a good enough width, and a length of box tubing long enough to make a suitable bearing along that width, so I affixed one spring to the front end of the platform and under the front bearings, thus holding the middle axle at whatever height was appropriate for the surface the model rested upon.

    There was much rejoicing.

    Yay.

    Testing our new suspension

    The rejoicing stopped as I turned my attention to the question of keeping the wheels on the axles. Initially, I rejected the idea of gluing them in place. On the Caisson, I’d capped the axle with bitz large enough to prevent the wheels from sliding off. I had no more of them, so I started looking for alternatives. Inspiration struck as I spied by collection of skulls. Not real skulls, mind, but plastic ones for decorating miniatures in Grimdark. So far I’d only used one, and I’d paid good money for them. And the Ork skulls looked just the right size to act as hubcaps. So I started futzing about with the correct angle to trim the end of the axles to get enough plastic to plastic contact to make sure the skullcaps don’t fall off. When I realized I’d trimmed an axle too short, I asked myself why I was going to such trouble to avoid gluing the wheels in place.

    The answer was simple – I didn’t want to work with superglue.

    The alignment looks good.

    Whining aside, I realized that the simplest way to get the look I wanted was to glue the axle into the wheel and glue the skullcap on the hub. Then I could adjust alignment by simply nudging the skull while the glue was still wet. So, I got out my superglue, cut the axles to the proper length, and affixed the wheels and caps on one end of the axles. Then it was simply a matter of sliding the axles into the proper bearings and gluing the wheels on the other end. I waited until the wheels were dry before attaching the other set of skulls. That way I only needed to worry about lining them up, and not that I was going to dislodge the alignment of the wheel as I did. Why persist with the skullcaps when their purpose was no longer relevant. Two reasons – one, I had grown attached to the visual; two – I’d already cut them from the sprue and cleaned up the attachment points. I could have thrown them in the Bitz box, but there was scant little decoration on this wagon chassis as it was.

    Decorative touches

    Speaking of decoration, at some point I took the flag from the chariot kit, extended the flagpole, and attached it to the back of the chassis. I also attached a not-so-random towhook under the back end. This towhook is for the Caisson. While all of this was going on, I was also spray-priming the animals and the Caisson. It had gotten up to forty out, and I wanted to take advantage of the warm weather. The assembly of the main chassis took so long that the sun had set before I was spraying that component. Luckily, my spray area is indoors, and I had light to see by. Unluckily, I had an open window sending all my warm indoor air into the cold outdoor air.