Now that we’ve assembled a passable Caisson, we can move on to the main body of the scratch build. To start with we need to make sure it can hold the weight of the model. While on the human scale, the main model is light, on the scale of the styrene we’re working with, it has a bit of heft. So the basic chassis is going to be a ladder frame of the thicker box tube. As I measure it out to fit the appropriate width of the model, I make a discovery – I cannot cut the box tube squarely. Every slice has a deviation from perpendicular, and there is a variation in length. Not huge, but enough that they will not all have that great of a contact surface on both ends if the ladder frame is assembled hollow. I found this out when the ladder frame fell apart. So Plan B – I take the ladder frame and assemble it on a sheet of plasticard, gluing it to the flat surface. Once glued down, I take a pair of scissors and cut the ladder framed section off the main card. The particular sheet I used was the same one I’d taken the Caisson parts from, so there was a notch already cut into the board. It was also thin enough to cut with regular scissors and not fail catastrophically. I then took little scraps of plasticard sheeting and reinforced the joints on the side facing away from the sheet.
Hand crafted by trial and error
The platform is now very sturdy and will serve as a proper base for the remainder of our work. But it’s ugly, you might say, and I’d agree with you. It is also the underside. People will not be getting a good look at the kludged face of it. They will be seeing the perfectly uniform sheet that we glued the box tubing to. The next step is to position the ‘bearings’. They’re not real bearings, they’re just short sections of box tubing through which the axles will run. But they do fill the important role of attaching the platform to the axles, and thus the wheels. When I first set about planning this, I realized that the slope would be defined by the front and rear wheels, and the middle wheels will be a bit tricky. So I positioned the bearings for the front and rear axles and began brainstorming. I’d initially envisioned short posts which would hold the middle bearings at the proper level below the plane of the platform. This idea got torpedoed by the inability to get precise lengths on the box tubing.
After going through a couple of possible ideas in my head, I decided that the best move would be one which did not depend upon my precision to keep the middle wheels on the proper level. I was inspired by a leaf spring. With the flexibility of plasticard sheeting (or at least the flexibility of the thickness I was using), I could have the bearing for the middle wheels float, and the weight of the model would hold them against the surface underneath. I could have made independent suspensions for two bearings on the middle axle, but I was worried about the strength of such a structure. I had a panel of a good enough width, and a length of box tubing long enough to make a suitable bearing along that width, so I affixed one spring to the front end of the platform and under the front bearings, thus holding the middle axle at whatever height was appropriate for the surface the model rested upon.
There was much rejoicing.
Yay.
Testing our new suspension
The rejoicing stopped as I turned my attention to the question of keeping the wheels on the axles. Initially, I rejected the idea of gluing them in place. On the Caisson, I’d capped the axle with bitz large enough to prevent the wheels from sliding off. I had no more of them, so I started looking for alternatives. Inspiration struck as I spied by collection of skulls. Not real skulls, mind, but plastic ones for decorating miniatures in Grimdark. So far I’d only used one, and I’d paid good money for them. And the Ork skulls looked just the right size to act as hubcaps. So I started futzing about with the correct angle to trim the end of the axles to get enough plastic to plastic contact to make sure the skullcaps don’t fall off. When I realized I’d trimmed an axle too short, I asked myself why I was going to such trouble to avoid gluing the wheels in place.
The answer was simple – I didn’t want to work with superglue.
The alignment looks good.
Whining aside, I realized that the simplest way to get the look I wanted was to glue the axle into the wheel and glue the skullcap on the hub. Then I could adjust alignment by simply nudging the skull while the glue was still wet. So, I got out my superglue, cut the axles to the proper length, and affixed the wheels and caps on one end of the axles. Then it was simply a matter of sliding the axles into the proper bearings and gluing the wheels on the other end. I waited until the wheels were dry before attaching the other set of skulls. That way I only needed to worry about lining them up, and not that I was going to dislodge the alignment of the wheel as I did. Why persist with the skullcaps when their purpose was no longer relevant. Two reasons – one, I had grown attached to the visual; two – I’d already cut them from the sprue and cleaned up the attachment points. I could have thrown them in the Bitz box, but there was scant little decoration on this wagon chassis as it was.
Decorative touches
Speaking of decoration, at some point I took the flag from the chariot kit, extended the flagpole, and attached it to the back of the chassis. I also attached a not-so-random towhook under the back end. This towhook is for the Caisson. While all of this was going on, I was also spray-priming the animals and the Caisson. It had gotten up to forty out, and I wanted to take advantage of the warm weather. The assembly of the main chassis took so long that the sun had set before I was spraying that component. Luckily, my spray area is indoors, and I had light to see by. Unluckily, I had an open window sending all my warm indoor air into the cold outdoor air.
Well, the kit containing the animals arrived. It was made by the same folks who made the main model, but is an older kit for their fantasy line. It’s supposed to make a chariot that can be pulled by either horses or lions. Since our IFV model is far, far larger than the chariot, we’re going to use both horses and lions. They did recruit the aid of a traveling circus after all.
Ragnmar: “Um, won’t the lions eat the horses?”
Dorian: “We just put the horses in front. That way the lions motivate the horses and the horses motivate the lions.”
Circus Lady: “I told you earlier, they’ve all been lobotomized, and had override chips implanted. The controller is built into the handle of my whip.”
Dorian: “Sure, spoil the fun.”
Ragnmar: “You’re a dick, Dorian.”
Don’t Worry, They’ll be Fine
The chariot kit also has a heap of bitz that will be perfect for adding character to other pieces. My army in the actual game has a lion’s head ensign, so it won’t be hard to find homes for the lion-themed decorations from the chariot. Lets clip all of the animals off the chariot sprue and assemble them. I specifically picked the chariot because the animal were posed to be pulling, and had an attachment point on their harnesses where a simple loop shackle could be fitted. We will eventually attach our chains to these shackles, but we’ve got to get them made first. The base model had the animals attached to a yoke, but has only one yoke in the set. To provide consistency, I want all four to be attached by a similar system.
My first idea was to drill into the attachment point and fit these staples. The loops of the staples proved to be too wide for the model as built. I’d made the mistake of buying the staples before I had the chariot model, and guessed wrong. When I tried to squeeze it narrower to fit the model, I started to realize it was going to be a good deal of work to get it to fit. Not only that, but in the end, it was going to be rather ugly and not fit properly. Oh well, $1 lost. Not really, since the staples are still perfectly serviceable in their original function.
An alternative came along when my first shipment of plasticard pieces arrived and it turned out I’d ordered the wrong size. I’d been buying axles for the main carriage, and these pieces of tubing are way too narrow for that role. But, if I can bend them into a hundred an eighty degree turn, they would fit almost perfectly as shackles for the chains to attach to.
So now we get to our first piece on working with plasticard. What is plasticard? In short, it’s high density polystyrene. Yes, the same material they make styrafoam from, only without the foamy airspace. I have straight tubes of the stuff and I need to bend it. Best way to do that is to apply heat. We’ve ventured into something I’ve never actually done before, but I’m too far down the rabbit hole to stop now. So, the first source of heat I tried is hot water. I took my Japanese kettle, set it to boiling, filled a coffee cup with hot water and rested a plasticard tube in it. I got a gentle bend in the part of the tube in the water after quite a few minutes of waiting. This did not make me happy, as I needed a rather severe bend, and I’m an impatient sort. So I dumped the now cooled water into my brush-washing bin and went to get my hairdryer.
My hairdryer has never been used on hair. I got it when I first needed to put plastic up to the windows on my house. It has only ever been used on plastic, and today would be no different. Now, if you do the math, there is probably more energy trapped in that cup of hot water than I’ll be getting out of the hair dryer. But the problem was, it wasn’t conducting into the polystyrene, but evaporating away with the steam. The hot air moving past it at high rate of speed will transfer more of its heat into the polystyrene than the water did. One thing to note with as thin a work piece as I’ve got here – the airflow out of your standard consumer hair dryer is not even in temperature. There are hot spots directly downwind of the heating elements. These hot spots are what we are looking for, as they will render the plasticard the most malleable. There may be some trial and error involved in finding these spots, but in the end, I got a loop. With the air of pliers and a mandrel, I was able to refine one of those bends into a shackle shape. Some trimming and cleanup later, and it glued neatly to the attachment point on the first horse. That’s a second benefit of switching from metal to plasticard – we can glue it and paint it using the same glue and paint as the rest of the model. The day is saved, we can now get our draft animals modeled. Sadly, as always happens, I get the technique perfected on the last shackle I need to make.
A lot of frustrating time went into this.
They will need a base, as they were not balanced to stand without being attached to the rest of their original kit. I can get some bases from the game store when I pick up sheet plasticard for something else I plan to do. Fast Forward a Week, and we have a plethora of plasticard options. Except there’s still a problem. I underestimated the diameter of the plasticard tube yet again. On the bright side, the new tubing is of the perfect diameter to serve as an axle for the wheels. So, I’m going to adjust my mental plan for the design. Not by much, mind you, but I had originally planned the MDF axles that came with the wheels and pinning them to the tubing, which would have required tubing wide enough for the axle to fit inside. Did I just say MDF? Yes. When wheels I got are Medium Density Fiberboard. While I can’t glue them to the polystyrene using plastic glue, I can paint them using the same paints.
I’m going to be perfectly honest. Scratch-build is new ground for me. So I’m going to start with a proof of concept and put together a caisson. Since there are multiple definitions of ‘caisson’, lets be clear – I’m talking about the two-wheeled cart for hauling ammunition. The wheels came in packs of four, and I only needed six for the main build. So I have a pair free for this proof of concept. I also have in my bitz collection a great many ammo boxes and fuel cans. As such can build the caisson and heap it with appropriate cargo without any additional investment. Is this a part of the main kitbash? Well, yes, it’s simply going to be towed behind the vehicle.
Right now our Circus lady is curing, we’re waiting for parts for the animals and wheels, and we need to start getting the main body assembled. Since this is not a tutorial on assembling the kit, I am going to skip any steps that are just “follow the instructions”. So we will focus on deviations from the instructions. The first thing where we’re going to deviate on the main kit is with some magnets. Magnetizing components allows for rapidly changing them out, and is often applied to weapons options. We won’t be magnetizing the weapons. We will be using magnets however. The key to magnetizing is pre-planning. Where do we want to be able to attach and detach other components at will? Two places. We want to be able to swap bases between the diorama and a scratch built flying base. We also want to be able to attach and detach the Circus lady at will. So we need two sets of magnets.
The first one is rather easy to place. Using the already magnetized base from the other model, I can hold the magnet in place until I affix it properly. How do you affix these internal magnets? There’s glue, but I had leftover Green Stuff, and with those channels in the floor, it will hold pretty darn well. Plus, being on the bottom of the model, it won’t be in as much danger of shifting due to gravity. So that one was the easy one. The other place we want to magnetize is the left headlight assembly. We want our Circus lady to be able to stand on the corner of the vehicle and motivate her beasts to haul. Initially I planned a line of three small magnets with the same polarity so we can have a few options as to where she stands. There was just one problem with this – when you get two magnets close to each other, they tend to act of their own accord. After a lot of frustrated fussing, I realized I wasn’t going to be able to do it at the present time. So I cut down to the two magnets on the ends, which were far enough apart that I was able to get them into the notches I cut in the back of the headlight assembly. Once I had glue in, I promptly entombed them in Green Stuff – I was not going to do that all over again.
Some assembly required
The magnets on the outside are there simply to help hold the inside magnets in place while the Green Stuff cures, and to remind me that there are magnets in there. Oh, and ensure polarity of the interior magnets. I know that once the interior magnets got entombed, there wasn’t much chance of them shifting, but I really don’t want to fight with the fiddly little magnets any more. So, we go back to textbook assembly until we get to the turret. Thankfully, I already decreed we were not magnetizing weapons, so that is out. So what am I doing to the turret? First off, I’m going to drill out the bore of the machine gun. No one will notice if you leave the bore the solid slug of plastic that it comes out of the box as, but that little added touch of detail helps. I don’t do it to every weapon, or even most weapons, but when I’m already going to all of this effort, I’m going to drill out the bore of the projectile weapons.
The second point of deviation is that we’re going to leave the turret as three subassemblies. The gunner, the pintle mount and the turret proper. Why? Because there are a lot of tight corners in there and trying to prime, let alone paint, all of those nooks and crannies is asking for trouble. So we’re going to paint them separately and press-fit them together. This requires not gluing the layers to each other. The second thing we’re going to do is to swap out the arms on the gunner. We need a pose that says “Drive me closer, I want to hit them with my sword.” And to do that, we need to give the guy a sword. So it’s back to the Bitz Box. Swapping out weapons arms is easy, right? Well if all you want to do is make sure he’s holding the weapon, sure. But we want him posed properly for the meme-reference. So we need to take a saw to some arms. For the left arm, we have a chainsword that’s just a hand, so we can just find an arm pointed in the proper direction and take off whatever’s in its hand. Too many of the arms are posed to hold something close in to the torso, which is the opposite of what we want. For the right arm, the pistol I want to give him has the wrong type of shoulder pad, so I have to swap it to an arm that is compatible with the correct ones.
So we apply a little saw to the arms and do some more part surgery. Why didn’t I use the saw before? Because the female parts were not as bulky, and wouldn’t deform as much from clippers where they were more than the knife could handle. The saw is slow, but it does less damage to the surrounding part and can cut through an arbitrarily thick block of plastic. Once cut apart, we reassemble the parts we want and we have one enthusiastic gunner who can’t wait to get into melee range. Nevermind the fact that he’s sitting behind a minigun…
So what’s next? Well, we need some parts to be delivered, and we need to look at what’s wrong with our Circus Lady’s backside.
That didn’t work out exactly as intended.
So what happened was that gravity caused the green stuff to slump against the front loincloth. And the upper part is still a mess. So lets cover the rump with a pistol from the Bitz Box. Yes, the pistols are gratuitously oversized. But with ammo packs, the holster hides most of the worst errors. We also have to attach a magnet to the heel of that boot. So far I’ve been using thin plastic glue. (Thin being a measure of viscosity.) But plastic glue works by chemically reacting with the plastic to cause the pieces to fuse to each other. It does not work so well with metal. So as I cut a notch from the heel of the foot to fit the magnet, I had to find the cyanoacrylate, more commonly called Superglue. I hate superglue. It sticks to anything but itself. So I end up having to hold the pieces in place for far too long before it sets and pray I didn’t get any on my fingers. If I did, I would get glued to the piece while waiting. This is more than a little annoying.
We’ve got a ways to go.
Almost as annoying as getting glued to the piece is realizing I don’t have magnets small enough to hide in the foot. So what am I going to do about this oversized lump of metal in her heel? I’m still thinking about that. So what is there to do now? We need to wait for the pieces I ordered online, but that doesn’t mean work has to stop. What can I do while waiting? I can paint. My preference is for spray primers and to paint light on dark. There are a few simple techniques to ensure a good primer coat that doesn’t wipe out details. First off is to remember that you can always add more primer, but taking it off will be difficult to impossible. Especially around the fine details. So short bursts in gentle sweeps will do well. You need about sixteen to twenty inches of separation from the spray nozzle to the piece in order to have the best dispersal of pigment. Don’t try to get the whole piece in one pass. Coast from one direction, so you have a dry face for the model to rest on. Let that layer dry and spray the other side. Repeat from as many directions as needed to remove pale spots and get a uniform coat. A bright penlight will help provide alternative lighting to check whether or not a given pale spot is the underlying plastic or reflections.
Oh, and whatever you do, make sure you spray prime in a well-ventilated area. Most sprays use hydrocarbon-based accelerants that will cause issues if you breathe too much. Plus the pigment, which you don’t want in your sinuses. No matter where you work, there will be droplets of pigment that float long enough to dry and form colored dust. You will begin to notice this if you use the same spot long enough. It can be wiped up, unlike a direct spay that will stick to whatever it hits. Last tip, put a backdrop behind the piece to catch as much of that loose pigment as you can. A simple cardboard box will suffice, provided it’s big enough.
Wherein we apply the base coat.
Right now we’re priming in eight pieces, three layers of the turret, the Circus lady, three weapons mounts, and the main chassis. This will allow the structure to have more posability, and allow us to paint it properly. If you notice the walker in the back, the one on the left, it’s not just there to look pretty, it’s a color reference for the vehicle. So we start with some base coats. The primer counts as our first base coat, because there are large areas of the model that will stay black. On our Circus Lady and the gunner, we have one model that has a lot of exposed skin and one completely encased in armor. His coat will be more uniform, mostly dark red. The base coat for the skin and hair will be leather brown, and while we’re painting it, we’ll paint the holster and ammo pouches. We need to be careful not to paint over her shirt. That one gets based in dark purple, the loincloth in pale gray and the metal in a lead hue.
A time-consuming, but vital step
While I could leave that as her skin tone, I’m not going to. These intermediate layers do two things – one they reduce the number of layers required to cover a pure black base, and it subtly influences the character of the final color layered on top. Most of the brown will be covered up, except for the holster and ammo pouches. Though the red is the final color of the gunner’s armor. Since I’m basing the Circus Lady’s armor, I’ll hit the metallic parts of the main chassis and weapons. Because there are so many “metal” components across my collection, this particular silver hue is one of my most commonly used pigments. There are two painting techniques I have to discuss when applying these patches. First is what is typically thought of when mentioning ‘painting’. That is evenly applying pigment to coat the area. This is used for things like gun barrels and antennae. The second is drybrushing. Drybrushing is the use of a limited amount of pigment (the ‘dry’ brush) to scrape over the prominent details of the model. This gets useful for grates, vents and simulating wear on mechanical components.
There are some people who would advise diluting your pigment. I have only once ran into a time when I needed to add water to paint – after a pot had all but dried out and needed to be restored to working order. This is because I find diluted pigment doesn’t cover well, and refuses to stay where I put it. You will typically get this bad advice online when you gloop it on. More appropriate advice would be to use less paint. As with primer, you can always put more on, but taking it off is not so easy.
So we start layering on other colors. With a few details, the “very undone” look of freshly primed pops to something looking closer to completed. For this reason, I try to pick primers that represent as much of the base color as I can. This is not always practical, and for individual characters I will just suck it up and paint it all, such as with the Circus Lady miniature here.
This story starts with a Christmas sale at the friendly neighborhood gaming store. While browsing, I managed to talk myself into spending money on the newfangled infantry fighting vehicle model for the latest dose of plastic crack from my favorite dealer. This was not the best purchase, because I was none too excited when I got home. But I’d bought it, so I took the shrink wrap off the box, opened it up and got out the instructions. Skimming through them, I found a spot where there were no part numbers. Mistaking this for a misprint, I went searching through the sprues for parts of the right shape to be the pieces involved in the operation in question.
That’s when I started to suspect something was wrong. None of the sprues in the box had the right parts, and the missing pieces were rather important. To be specific, they formed the stand that allowed the model to appear to hover (if you ignore the fact that you can still see the stand). Box art showed these pieces to be clear, and online unboxing videos showed a sprue of clear plastic with the two parts I did not have. Now I was a bit miffed. This wasn’t like some optional component I could choose to omit, so I needed to find a solution. Well, my first thought were the bitz merchants online who routinely part out kits. Then I realized, “This is a manufacturer’s mistake, I should start with customer service.”
I sent them an e-mail, then sent them another one when an auto-reply said I should provide more information (like the model number). Then a few days later I get a message telling me a replacement had been dispatched. I thought, “Great, I’ll have my stand, and I’ll be back in business.” A few details began to creep into my consciousness. First was fairly innocuous, the $0 order put in my account history linked back to the full kit. Well, that could be explained by the website not having product pages for individual sprues. Then there was the FedEx shipping weight – two pounds. And box dimensions too big for the tiny clear sprue I was expecting. I began to suspect they had not sent me a replacement sprue, but a replacement kit.
And I was proven right when the box arrived. A whole, still shrink-wrapped kit. My initial reaction was “Why would they do that? All I needed was a sprue.” But some logic began to tell me why it happened this way. Let’s look at it from a business process perspective. You are a company that produces plastic model kits on injection-molded sprues. You have hundreds of products, each product contains anywhere from one to a dozen sprues. Are you going to maintain a warehouse of every possible replacement sprue you might need to send out? Not if your quality control is any good. You’d be paying for warehousing and staff while hanging on to a lot of unsold inventory ‘just in case’. What about grabbing a sprue from the factory? Well, not all of the products are actively being pressed at any given time. There might not be any for that replacement part lying around. Plus you’d disrupt the finely tuned processes. And forget retooling a machine to mold a one-off. That would just be absurdly expensive. But, you do have a worldwide distribution network which is already tuned to pick and ship completed kit boxes on-demand. The marginal cost drops to the box plus shipping. That is far lower than the alternatives, and faster as it is not a deviation from routine for the supply chain.
The Sprue
Long story short, I got a complete kit from customer service to replace my incomplete kit, and they don’t want the incomplete kit back. So what am I to do with the incomplete kit? It’s almost the whole thing, just missing a stand. I could be boring and rig up a stand, it’s going to be obscured by the vehicle body anyway.
But then I’d be living down to my Glib reputation.
Instead I decided to be funny. We have this oversized, high-tech IFV for power-armored super soldiers. What does it do when the lift systems break down on a low-tech backwater? A conversation between the fictitious driver and the resident mechanic came to mind.
Ragnmar: “The Grav systems won’t grav and the turbines won’t turb.”
Dorian: “That’s not technically-”
Ragnmar: “I don’t need to be technically accurate, I need to be moving towards the front. I’m stuck in this circus!” *gestures wildly at the tents around them*
Dorian: “While it may be a colorful local encampment-”
Ragnmar: “No, it literally is a circus. They have trained lions and everything.”
Dorian: “Normally I’d get a transport in here and put you back in reserve. But our ships left the system to-”
Ragnmar: “Skip to what you’re actually going to do.”
Dorian: “Do you need to be back at full capacity, or just moving again?”
Ragnmar: “Just get me moving again.”
Dorian: “Excuse me, circus lady, I’m going to need your help…”
And so I thought of the super-advanced grav-IFV up on wheels being pulled into combat by circus animals. That, of course, is not something the kit is designed to do. So now we’re firmly into what is affectionately known as “Kitbashing”. To give a dry definition, at its most basic, kitbashing is the act of customizing the appearance of a model by using parts from outside the kit from which it is normally made. Sometimes, this is as simple as swapping out heads on infantry. Other times, it gets complicated to the point where the original model is unrecognizable. We’re aiming for in between, with an amusing scene that is still somewhat complicated in terms of the customizations, but still recognizable as the original model.
So, what do we need?
We have the unassembled base kit without stand. We need wheels, circus animals, some thing to attach them to the main body, and the circus lady. I’ve also decided that I want this scene to be modular, that is, if I want to deploy the model to the tabletop, I can detach it from the scenery, drop it on a jury-rigged stand and run it alongside the complete version. So, the wheels should be attached to a chassis, but not the vehicle’s chassis proper. This frame is one more thing for the list.
Now to accomplish this we need to look for parts. The chassis to hold the wheels is going to be new construction. New construction? Yes, there is a material commonly called ‘plasticard’. It is the not the same plastic as the average model, but sold in sheets, bars, tubes, etc. It is one of the vital tools in the arsenal of anyone looking to do more than just swap parts. Being plastic, you don’t need any special paints or tools to work with it versus the normal kits, and it supplements the more expensive detailed moldings. For something like a chassis between some wheels, tube and beam plasticard is ideal. It spends most of its time unseen, and even if seen, will look the part it’s trying to play.
An easy way to attach the animals to the vehicle is by using actual chain. Craft store chains in ‘hematite’ color are easy to come by and of the right scale to fit in with the model. They’re metal, but we don’t need to paint them or anything, since they’re already in the right color. We will need to cut them to length, so I’ll have to make a note to find my wire cutters. So, now we need to source some animals. Preferably ones that are posed like they’re pulling something. I spent a lot of time on this one. And I found the perfect solution. It’s an older kit, but it’s a fantasy chariot that is supplied with both horses and lions as options for draft animals. I’m not sure yet if I want to use the wheels from the chariot kit, they’re kind of small. The wheels are important given their juxtaposition to the high-tech main body. They also need to look like they’d be able to hold the weight. After a while, I decided to order some from the internet and save the chariot wheels for another day.
Now we come to our Circus Lady. There are two things this part must do. First, it must not look like I just grabbed a basic soldier and gave it a whip. Second, it must still look like it belongs to the same faction. The whip is vital, as the stagecoach driver, she’ll be using it to direct the animals pulling the whole thing. But all the whips I have belong to a different faction. We’ll call them BDSM Elves, since that’s a non-trademark infringing way of getting the point across. I can’t use a whole model from the BDSM Elves because, well, that wouldn’t be able to pass for the faction the IFV belongs to.
I’m somewhat surprised that I got fifteen hundred words into an article about kitbashing before I mention the concept of the Bitz Box. It’s really as simple as it sounds. Most kits have more options than can be used on any given model, so there are bits left over. These get thrown into a box in case they can be used later. The base model for our Circus Lady will be built around the sorceress body that came with a dragon rider kit. She was the option I didn’t use when assembling it. However, she does have a whip arm and is built to the same scale and proportions as the models of a sect within my main faction. Since I have a lot of bitz not used to make these other girls, I can mix and match until the Circus Lady fits in with the proper faction.
My Bitz Box
Picking through my Bitz Box for these silent sister pieces, I find a minor problem. The whip hand is a left hand – and so are all of the good hands for the silent sisters. A ‘bad’ hand in this case is a hand gripping something I don’t want in the finished piece. I do have some pointy silent sister hands, and a right handlebar hand from… lets call it ‘cyborg cavalry’. That’s close enough. While this right hand on the handlebar is not a perfect fit aesthetically, it is to the correct scale, and more importantly, it is easy to make the whip fit. We just need to conduct a little part surgery and we can make a right arm. Joining the whip to handle is the easy part. Next we need to take one of the ‘bad’ hands and separate the forearm so we can graft that forearm onto the cyborg cavalry hand. Shaving of the right slivers of plastic, and we can hide the fact that the hand doesn’t fit.
Since the sorceress model was designed to be seated, we need to adjust the legs. In fact, lets take this armored leg with a loincloth and use that to make her stand. In a nice bit of fortuitousness, the curve of the waist chain on the sorceress matched the curve of the top of the armor on the loincloth leg. So it was easy to trim down the torso and glue it in place. The sculpt almost looked like it was meant to be. Fitting in the right leg was less cooperative. I grabbed the completed version of the kit (the one that gets to have its stand) to use as a measuring device for her pose. Now, you may have noticed that some of these pieces are black and the rest are gray. This is not because they were molded from black plastic. No, this was because the sorceress is an old model. One I bought when I still primed on the sprue. This technique did not work out so well, because it resulted in weak joints and models that broke more often than I liked. To glue these pieces into the kitbash, I have been carefully shaving off the primer to expose a clean plastic surface that the plastic glue can react with.
Making a Lady
Since I only have two sorceress torsos and multiple silent sister heads, I do the more drastic trimming to the head and give it a profile more like the one made for this torso. While the sorceress as delivered had a backside to make HM happy, it doesn’t take much to notice that our Circus lady doesn’t have a backside to speak of. And so we come to Green Stuff? What is Green Stuff? It is… green. Actually it is two-party epoxy putty that very often comes with one component tinged blue and one yellow. This gives an easy indicator of when they’ve been properly mixed because it turns green. It is also sold in other colors, but “Green Stuff” is widely recognized as the generic term for the material. While still freshly mixed it is somewhat adhesive and quite malleable. It is used both to fill gaps and to sculpt components. After about a day or so, it will have hardened up and can be sanded, cut or painted. My thought was we should sculpt ourselves a back half to the loincloth. I overestimated my skill as a sculptor. Still, I filled the gap, and have something hanging down there. We’ll let it cure and see what there is to work with.
Gluteoplasty Not included.
Next step – we start assembly on the main vehicle.
NY Jets at Cleveland (-3) Starting off with a tough one. Cleveland has been showing some cojones this season, but I have to think the Jets will pull through. NYJ – take the points.
Indianapolis at Philadelphia (-6.5) Both teams have been mediocre this year. Indy hasn’t shown much of a talent for covering the spread, however, so I’ll go with Philly at home. PHI – give the points
Cincinnati at Carolina (-3) Carolina pissed me off by blowing last week’s game, while the Bengals have shown up for both of theirs. CIN – take the points.
Tennessee at Jacksonville (-6.5) Jacksonville is a much better team than I originally thought, so I’ll go ahead and take them this week, probably only to be let down. JAX – give the points.
New Orleans at Atlanta (-3) The Falcons are another team that’s better than I thought. However, I still don’t think they’re better than the Saints and their insane offense. NO – take the points
Denver at Baltimore (-5) Denver has a rather amazing 2-0 record. The reason I think it’s amazing will probably be apparent by halftime. BAL – give the points.
NY Giants at Houston (-3) Crap. Tough game. I wouldn’t put a cent on this IRL, but for here, I’ll go with the Giants. NYG – take the points.
Oakland at Miami (-3) Miami has been looking good so far this year. So them playing at home against a mediocre team like the Raiders is one of my easier picks this week. Watch me get it wrong. MIA – give the points.
Green Bay (-3) at Washington I hate Washington. I really, really hate Washington. Have I mentioned that I hate Washington? Go Green Bay. GB – give the points.
Buffalo at Minnesota (-16.5) Minnesota is a better team than the Bills (who are the new Browns) but 16.5 points better? Mmmm… BUF – take the points
San Francisco at Kansas City (-10) Again, KC is a better team than the 49ers, but 10 points? Well, okay. KC – give the points.
LA Chargers at LA Rams (-7) Imma go with the Chargers, for no particular reason. LAC – take the points.
Chicago (-5) at Arizona Chicago isn’t that great, but Arizona sucks almost as hard as its former Senator. CHI – give the points.
Dallas at Seattle (-3) In another “I don’t like this team” special, fuck the Cowboys. SEA – give the points.
New England (-6.5) at Detroit The Patriots are better than the Lions, but I’m not sure they’re a TD better in Detroit. OTOH, I’m not sure they aren’t. NE – give the points.
Pittsburgh (-2) at Tampa Bay Tampa has looked much better than I thought they’d be. The Steelers haven’t. I’ll go with the Bucs. TB – take the points.
Sturgeon’s revelation: “Ninety percent of everything is crap.”
There have been close to 15,000 projects for board games on Kickstarter. If we just go with the ones that were successfully backed, we’re probably at about 60% of that number, and at least 90% of them are crap. Today I’m here to talk about some of the ones that aren’t crap, and some signs that the game project you’re looking at may be part of that 90%.
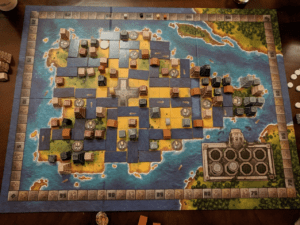
Game 1: Scythe – Steampunk, alternate WWII, and engine building (2-5 players; 7 with expansions)
When most people look at Scythe, they see a wargame with sculpted mechs and characters. This is not a wargame, if you go in expecting a lot of combat and dice rolling, you’ll be very disappointed (especially as there’s no dice in the game). Instead, Scythe is a game of efficiently expanding and building up your faction to score the most points when the game ends. In fact, the biggest random element of the game is the setup, where each player is randomly given a faction board, and an action board. The faction determines your starting location, special abilities, and piece color. The action board is where the meat of the game is. Each action board has the same 4 top and bottom actions, but they are not paired the same across the boards. On each players turn, the player selects an action, performs the top action, and then (if they are able and want to) perform the bottom action. The top action items are:
Move – Move two to three units one hex
Trade – Pay one coin to get two resources of your choice or gain popularity
Produce – Select up to 3 hexes that you control to produce resources
Bolster – Draw combat cards or increase your power
While the bottom actions are:
Upgrade – Pay oil to move an upgrade cube from the top of your board (making a top action better) to the bottom of your board (making a bottom action cheaper)
Build – Pay wood to build a structure on a hex you control
Deploy – Pay metal to place a mech on a hex you have a worker on
Recruit – Pay food to get a recruit, which will give you a bonus when players on either side of you take a specific bottom row action
The bottom row actions will also give you coins (between 0 – 3). You cannot take the same action two turns in a row. All of the players are isolated to their own 3 hex peninsula at the beginning of the game, and they all have different methods to move off of that to the center of the board. As people are taking their actions, they can move to claim encounters (which usually provide a small reward, a big reward for a cost, or a small reward for a cost). As people slowly expand their faction, they are working towards goals. The game ends immediately when 6 stars are placed by any one faction. Stars are placed for any of the following:
Completing all of your upgrades
Building all of your buildings
Deploying all of your mechs
Recruiting all four of your recruits
Producing all of your workers
Completing a secret objective (each player is dealt 2 at the beginning of the game)
Winning combat (up to 2 stars for this one)
Reaching the top of the Power track
Reaching the top of the Popularity track
The Power track is used for combat, there are combat dials that allow the two factions involved in a combat to secretly decide how much of their power they wish to spend for the combat. Each player may also play combat cards based on how many units are involved in the combat. Both players reveal simultaneously, spend the cards, the power, and the winner is decided. The winner is the player who’s total power spend was the highest, with the attacker winning ties. The losing player’s pieces are all returned to their starting space, and the winner now controls the hex. You may have noticed that I’ve talked about controlling hexes multiple times so far. The reason the control of a hex is important is that unlike most games, resources stay on the game board, and can be spent from any hex you control.
The Popularity track is critical in this game. There are three tiers of Popularity, which give you three different values for items for end game scoring. Popularity is hard to gain, but can be very easy to lose. If you attack someone, and force their workers back to their home base, you lose popularity. Encounter cards that give you a big reward for a small price, that small price is usually popularity.
One other special location on the board is in the middle. It’s referred to as the Factory. Whoever controls it at the end of the game counts it as 3 hexes for end game scoring, and as a faction moves their character model onto the factory they are able to select a Factory card to add to their action board. These are usually better options than the standard actions, and have a move that allows you to move a single piece 2 spaces instead of just one.
At the end of the game, you count up victory points by paying out coins for hexes controlled, every two resources you control, placed stars, and building locations (based on a tile that is randomly selected at the beginning of the game). The player with the most coins wins.
Game 2: Roll Player – Character creation has never been so fun. (2-4 players)
Have you played Dungeons and Dragons at any point in your life? Then the theme of this game should come very naturally to you. In this game, you are building a character. You won’t be using the character for anything (although the expansion due out later this year has you fight at the end), but you can see who’s character stuck closest to their “theme”. Each player starts by either selecting (or randomly being assigned) a race board. These are your standard elf, human, dwarf, dragonkin, etc. races, each of which has some attribute bonuses and penalties. After that, each character draws a dice from a bag and the color of the die indicates which class card they select. Each class card has two sides, and the player selects which class they want to use. Then each player is dealt a backstory, and an alignment card. These cards are where players will earn the majority of their points. Class cards have attribute goals, an ability, and a class color. Backstory cards have different color dice assigned to different columns in each of the attributes, and Alignment cards have positive and negative points at different locations. As complicated as it sounds, the iconography is really well done, and makes it very clear what your goals are. The last part of setup is that each player draws out starting dice from the bag equal to the number of players plus four. These dice are then rolled, and players start placing them into their attributes. Finally, a market is built out of cards equal to the number of players plus one. The game is then played in phases:
Roll Phase – The starting player pulls dice equal to the number of players plus one, and rolls them. These are then arranged on Initiative cards in order. So the lowest roll go on the lowest numbered initiative card, and the highest roll go on the highest initiative card. If two or more dice come up with the same number, the starting player chooses the order for those dice.
Dice Phase – The start player then selects one of the dice and it’s matching initiative card, places the dice in an attribute row, and (optionally) takes an attribute action. I’ll get to the attribute actions a bit later.
Market Phase – In initiative order, each player may either buy a card from the market, or discard a card from the market and get two gold. There are different types of cards available: Weapons, Armor, Skills, and Traits. I’ll explain those in a bit more detail later.
Cleanup Phase – Each player may refresh a skill card, the remaining die goes back into the bag, and the leftover market cards are discarded. The start player then moves to the next player clockwise.
The game continues until all of the players have filled up their character sheet. As players place dice into the various attributes, they are able to perform special actions based on the attribute:
Strength – Flip any die on your character sheet over
Dexterity – Exchange any two dice on your character sheet
Constitution – Increase or Decrease the face value of any die by 1
Intelligence – Reroll any die you wish, keep either the new or the original value
Wisdom – Adjust your alignment in one step up, down, left, or right
Charisma – Spend one less gold buying a market card this turn
Why would you want to decrease a die? Remember when I said that each class card has attribute goals? If your goal is 14-15, and you have a 16, you’re failing that goal. There are some goals that are 14+, and others that are a single number. Generally speaking, the harder it is to reach a goal, the more points it’s worth. Your attribute values, dice placement, and alignment can grant you quite a few points (~20 for hitting everything exactly); however, you can also score a good deal of points based on the cards you’ve purchased.
Weapons – Grant special abilities or bonuses going forward. The will have a picture of one or two hands on them, you may not have more than two hands worth of weapons at a time (but you can discard them as you wish)
Armor – Set collection, and grants points based on how many pieces you’ve acquired, with a bonus point if it matches your class
Skill – Special abilities that you can use as long as you can move your alignment tracker as indicated on the card. You only refresh one each turn, so although you can do a turn of using four skills, next turn you’ll only have access to one of them.
Traits – Here’s the big points. When purchased, these will adjust your alignment (if possible), and at the end of the game can be worth a large number of points.
At the end of the game, players total up their points, and the highest value wins.
What are the warning signs you can find in a project?
It’s a first time creator – You’ll have quite a few projects where it’s the creator’s first project. That’s a big warning sign (especially if they haven’t backed any projects). The less you know about something, the easier it seems. You’ll see first time creators having their printings being done in China, and be ignorant of the shutdown that happens during Chinese New Year (a full month). Or they’ll have been way too optimistic with the costs for things, shipping isn’t cheap, nor is art.
Lots of flash, no substance. – Lots of buzzwords, lots of mock-up images, lots of stuff to draw you in. But what’s missing? Rulebooks, play test descriptions, notes on balancing. They may have a great idea, but it’s hard work to translate that into a good game, let alone a good game that you’re interested in paying for with the hopes of getting it.
Previous projects have complaints about fulfillment in the comments – Always take a look through the comment sections on the creator’s previous projects (if they don’t have any, refer to warning sign 1). After removing those who are the overprivileged backers (“It’s been 12 hours since I posted this comment, and you haven’t responded yet. I demand a refund!”). Look for complaints of poor/no communication, delays being improperly managed, late fulfillment (or no fulfillment at all).
Also realize that most of the good games on Kickstarter will eventually make their way into retail, albeit at a higher cost then you may have paid if you backed the Kickstarter (and without promos). I know I’ve slowed down a lot on my Kickstarter backing, generally going for obscure expansion (hello King’s Forge), and reprints of games that are out of print.
First, this is a gedankenexperiment, not an actual proposal. Sometimes you just have to think about the world in different ways. Secondly, the clock rules in football are stupid, and other than tradition no one would create them the way they are. While this is an extreme example, here is the kind of things that happen with the current rules:
Simple, there would be a play counter. Each quarter would consist of 35 plays from scrimmage (28 in High School). Exceptions would be extra points and plays with an accepted penalty (dead ball penalties occur during a dead ball and would be no different from today). Kickoffs and free kicks are not from scrimmage and would not count as plays. Field goal attempts and punts would. Thirty-five works out about right. Current NFL teams run just about 70 plays per game on average. Most colleges run a bit more, but see below for how that would change.
There would still be a play clock, but its rule could be set for whatever pace of play is wanted, without concern for the game clock.
How would this change the game?
In many ways, not at all. In others, dramatically. The big changes would be:
Passing vs Running – We wouldn’t have 4.5 hour long Washington State games because a pass play, whether complete or incomplete, in bounds or out, would take up the same “time” as a running play. On the other hand, an 18 play, all run, death-march drive would take up half a quarter instead of 60 to 65 percent of one.
High tempo offenses wouldn’t get more plays. A high tempo offense would still have advantages, but adding extra possessions onto the game isn’t one of them.
The end of half/game would change dramatically.
If you have the lead, 1st down and 4 or left on the play counter, you can take a knee (or 4). Much easier to figure out when you can go to victory formation.
Time outs aren’t for stopping the clock, they would be used like they are in the first half, to avoid confusion or to give a team a rest. We could probably reduce the number of them.
The field opens up for comeback offenses. You no longer need to throw sideline routes. The middle of the field is opened up, as is running plays if you think that would be more successful.
Clocking the ball goes away. No need to waste a play stopping the clock. In fact, it would be counterproductive.
There are other ways it would change the game, discuss in the comments.
What was the point of all this again?
It was a fun idea I had about a decade ago and have been noodling around with since then. I do think it would make end of games more exciting, without the extra time out breaks and letting teams run whatever play works best. It gets rid of some of the arbitrariness in the rules, especially with the fast vs slow moving referees and the silliness over checking the clock to see if there is 1 second left or not. But it’s not a serious proposal…no wait, yes, it is. This would make football better. It should be done. There are no down sides, in my opinion, and plenty of advantages. You might disagree, but you would be wrong. It will never happen, this is further outside the Overton window than the Single Land Tax. But that doesn’t mean it isn’t a good idea.
Easter weekend is also the weekend of KinkFest. KinkFest is one of the largest west coast gatherings of people into Kink, BDSM, and related sadomasochistic pursuits. In some ways, KinkFest is like any other convention. A large group of people in a giant hall, attending lectures, perusing vendor booths, and socializing. Where it departs, obviously, is the subject matter. The classes usually involve demonstrations that can get you arrested in some places or are interactive and intended to teach a new skill. And the socializing involves leather and latex and cross-dressers and rope and beatings and all kinds of fun, fucked-up shit. Well, not literal shit. The dungeon doesn’t allow scat, thankfully, nor piss play or Roman play.
This year was KinkFest XX. The Portland Leather Alliance has been putting on the event for 20 years. It’s grown to 1500 people attending and takes up the largest space at the Expo Center in Portland, OR. It’s an all-volunteer run effort. And we bring in presenters from around the country and even internationally. It’s 3 days of debauchery, education, and friendship, and I kind of look forward to it every year. Sorry, no actual pictures as cameras aren’t allowed during the event, and the official photos haven’t been posted yet. I’ve included a few shots I’ve taken that are relevant but hopefully SFW.
Education
One of the fun things about KinkFest is that you have attendees who are new and jumping feet first into the deep end and old heads like myself who’ve been involved for decades. The classes cover a wide range. From the relatively vanilla-like classes on anal sex, giving head, or having multiple partners, to basic kink-related things like flogging and how to process pain, to more advanced topics like full-time total power exchange, medical play, and other types of edge play. Here’s the worskshop list from this year.
Edge play is usually play that carries with it higher risks or is pushing close to the limits of the players involved. What that entails varies by kinkster, and it is like Justice Stewart’s definition of porn: you know it when you see it. Some of the more common types are play using knives, needles, and increasingly race and misogyny play.
Backside of a takate kote chest harness. Jute rope
The Kink scene has always fetishized consent for a couple-few reasons. The first is that knowing that all parties directly involved are consenting is the difference between play time and abuse. It may also be the only difference between getting your rocks off and going to prison. In some jurisdictions, even that wouldn’t help, so trust is paramount when you’re doing some of the things we do. Having trust in your partner to stop when you use your safe word, to not push too far, or not take advantage when you are helpless means that negotiations and consent are important. Third, because we are playing with things that are dangerous and carries physical, emotional, and psychological risks, having some security by emphasizing discussion and agreement is important to people in the scene. There is a focus from the older crowd on autonomy, and the idea that you can’t exchange power if you don’t have power to start with, where negotiations are the means for doing so.
This does lead to some entryism by SJW types. But most people aren’t much impressed by them. Part of the point of kink is risk and ambiguity and playing with those things. People do need to learn etiquette around a dungeon. The rules are different. In some ways they are looser than in a nightclub or normal situation. You’re going to see people doing and wearing (or not wearing) things you’d never see in public. In other ways they are more stringent. The biggest one is don’t touch other people or their things (which may mean other people) without asking or being invited to do so. There are other protocols like not talking to people at a play station who are having a scene or standing too close. Generally speaking, people into kink recognize individual autonomy and have developed etiquette around supporting it.
Vendors
Violet wand for shockingly good times.
Like any other con, there are vendors at KinkFest. Vendors selling leather vests and outfits and cuffs and collars. Toys for impact from wooden paddles to acrylic canes. Electro play toys like violet wands and tasers. And of course, rope, rope, rope for bondage and suspensions. There are floggers and whips and latex outfits. Oh, and dildos. Every shape, size and description you can think of. There’s even one vendor called InHerTube that makes special dildos and harnesses that attach to the thigh, or the end of your boot. The vendor hall makes a good spot to wander around, people watch, and socialize with friends. Or to arrange a scene that night in the dungeon, featuring the toys one just purchased. Some of the vendors are truly talented at the things they make.
Dungeon
The dungeon at KinkFest may be the best in the country. To start off with, it is 36,000 sq ft. That space is divided into individual 10′ by 10′ play stations. Each station has some sort of furniture in it: St. Andrews Cross, spanking benches, bondage chairs, massage tables, pagodas, cages, medical tables or simply thick floor mats. The center piece this year was a giant truss structure laid out in four squares with hard points for doing rope bondage. It covered, by my estimation, about 2500 sq ft of space. The whole dungeon has a professional sound and light setup to help set the mood. And it honestly looks like something out of a movie. Some of the extras maybe weren’t as telegenic.
There were some amazing scenes that took place. My favorite was probably an alien probing scene. At least from a spectator’s perspective. There was also the car wash. A couple of nubile young ladies in transparent latex with sponges and water who would wriggle all over their subject and give them a washing. Whip alley is always fun. It’s a 40′ by 20′ section closed off by chain link that has space for two whip scenes. Hearing the bullwhips crack and pop over the sounds of the crowd and music can be startling to some, but it’s part of the atmosphere to me. It goes nicely with the screams, and surprisingly the more common laughter.
And that’s what brings me to the libertarian bit in this piece. It isn’t all just titty-lation (hi Q!). The Kink scene can be a microcosm of spontaneous order, self-policing, private property, and self-ownership. The entire KinkFest phenomenon refutes the ideas people have about why small government couldn’t work. It absolutely works.
The entire affair is organized by volunteers. The core staff put in 20+ hour weeks for 9 months and don’t get paid a dime. They perceive a need and they do it because they want to see it happen. It is a direct counter-argument to the idea that feeding the hungry and sheltering the homeless wouldn’t happen without government. People donate so that shit gets done. This includes people spending hours to build dungeon furniture then giving it to the organization. Or specialized skills like professional riggers who donate their time to get things done. Same for the promotion and lining up vendors.
Impact toys, Rope bondage, and the beginnings of some bruises on a bottom.
The volunteers, usually younger members of the community, who help carry it all off give up part of their time enjoying the convention in exchange for free admission. This is a fair exchange of value for those who couldn’t pay the entry fees that are used to pay for the bits that aren’t done by volunteers. Nonetheless, the volunteers earn their keep. It’s also interesting in that if someone volunteers, gets in free, but doesn’t keep up their end of the bargain, they get banned from next year. This deals effectively with the freeloader problem.
Risky things happen in the dungeon. People wear their bruises and welts and even lacerations with pride. Yet the policing is done by a volunteer crew whose focus is on making sure the rules are followed and people are having a good time. The Dungeon Monitors are a model for private police. They are mostly focused on facilitating play in a way that reduces risk as much as possible. They only interfere when called on, or when there is a genuine threat to life and limb. And even then, they are trained in de-escalation and using their words instead of violence. Despite 1500 people all doing fucked-up shit, they rarely must intervene. They wind up offering council or telling people where supplies are like cleaning stuff, first aid, etc. They occasionally must do some dispute resolution over who has dibs on a piece of equipment. But even that’s rare. Because people police themselves.
People and their property are also sacrosanct. Despite all the degeneracy on display, asking first is ingrained and important. Yes, there are yahoos that are new that don’t understand and make mistakes. They are usually quickly identified and corrected. And yes, there are predatory types that look for vulnerable victims to assault, but by and large, those people stay away from the organized group events. Because, again, they get identified. I’d wager one is less likely to be made uncomfortable by a stranger groping you or trying to corner you or to wind up having unwanted violence done to you at a kink event than at a normal bar or concert. It isn’t perfect, but it puts the lie to the idea that without government you can’t have people getting along peacefully or that corporate action requires coercion.
Rope and knife
Another note on property. Most players who have been at it a while have large toy bags. This can be anything from a backpack to rolling suitcases stuffed with stuff. To keep from turning the dungeon into an airport, large shelves are setup near the entrance. People leave their stuff unattended for long stretches of time while playing voyeur or looking for just the right playmate. And return to find their toys unmolested. Some of those toy bags have thousands of dollars in equipment in them. My rope kit alone is probably close to a thousand bucks worth of jute and hardware. Toys rarely go missing. And on the few occasions where they have, it’s usually a case of someone picking up what they thought was their own toy but was someone else’s and it is promptly returned.
That’s not to say there aren’t problems with SJWs, as mentioned. There are, especially online, a contingent of the usual intersectional feminists who want to make any accusation of violating someone’s consent an automatic blackballing of the accused. They use all the language SJWs use in campus kangaroo courts and make big posts on Fetlife, the kink equivalent of Facebook. But fortunately, they don’t have much power in the flesh and blood world. Even more interesting, the vocal ones are learning a hard lesson that the #metoo movement is learning: experienced tops with the more exotic and in demand skills are being much more selective in who they play with for the simple expedient of wanting to guard their reputations. The gender and pronoun thing is something of a big deal. But my experience is that most of those folks are polite in requesting you use their name and pronouns. Those that would like to be able to force you, power is so decentralized, it is hard to coerce people.
One of the saddest things to me is that so many kinksters don’t see that. In their private lives they live and play by libertarian ideas. But they can’t make the leap to seeing it as a strong basis for politics. The left politics are almost reflexive and without thought. I think because many people into kink have negative experience with religious and political conservatives they lean the opposite direction in politics. And there’s a larger contingent than the general population of people who are dysfunctional and therefore want their gimmedats. I try to talk to people about it, and I’ve made some inroads with a few. But cutting through all the accumulated derp is slow going. There are some things you can’t beat out of people.
Impact toys: Carbon fiber cain, hawaiian hardwood hairbrush paddle, rope fist baton, rubber paddle (for vegan play partners), tigerwood paddle, riding crop, small acrylic cane, three floggers.My dungeon/playspace. Instead of typical furniture I have hardpoints for suspension.Diamond Pattern chest harness in jute.One of my first suspensions. Four point side suspension with hemp rope.
…and the confirmed predictions keep rolling in! Between the Glibs engagement, hookups with hotties, and the fishing fotos we have further proof that the stars never lie.*
What do we have for you this week? Well, as always, some things stay the same. The sun is still in Taurus, so that’s good for ranchers. We still have Mercury in Aries harshing everyone’s mellow and making my job harder. And we still have a retrograde Jupiter in Scorpio. But…
Celestial Ying-Yang
This week we have an odd alignment of that retrograde Jupiter with Sol and our own Terra Firma. That amplifies the Jovian effects out the celestial ying-yang. So it becomes more important to get a handle what Jupiter is actually doing as it’s spinning the wrong way through Scorpio. I think in this case, it’s crucial to get some context from the rest of the chart and how it relates to this. So as above, we’ve got the Mercury in Aries thing. This tension/ambivalence simultaneously makes our interpretation both easier and harder. It indicates that both of alternativeinterpretations will be true, but that we won’t be able to necessarily know how they are applying. The conclusions are:
Your OCD is going to be worse than usual.
You should spend some time focusing on your genitals.
If you have the opportunity to cloister yourself with someone (actually two someones, see below) for said genital-focusing you should take it.
Said time should involve “unnatural acts.”
Venus in Gemini indicates it’s a great time for three-way lovin’, twincest, and/or mirror use. Related to that, there is also an alignment of Venus with Sol and Mercury, so if this is your first time with said twins, take it. Actually, why would you need me to tell you to accept the offer of a threeway with a set of twins? What is wrong with you?
In non-hot-group-action signs, we have an addition to the sports betting signals that have been hanging out for a few weeks: the moon comes into conjunction with mars. This is a change sign, so if you’ve been lucky betting on a particular team, this week they will let you down.
Tarot update: I suck at image editing, and I’ve been busier than something that is extremely busy in folksy analogies. If there is anyone out there who is competent and enjoys this sort of thing, let me know.
There is a reason the Rider-Waite deck is so popular: it’s got a ton of detail to fixate on and inspire drug-assisted mental connections. So sometimes (barring the intervention of actual artists) I’ll be just adding things onto existing cards, like so:
So here, it’s a simple matter of replacing the scepter with a banhammer and adding Her initials to the shield. We get to keep the reclining position, the crown of stars, etc. that are used for interpretation cues.
While I do like R-W, it seems more appropriate for The Tower to use one from The Cthulu Mythos Tarot:
Of course, this brings up a good question: How do we communicate the glibness of the Arcana? The SPempress is relatively easy, as is The Sun, Reversed:
Hello, Rufus!
But for SF, should we use the current hedobot avatar, or the earlier Snidely Whiplash? Hedobot with a Snidely Whiplash mustache?
If anyone has a preference how they are to be represented, please let me know, or better yet, send me the artwork. Honestly, an actual photo of Yusef with a bindle walking along the edge of a wall at Slab City would be AWESOME.
As mentioned in a couple of threads, the girlfriend and I (not pictured) went down to Ravenwood Castle to take part in Hoop and Stick Con, a gaming convention put on by the castle that raises funds for Extra Life (previously, the fundraiser was for Child’s Play… both are worthy charities). This year’s goal was $9,500 of which $50 from each $75 ticket was donated, as well as half of all room rental costs for the weekend (room rentals included convention tickets). So it’s a bunch of geeks getting together to play board games, role playing games, eat, drink, and have fun… all while raising money to help sick children. This is the sixth year of this convention, and the first one I have attended. Below, I’ve got some pictures and comments on some of the games I was able to get in.
Thursday night:
Arrived after watching the girlfriend freak out after driving on country roads. It was raining (this was a common theme to the weekend). We were told our cabins were a short hike to the castle, which while true, did not include the fact that the hike was uphill, on a poorly marked trail that was nearly washed out. We did not attempt to walk up the path again. Since we were walking up, we just brought a couple of games. After dinner we got a ride back to our cabin and drove back up, allowing us to bring up more games. I managed to teach Topiary to several people, as well as Mexica:
Both games I taught have simple rules, with some deep strategy. Both also allow some cruel blocking of other players in the game. Topiary is a light filler, taking about 20 minutes to play, while Mexica takes about 60-90 minutes to play and has a deeper strategy with less randomness..
Friday:
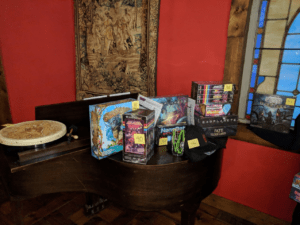
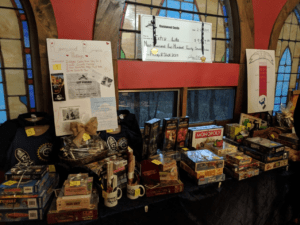
Woke up to rain. Got cleaned up and drove up to the castle, after a light breakfast we looked around to decide what to play. More people had arrived, and there seemed to be about a 60/40 split between roleplayers and boardgamers. The items for the silent auction had been set up, and the girlfriend and I looked over the options.
She decided she wanted the B. Nektar basket, while I went for the Bell’s basket, the Jackie-O’s basket, and the Heavy Seas basket. After writing down some bids, we then got some games in. Today I got to teach Torres:
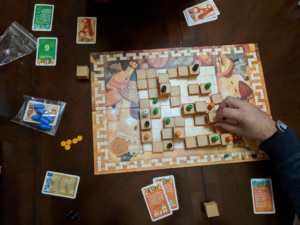
Another action point based area control game that the girlfriend had never opened or learned to play that I enjoy. It plays in about 60 minutes, and has gone through many printings with different variations on the rules. I also got to teach a game of Isle of Skye, a nice tile placement game with an interesting auction mechanic. I learned a game called Dragon’s Delta which was an action programming game that had a very mild dexterity element to it. I played more games of Mexica (I really like this game, and the Iello version is a beautiful printing). Then I played an Ameritrash game called Fate of the Elder Gods:
This one I wasn’t too big of a fan of, it seemed to overstay its welcome, and I don’t know how well the elder gods powers are balanced. But that’s an initial impression after several days being low on sleep, and playing with a bunch of new players. I’m more than willing to give the game another shot.
Saturday:
The rain continues… today after breakfast, I got into a big heavy worker placement game by Uwe Rosenberg: A Feast for Odin:
This is not a short game, as it took 4 new players about 3 hours to play through. Surprising (to us players at least), we all managed positive scores in the end (you start with -86 points). I won with the lowest winning score in the history of the included score pad at 55. More games were played, and beer consumed. For a size of the scale of the castle, this is the main room:
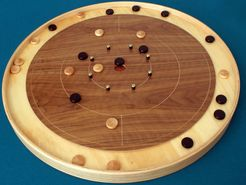
There were at least three other gaming rooms in the basement, split up between the main pub and two side rooms. The downstairs area was mostly running RPG’s through the weekend. Although they did have a Crokinole board in the pub:
That finally made me realize how big this game is. Looking at most of the pictures, it looks to be about the size of your standard Monopoly game. This is shockingly wrong. The playing area of the board is over two feet across. I got to learn how to play this while waiting for dinner to be ready, and am now looking for a board for my basement. This is the day that the silent auction completed, and the girlfriend and I won three of the items we had bid on (the B. Nektar basket, the Bells basket, and the Jackie-O’s basket). During dinner, we found out that the convention had raised $11,587 for the Extra Life charity:
After this, we played a couple of quick fillers (Topiary again, which I failed to take any pictures of at the convention) while waiting to pay for the silent auction, then went back to the cabin to deplete the alcohol stores we had brought down with us.
Sunday:
Today was a slacker day. Wake up, clean up, pack everything up, and then head up to the castle for breakfast. No real gaming today, just saying goodbye to the people we met, and watch the girlfriend exchange Facebook information with others. I then convinced the girlfriend that we should go to Athens, were I saw this appropriation of Libertarian culture:
And had to find solace in the beers of Jackie-O’s: