It’s the hardest part about being vegan. I don’t really miss butter. I don’t miss milk. Sometimes I miss some half and half in my coffee, but that’s rare.
What I do miss is cheese in all its cheesy goodness.
It’s important to let go of your expectations of cheese when trying to be vegan. There are some really good vegan cheeses out there that taste like cheese, but if you expect it to act like cheese and behave like cheese, you’re probably going to be disappointed, so don’t go expecting to make a really good cheesy pizza (though if you figure it out, let me know).
With these vegan cheese recipes a lot of dishes are back on the menu.
But before I get into the recipes, here is a pantry list for you of commonly used ingredients you should have on hand:
Last time I went through the steps to turn simple pork belly into yummy smoked bacon. This week, we wander over to Italy to discuss another delicious form of “bacon”, Pancetta.
The primary difference between the two is that Pancetta is not smoked, but it is aged to reduce water content and to allow flavors and texture to develop. It actually belongs in the charcuterie family. In the beginning though, the two are actually treated pretty much the same way, with the primary difference being the use of Cure #2 instead of Cure #1 in this application. As we discussed last week, Sodium Nitrate(Cure #2), is basically a time release form of Sodium Nitrite(Cure #1), in that as it breaks down over time, it converts from one to the other. This allows the meat to sit at higher than refrigerator temperatures for an extended period of time while minimizing the fear of botulism. It is also very important that everything, including your hands, be squeaky clean when working with charcuterie.
On to the recipe. The recipe I’m using here is from Stanley Marianski, author of a number of cookbooks on meat and pretty much the go to for sausages and charcuterie in general. This recipe is from his website. It’s easy to get lost in a deep dive there.
Because every cut of meat differs in weight, ingredients are typically measured in a percentage of the weight of the meat. For this particular batch, this is what went into it.
1950gm(100%) Pork belly
47gm(2.4%) Kosher salt
5gm(.26%) Cure #2
21.5gm(1.1%) Brown sugar
37gm(1.9%) Black pepper
8.4gm(.43%) Juniper berries
1.36gm(.07%) Bay leaves
3.7gm(.19%) Nutmeg
2.34gm(.12%) Dry thyme
4 cloves Garlic, minced
Mix salt, sugar and Cure #2 together. Grind all the herbs and spices and mix them, along with the garlic, into the cure mixture. Make sure it’s mixed evenly.
Wash and dry the pork belly. Evenly distribute the mixture over both sides of the belly and the sides. Place in a 2 gallon zip lock bag, or into a vacuum bag big enough to handle the belly. Add any cure and spice mixture that did not adhere to the meat and seal.
Like the bacon, flip and massage the belly in the bag every couple of days. It will exude liquid initially, and then reabsorb it. We’re going to let this cure in the fridge for 14 days. At that point, remove from the bag, rinse and dry. Slice off a small piece and taste to see how the flavors are. Because we used Cure #2, the Pancetta is fully cured and does not have to be cooked before consuming. You can fry it, if you prefer.
At this point, we’re ready to tie it up. If you like, you can sprinkle the fat side with some black pepper. Place the belly skin side down with a piece of butcher twine(heavy string) centered and long enough to tie around the rolled belly. Roll the meat into a tight roll, you do not want any air pockets in the middle. You want the belly really dry, otherwise getting a purchase can be a pain. Tie the string tightly around the roll using a double overhand knot. Another pair of hands can also come in handy here. At this point, you are going to tie a string ever inch or so moving from the middle to the ends, taking care to keep the belly rolled tightly. You want to know the best part? You can skip this step all together and leave it flat. I don’t but you can. You would just be making Pancetta Tesa instead of Pancetta Arrotolata.
Now for ageing. The ideal conditions are 50-70 degrees Fahrenheit and 50-70% humidity. If you are fortunate enough to have a basement, or some other place with those conditions, you win! If not, many people build a curing chamber. I don’t have one, so I have found another method that allows me to age in the refrigerator. I give you: UMAi Dry Bag
UMAi dry bags are da bomb. The bags are a one way, semi-permeable membrane, which allows moisture out but not in. They are designed to be used in the refrigerator, and the normal air circulation that comes from opening the door is enough. I’ve used them in a number of different applications and am pretty pleased with the results. Until I have a place to put a curing chamber, these work quite well for me.
Weigh the cured meat and write it down. If you’re going to hang it outside of a curing chamber, wrap it lightly in a cloth and tie some string around it and hang it in your chosen spot. If you’re using an UMAi bag, follow the directions that come with the bags and place on a rack in the fridge. What we’re shooting for here is 30-33% weight loss. The downside with the UMAi bags is that it tends to take longer to achieve that goal. Hanging the Pancetta will get you there in several weeks, UMAi can take 6-8 weeks. When it’s done, the Pancetta should be firm. Smell it to make sure it hasn’t developed any off odors. If it does, there’s a possibility that spoiling has occurred and it’s not worth the risk. If handled and processed properly, there should be a very low risk of this happening.
Time to slice! I typically shoot for 3/8″ thick. Because there are only two of us, I vacuum seal two slices per package and throw it in the deep freeze. Because this is fully cured and can be eaten raw, I also slice some paper thin for charcuterie plates.
Like smoked bacon, I use Pancetta mostly as an ingredient in something else. Diced Pancetta cooked into any type of greens adds great flavor to the dish, along with the complex flavor when you chew a piece. If you have thinner slices, you can also use it in place of bacon in a BLT. Soups. The options are endless.
It was Friday and nothing seemed to be of interest. I wasn’t sure what I wanted, so I did the sensible thing and found the one with the label with the most colorful, eye catching label possible.
This is my review of Hop Valley Brewing Co Reveal Pale Ale:
Seriously look at that rainbow, isn’t it fabulous? I like what they were trying to tap into here. The rainbow is a symbol known to brings positive feelings for centuries. One of the oldest is the flood story.
Here God tells Noah his rein of terror has ended, and the flood waters will recede, and the Earth shall flourish once more. God promised that he will never again flood the world to destroy it and left a rainbow as the symbol of this promise. Next time he will just use fire and throw everybody into a flaming pit. Crazy stuff, really. We are reminded of this promise every time it rains, after all we need the rain but not enough to flood the Earth and kill us all. God remembers, that’s why there is a rainbow.
The rainbow is also a symbol of fulfillment. Think of what lies the end of the rainbow, the prize that awaits the person willing to seek out the source. The pot of gold of course!
Rainbow symbolism has such a powerful meaning to each of us and graciously bestows the energy of blessings. The symbolism of a Rainbow intuitively tells us to hold onto hope, to believe beyond a shadow of a doubt that sacred blessings open to us when we are following our hearts desire. And the symbol of the Rainbow tells us that we are guided to our hearts desire when we open to spirit to let us guide us.
The rainbow itself it composed of seven colors–all the same colors representing the seven Chakras. To learn more about the colors and their spiritual meaning, click here.
Do you cry out for magic? Do you feel it dancing in the light? Is it cold? And have you lost your hold to the shadows of the night? I have good news for you.
While you turn that last link up, let me tell you something, this beer is good. It has a pleasant hop balance with, dare I say, a fruity finish. If you like the Pale Ale, but not the India variety, you might fancy this one. Hop Valley Brewing Co Reveal Pale Ale 3.8/5.
Heat is the enemy when you are making pie crust. If you want a good flaky crust, you need to keep it cold until you put it in the oven.
The recipe I use, which makes enough for a nine inch double crust or two single crusts, is as follows:
2 ½ C all purpose flour
2 sticks cold butter
1 T sugar
2 tsp salt
¼ C icy cold vodka
¼ C ice water
Instead of vodka you could use white or apple cider vinegar (chill it). Naptown Bill says he grandmother uses sparkling dry white wine or champagne in her pie crust. I may give that or sparkling water a try.
Mix the flour, salt, and sugar in a bowl. Cut the butter into cubes and toss with the flour.
Stick the bowl in the freezer. I also put the blade from my food processor in the freezer as well. After at least one half hour, I put the flour/butter mixture into the bowl of the food processor and give it a few pulses. Don’t over mix, you want the butter to remain in chunks.
Next add the quarter cup of vodka while pulsing the food processor.
(No! Don’t drink it! Put it in the dough.) I keep my vodka in the freezer, so it is ready to go. I keep a pitcher of water in the refrigerator and add ice cubes when I start making pie dough. Add the ice water, a tablespoon at a time until the dough starts to come together. It will still be pretty shaggy. The way to test if you have added enough water is to squeeze a handful. If it crumbles, you need to add a little more. If it breaks into big chunks, it is ready.
Cut a big piece of plastic wrap and dump the dough onto it. It won’t really seem like dough yet. That’s ok as long as you can form it into two discs – about six inches in diameter. Wrap each in plastic and put it in the refrigerator. You should still be able to see pieces of butter in the dough.
As it sits in the fridge, the flour will absorb the water and it will be less crumbly and shaggy.
I like to make pretty things, so when I saw the rose apple pie all over the internet, I had to give it a try. I don’t know who deserves the credit for inventing it. This one has an excellent tutorial for slicing the apples and making the rose. I didn’t really like the recipe though. So I added my own small touches.
If you want to do the rose design, follow the tutorial. Here are my tips and changes. You need about four medium apples. If they’re small, use five, if they’re big use three.
I increased the cinnamon and nutmeg to ½ teaspoon each and added ½ teaspoon of ground ginger and added to the sugar. Then I tossed the slices with the sugar mix and let it sit.
This lets the juice release and creates the liquid you will use for the caramel sauce.
While the apples are macerating, take one of your pie dough discs out of the fridge. Sprinkle a little flour on a cutting board and roll it out. Press hard when rolling because it will be stiff. You want to make as few passes as possible. Flip the dough every two or three passes and more flour as needed to keep it from sticking. When it’s rolled out big enough, use your pie plate as a guide and cut around it. Remember to leave plenty of room around it to account for the depth. Press the dough into the pie plate and dock it with a fork.
After the apple slices have sat for about ½ hour, you need to remove them from the liquid and squeeze the liquid out. I wear gloves for this and laying out the slices because it is ….sticky.
That’s also why I have no pictures of the process. (See the tutorial).
Preheat the oven to 375 now. It took me about five minutes more than the preheat time to lay out the apple slices. The tutorial I linked above says to overlap the ends of the slices. I think that makes the pie too ‘loose’, it creates gaps. I like my apple pie to be packed with apples. So, I put them end to end.
Start on the outside and just keep going until it is all filled in. Lastly, curl one slice and stick in the center. Cover the pie with foil and bake for about 40 minutes or until the apples are the texture you like. You can test it with a knife. Not only should the knife slide in easily, it should also slide out easily. Then bake uncovered for another 10 minutes until the crust and apples are golden. Look at the flaky crust!
While the pie is baking, make the caramel sauce with the reserved apple liquid. I added a tsp of vanilla and ¼ C of bourbon (No!, Don’t drink it! – honestly, you people.) Then reduce it to about half the volume. When it is almost done, the bubbles change. It becomes thicker and the bubbles are bigger and almost glossy.
At this point, turn off the heat and slowly pour in some cream. I am always a little nervous making caramel sauce because a work colleague de-gloved two fingers when he spilled some. He had to have two surgeries and it took months to recover. Caramel is no joke.
When you are ready to serve, pour caramel sauce over the pie.
Recently Phoenix was hit with a few storms, and one occurred over a Saturday afternoon. No problem. I can just hang out here, right? Sure. This however was no ordinary Saturday, it was one where we had one of these, and I simply didn’t want to go outside. Would you go outside during one of these?
Probably not. So it was one of those afternoons where I tell my kids to go somewhere else in the house and find something to put on for noise. Sadly, I didn’t have the remote. I never have the remote. Why? Because I am not normally interested in what is on TV; live sports, DIY, and Food Network being an exception. So I don’t care what is on because I’m probably just going to ignore it anyway. My wife picked a Netflix show called, GLOW.
This is my review of Unity Vibration Raspberry Kombucha Beer.
I hope you appreciate this is a free service I provide.
Prior to the storm I went to Sprouts and found this while waiting for the butcher to finish my order. I can’t watch women wrestling in the 80’s while sober; its just weird. Kombucha seemed an appropriate choice.
You heard me. Its about women wrestling—in the 80’s!
The story begins where two actresses are at their aerobics class. I paid little attention to the dialogue, but they’re both out of work and the story line takes off when one later finds out the other slept with her husband. Cue the main conflict. One is significantly more attractive in the opinion of many that recall the 80’s fondly–specifically, she’s a buxom blonde. Next they add in more conflict at the audition, where two women are questioning why are they there. They are both relived to find out it isn’t porn, but mildly disturbed it is wrestling.
The director of this whole thing is a hilarious composite of 80’s tropes between the thick glasses, the power-stache, alcoholism, and womanizing. He embodies the type of toxic masculinity that quite frankly is missing from popular culture. Yes, he’s a dick, but he’s kind of the glue that binds all these people together and frankly that’s probably why you will watch beyond episode 1.
Coming to Comicon!
Another reason is you might find “Wolf Girl” strangely compelling, as she is the only character not playing a character within a character. She’s just “Wolf Girl.” The rest of the girls are hilarious stereotypes that outside the context of 80’s culture would never be seen anywhere. Some are okay, the Valley Girl, and the British girl named, “Britannica,” for example. Others are intentionally offensive, such as the Hindu girl playing a Libyan Terrorist, the Asian girl playing a character named, “Fortune Cookie,” and a Black Actress as the character called, “Welfare Queen.”
Most of the plot revolves around the actresses learning to wrestle, finding a character to play, the blonde lady coming to terms with being a headliner for a wrestling show, having nobody else to pair in the act but with her former home-wrecker friend, and her former home-wrecker friend being unable to find a character. That is until she figures out how to counter the blonde’s character as an All-American, Apple Pie type appropriately named, “Liberty Belle.”
…I was wrong, this is coming to Comicon near you!
Naturally, her nemesis is a Soviet agent named, “Zoya the Destroyer.”
The show is filled with good one liners. Once they actually get around to performing in front of live audiences does the plot start to slow down. They could’ve stopped there, but they didn’t. If you get to this point, you’re probably just going to finish the season just to find out what happens.
So what in the hell is Kombucha? It’s a probiotic tea fancied by the crunchy vegan types at Whole Foods and Sprouts. Its meant to replace the “good” bacteria in the digestive tract. I don’t recommend it unless you simultaneously spent the weekend snorting a Z-pack and are lactose intolerant. In this situation, they simply let the bacterial cultures ferment until it comes to a high enough ABV they can reasonably market it as beer. It’s not beer. It’s an affront to humanity.
So the bottom line, this show is silly but you might like it, so check it out before they make it suck like the X-Files. This drink is also silly, and you’ll probably hate it. Try it at your peril. Unity Vibration Raspberry Kombucha: 1.1/5
Hello again, my caffeinated friends. I’ve peeled a few Koch dollars off my pimp roll and bought an AeroPress for review. I set the trusty French press aside and have been using the Aeropress for the last 2 months. Will it replace the French press for good? Does it make better espresso than my Moka Pot? Is it smoother than the cold press? Well, read on friends and find out along with my world famous…ok, vaguely remembered by a small cadre of weirdos, pro/con list!
AeroPress starter kit. The barrel, plunger, filter cap, stirrer and funnel combine for easy storage.
What is an AeroPress you may be asking yourself. It is a basically an oversized syringe with a filter. Medium ground coffee is place inside the barrel and filled with hot water (175 F) to make a regular cup of coffee. The water and coffee steep for 60 seconds and then you invert whole apparatus over your favorite mug and press the coffee out through a paper filter, then top off the mug with hot water. If the barista prefers espresso, use a fine grind with the same water temperature and steep time, but don’t dilute with hot water. This deceptively simple device does allow for great variety in preparation through adjustments in water temperature, grind, steep time and how hard or soft you press the plunger. In fact there are AeroPress world competitions to see which coffee enthusiasts can coax the best cup of Joe out of the simple and inexpensive appliance. I give you The World AeroPress Championship for you super coffee nerds. *looks around* Just me, huh?
So what do I think after living with the AeroPress for 2 months? It makes a damn fine cup of coffee in under 2 minutes. For those who don’t want to make a morning ritual of your coffee habit and just want caffeine coursing through your veins ASAP, this is a good option. Clean up is a breeze. After pressing the coffee all that is left is a mostly dry coffee puck. Just shoot it into the trash can and rinse the plunger. Easy Peasy, Lemon Squeezy. I’m not usually a fan of paper filters, but a good pre-rinse with hot water seems to eliminate the paper taste. The filters are inexpensive and they give you enough when you buy the press starter kit that you don’t feel cheated.
As much as I like the AeroPress, it can’t do it all. It can’t rival the low acid smoothness of the cold brew system and it lacks the volume of the Moka pot for espresso, though I do prefer the taste of AeroPress espresso. The AeroPress also can’t be set on a timer like most drip systems and is not well suited to making large volumes of coffee.
So the big question, “Does it replace the French Press?” For me, it doesn’t because I want the most pure expression of each bean that I roast. I’m willing to trade a clean cup of coffee for the unfiltered experience. That being said, if you are the sole coffee drinker in your home, like easy clean up, don’t want to spend a ton of money, don’t have much storage space, and enjoy experimenting with grind, temperature, etc. the AeroPress is hard to beat.
How to Use
(Disclaimer: These are not the instructions provided by AeroPress; this is the inverted method, which I find superior)
Step 1. Fill with ground coffee. (pro-tip* wet the rubber plunger before placing in barrel to reduce friction/extend life).
Step 2. Fill with hot water and stir.
Step 3. Attach filter.
Step 4. After 1 minute steep, invert over mug.
Step 5. Press gently until you hear air escaping.
Step 6. Top off mug with hot water.
Step 7. Remove filter cap and press plunger to eject coffee puck into trash. Rinse AeroPress.
Pros
cost – $33.90 starter kit that includes 350 filters
reliability – so simple it is unlikely to fail in any way
flexibility – nearly infinite ways to make coffee
storage – takes up very little counter/cabinet space
taste – it does a really good job of extracting flavor.
clean – super easy clean up
easy to use – full disclosure* I did make a large mess when I put the coffee in wrong while sleepy
cup – really clean cup of coffee. no muddy coffee (sediment)
Cons
filters – some people prefer unfiltered coffee
consumables – although not very expensive, you do have to buy replacement filters
serving size – the isn’t the go to for a large dinner party
aesthetics – not something you want to proudly display
accessibility – this might be a stretch, but if a person has arthritis or limited hand strength, the plunger may be difficult to press.
I mean come on, it’s bacon. You want a good reason to hate on Joos, Mooslims and vegetarians/vegans? They don’t eat pork, which means they don’t eat bacon. In this two part series, we’ll go through the process of creating two glorious versions of pork belly, smoked bacon and Pancetta.
Today we do bacon. To start with, we need some fresh pork belly (also called pork sides). We have Cash & Carry here, which carries good quality products at reasonable prices. What you want to look for when making bacon, is a slab that is 2/3 meat to 1/3 fat. I find half bellies work best for me.
What we need next is to calculate the proper amount of Cure #1 (pink salt), salt and sugar. Cure #1 contains 6.25% of Nitrite, with the rest being Sodium Chloride. The FDA guidelines for Cure #1 & 2 is 1.1gm per pound. This is approximately 1tsp per five pounds of meat. A great way to figure out your quantities is to use a cure calculator. The best one I know of is the one on the Digging Dogs Farm website. Do yourself a favor and purchase a decent scale that will do small quantities. This is the one I use:
Unless you’re eating quantities of cured meats on a regular basis, you may rest easy when it comes to the bogeyman that is Nitrites/Nitrates.
“According to the Centers for Disease Control and Prevention (CDC), your daily intake of sodium nitrate shouldn’t be more than 3.7 milligrams per kilo of body weight.”
For someone weighing 150 pounds, that equates to .25gm. A five pound slab of bacon contains .34gm of pure Nitrite.
Sodium Nitrite is commonly known as Cure #1 and is typically used for meats that only undergo short term curing, usually two weeks or less. Sodium Nitrate, known as Cure #2 is used for longer curing meats such as salami. The Sodium Nitrate breaks down over time and converts to Sodium Nitrite, basically making it a time release source of Sodium Nitrite.
Celery juice “substitute”. Yeah, the naturally occurring Sodium Nitrate in celery is chemically converted to Sodium Nitrite, or left as Nitrate. You’re using the same chemical to cure your meat. This is known as “marketing”. To stay within FDA guidelines, the same quantities of both are used, regardless of source.
Okay, we used the calculator, we measure out our curing mix, now we need to add other flavorings, if you so choose. You can use whatever strikes your fancy. I’ve found what works well for me is to add a good amount of black pepper, granulated garlic and ground bay leaves. Mix this all up with your cure and rub it evenly over your rinsed, and dried belly. Rub it in good. At this point, we need to wrap it and let it rest. You can buy 2 gallon zip lock bags, which work very well, or if you have a vacuum sealer that can do large bags, it’s a great option. I think the vacuum sealing results in better penetration of the cure. Next, into the refrigerator for 10-14 days. I like two weeks. I think it produces good flavor and you know your cure has penetrated all the way through. Every couple of days, flip the package over and rub the meat. Liquid will appear in the first few days and then most of it will gradually reabsorb.
After we’re done curing our belly, it’s time to prep for smoking. Rinse all of the cure and flavorings off the belly and dry it well. Now it needs to go back on a rack in the fridge for 2-4 days. This will allow the surface to dry and form a pellicle, which is a slighty sticky surface the smoke will adhere to. This is also where you can add things like black pepper to turn it into pepper bacon just before smoking.
Cold smoking versus hot smoking:
Cold smoking will give you a product with a nice flavor and a finer crisp texture when the bacon is cooked. The bacon will still be raw when it’s done smoking. If you’re going to cold smoke, follow the directions on your smoker. Not all of them are capable of cold smoking. I have a quality electric smoker which allows me to control the conditions quite well, but it does put out a lot of smoke in the beginning, so I’ve had to develop process where I don’t over smoke the bacon, which will result in a product that smells like a campfire. The timing for cold smoking also varies widely. Some are capable of cold smoking for several days. In my situation, it’s about 4-6 hours or else there will be too much smoke.
Hot smoking is a fine alternative. You will need a temperature probe for your bacon. ThermoWorks and Maverick both make quality probes.
Follow the directions for your smoker. It should take about four hours at 200 degrees to reach an internal temperature of 150. Don’t get the smoker too hot, or you will start to render out the fat, which is not at all what we want. With hot smoking, the bacon will be fully cooked when it’s done smoking. I most definitely recommend slicing a piece off the end when you bring it inside and stuffing it into your maw for one of the finest bites of porcine known to man.
Wood choice is up to you. I find a combination of hickory and cherry, or apple gives me the best results. And for those of you who don’t like smoked meats, or don’t have a smoker, bacon doesn’t have to be smoked at all if you so choose. Once you’ve let it dry in the fridge for a few days, slice it up.
Once the bacon is done, let it rest in the fridge uncovered for up to a week to allow the smoke to penetrate.
On to processing. I cut the bacon into four squares and throw them into the freezer. You want the meat close to freezing for slicing. I cut them into pieces because I have a small slicer and it’s easier for packaging. I would recommend buying a slicer better than my cheap Cabela’s pos. I’ll be upgrading in the not too distant future. Cut the bacon to the thickness you like and then package it up. I do eight ounce packages.
From here, the rest is up to you. I actually don’t eat a lot of bacon as just bacon. More often than not, it’s an ingredient in another dish. As for cooking slices, the best method is on a rack in a 325 degree oven. The way I typically do it is to lay it in a cold skillet and turn the heat onto medium. I keep an eye on it and turn it frequently. Dry on paper towels and enjoy! In our next episode, we will explore making that delectable Italian style bacon known as Pancetta.
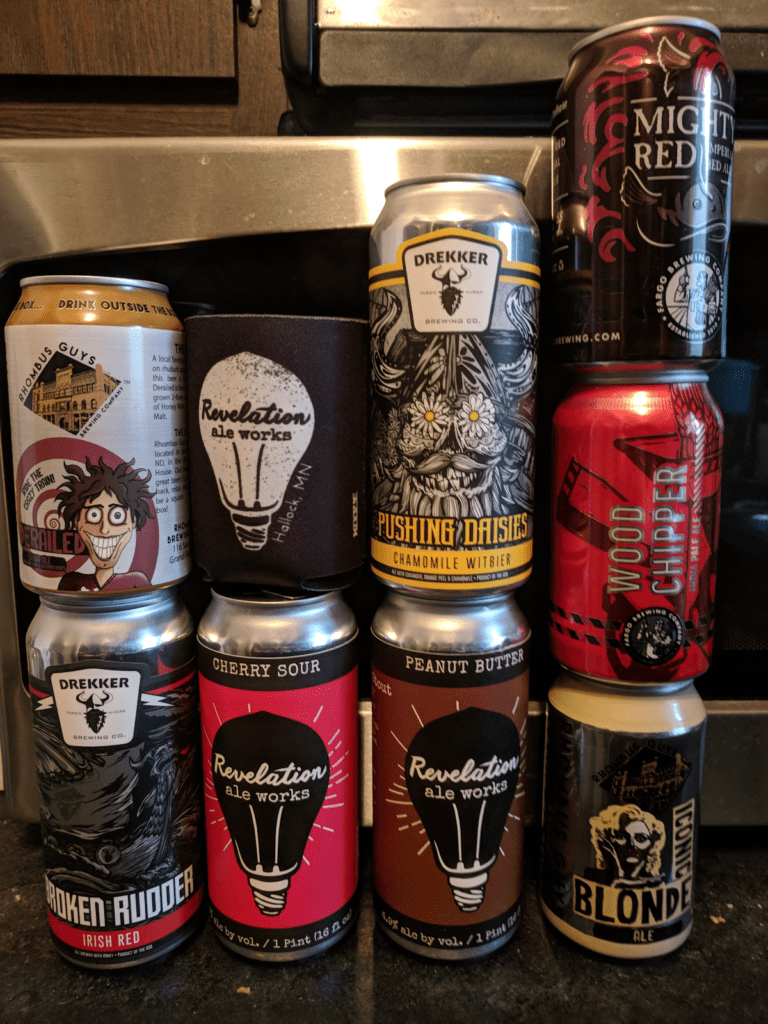
The box arrived, albeit with some damage. Thankfully MikeS listened to the suggestion to ship cans, and everything in the package survived:
Revelation Ale Works Cherry Sour(below):
This pours a clear red with a huge pink head. The aroma is a hint of cherry, and a bit of funk with some acid in the back end. The head sticks around for a while, then fades out. Bright sour notes, with notes of sweet and tart cherries coming through. Lactic acid is the
one I’m picking up the most of, with a sharp sour note in the back of the throat. Light bodied, with lively carbonation makes this an excellent summer beer. Overall: 3.75/5.00
Drekker Broken Rudder Irish Red (right):
Pours a clear brown-amber, a bit light for a red ale, with a white head. Aroma is of caramel, with a touch of roast. Mild flavor, roasted notes, some caramel notes, and a touch of malt sweetness. Just enough hops present to prevent it from getting cloying, with just a hint of earthy notes in the finish. The beer has a full mouthfeel, with moderate carbonation. Overall a solid Irish red. Overall: 3.5/5.00
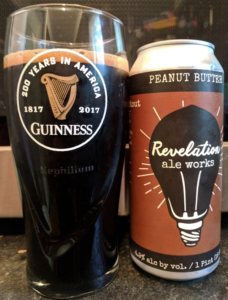
Revelation Peanut Butter Stout (below):
Aroma is moderate peanut butter, pours an opaque black with a thin ring of tan head and some dusting on top of the pint. Almost no carbonation present (though this may be due to the can and shipping), flavor is mildly sweet with a touch of roast, and a finish of peanut butter. I’d like to try this one properly carbonated. Overall 3.25/5.00*
Drekker Pushing Daisies (right):
Pours an opaque orange-yellow, with a thin white head. Bright aroma, with hints of citrus, clove, and chamomile. Nice carbonation levels, with a moderate body. Flavor starts a bit sweet with a touch of creamy wheat. It finishes with a nice spice and floral finish. Overall
a solid witbier. Overall 3.75/5.00
Fargo Woodchipper IPA (below):
Aroma is of pine, with some floral notes. Pours a clear amber with a white head. This is definitely on the hop forward side, with just a touch of sweet malt notes coming through with a kiss of caramel before pine, pith, and bitterness come through. The bitterness lingers for a while, with some earth noticeable in the finish. A bit light in body, but overall a solid IPA. Overall 3.75/5.00
Fargo Mighty Red Imperial Red Ale (right):
Pours a clear reddish-amber with a thin white head. Aroma starts off with caramel, and then fades to piney hops. Mild hop presence then the aroma would indicate, Nice caramel notes, a touch of roast, and then a mild earthy bitter finish. Moderate body, and nicely inviting. Not sure it really reaches Imperial levels (at only 6.6%), but a solid Red. Overall 3.50/5.00
Rhombus Iconic Blonde (below):
Pours a clear, pale straw with a white head. The aroma is a touch of grain, with a bit of something sharp behind it. Light bodied, just a touch of malt sweetness, and a bit of floral hop notes. Crisp and refreshing on a hot day. This is a very solid blonde ale. Just the thing to reach for when you just want a clean, cold beer. Overall 3.75/5.00
Rhombus Derailed – Strawberry Rhubarb (right):
A mild sour aroma starts off, with a touch of strawberry lurking behind the tartness. The beer pours a hazy pinkish-straw with a full white head. Bright sour flavor, with both the rhubarb and strawberry coming through. There’s enough lively carbonation to lift the flavor off the palate and keep the beer light and refreshing. Overall a very good fruited sour.
I don’t have time to cook this week (or to write a long post) so I don’t have an “If I weren’t vegan…” post for you, so I thought I would do a quick roundup of vegan cookbooks. Over the coming weeks I’ll do these small roundups when I don’t have the time to do a long article for you.
Cookbooks
Vegan for Everybody By the folks at America’s Test Kitchen, Vegan for Everybody is one of those books I keep giving to people who say they want to go vegan, but aren’t sure how to do it. The tortilla soup recipe hits my craving for tortilla soup from Blue Corn Cafe in Santa Fe. Another favourite is Red Lentil Soup with North African Spices, by which they mean paprika, coriander, cumin, cinnamon, and ginger.
Simple Recipes for JoyIf you can get past the name, this is a really amazing cookbook. Written by Sharon Gannon, these recipes are largely drawn from the Jivamuktea Café she has co-owned in NYC since 1984. Recipes are plant based, and delicious. I haven’t made one dish from this cookbook that disappointed me. The maharani dal recipe is so good, and has the same comforting effect on me as sambar.
Vegans Know How to Party I have no idea how this book came into my life; it just appeared on my bookshelf one day, but it’s amazing, and the title cracks me up. This is the perfect book for the vegan who likes to host dinner parties, which isn’t me…I don’t like having people in my house, but it might be you.
On my cookbook wishlist:
Thug Kitchen: Eat Like You Give a Fuck Anyone who knows me personally knows that I love swearing and gangsta rap. Combined with vegan food, this cookbook looks perfect for me. Everyone I know who has this cookbook says it’s incredible and there isn’t one bad recipe.
Vegan Comfort ClassicsComfort food gone vegan. If there’s one thing I don’t do very well in the kitchen, it’s traditional American comfort food. It’s probably because most of my comfort foods are Indian, Thai, Japanese, or Middle Eastern, but sometimes I really want traditional comfort food like I grew up with. This cookbook has some promising reviews.
That’s it from me this week. See you all in the comments!
Even though I rarely use recipes, I love them. They provide me with inspiration and ideas for combinations I may never have thought of on my own. I also love cookbooks, especially those that focus on techniques or a cooking philosophy. It’s not unusual to find me spending a Sunday afternoon curled up on the couch with the dog and a cookbook. Today, I’d like to recommend a few cookbooks that I turn to over and over.
First is “An Everlasting Meal: Cooking with Economy and Grace” by Tamar Adler. This isn’t your typical cookbook. She has modeled it after M.F.K. Fisher’s “How to Cook a Wolf” and it is thus more like a series of essays about how to eat. Each chapter is organized around a method or ingredient and her guiding philosophy shines through. I think her philosophy could be summed up as ‘Start and keep going.’ I just love her writing. It is beautiful and she really captures cooking – not just eating – as a sensual act. Take care with your cooking and plating and you will be satisfied with less because you have satisfied all your senses, not just taste.
Sprinkled through the chapters are recipes that illustrate the methods or use the ingredients she has just discussed. Reading her descriptions, you can almost taste the dishes. Her writing is reassuring as well. Yes, you’ll make mistakes. It will be okay, there are sections devoted to explaining how to save your mistakes. If your pork chop came out dry, it can be turned into hash. I wish I’d had this book years ago, but I’m not sure I would have truly appreciated it then.
Growing up, vegetables were usually boiled until soggy and served as is. I hated them. Boiled vegetables can be wonderful (see Tamar Adler’s book) if treated correctly, but it took me years to get over my hatred of boiled vegetables. If you grew up like I did, then Susie Middleton’s “Fast, Fresh, & Green” may change your life. This book is all about how to cook vegetables so you want to eat them Each chapter is organized around a specific technique like roasting or sautéing. She gives you a base method/recipe and then several specific recipes as examples. Her Sautéed Sugar Snaps with Salami Crisps is wonderful. I sometimes make it with snow peas.
The principle behind “Ratio” by Michael Ruhlman is that you don’t need a recipe as long as you understand the appropriate ratio behind the dish. He delves into the science of cooking more than Susie Middleton or Tamar Adler. The book is organized like a typical cookbook – Doughs and Batters, Sauces, Sausages, etc and carefully explains the science behind the ratio. This is the book that inspired me to start experimenting when baking and resulted in my Holy Mole brownies.
Another book that investigates the science of cooking is “Cooking for Geeks: Real Science, Great Hacks, and Good Food” by Jeff Potter. I love this book because it, more than any other cookbook I’ve read, encourages you to experiment. Want to test the calibration of your oven, it explains how to use sugar to do so. Why are copper bowls good for making meringues? Potter explains. There are directions to make your own seitan, a DIY sous vide and resources for finding molecular gastronomy supplies like meat glue. I enjoyed the recipe to make brownies using orange peels as a little cup. Fun!
The newest addition to my library is “Salt, Fat, Acid, Heat: Mastering the Elements of Good Cooking” by Samin Nosrat. Like Adler, she is an alumnae of Chez Panisse. I find Alice Waters insufferable in interviews, but she raises good cookbook authors. This book is all about how to cook – how to use salt and fat and acid and heat to make good food. The first half of the book explains techniques, interspersed with her memories of learning to cook at home and in a restaurant. It almost feels like part memoir. The recipes start after she has explained how to cook. The book is illustrated and the illustrations remind me of Mollie Katzen’s work (excellent vegetarian cookbooks). Every recipe has variations at the end. I used her best pan fried chicken to make pork schnitzel.
If you watched Alton Brown’s “Good Eats”, then Shirley O. Corriher is likely familiar to you. She used to show up and lecture Alton about food science. Unfortunately, her cookbooks read like textbooks and she is giving a lecture. They delve deeply into the science of cooking. If you want to understand how to make a tender pie crust instead of a flaky one, she makes it clear. Each recipe explicitly lists what it is intended to illustrates. They are truly useful references, but not something you want to curl up with on the couch on a rainy day.
“The Joy of Cooking” is an all purpose cookbook. Each chapter and section starts by telling you ‘about’ the method or ingredient. For example ‘About Pancakes’ gives tips for success and is followed by a lot (I mean a lot) of recipes. If you need to know how long and what temperature to use for that four pound roast, “The Joy of Cooking” has got you covered. It is also useful for learning the tips of success (how do I make a good dumpling) and finding a basic recipe that can serve as a base for experimentation, but I rarely make any of the actual recipes here. I just learn what goes into a typical pancake or dumpling or beef stew and go from there.
 I. Love. Cheese.


 Here God tells Noah his rein of terror has ended, and the flood waters will recede, and the Earth shall flourish once more. God promised that he will never again flood the world to destroy it and left a rainbow as the symbol of this promise. Next time he will just use fire and throw everybody into a flaming pit. Crazy stuff, really. We are reminded of this promise every time it rains, after all we need the rain but not enough to flood the Earth and kill us all. God remembers,
  The rainbow itself it composed of seven colors–all the same colors representing the seven Chakras. To learn more about the colors and their spiritual meaning,


 he director of this whole thing is a hilarious composite of 80’s tropes between the thick glasses, the power-stache, alcoholism, and womanizing. He embodies the type of toxic masculinity that quite frankly is missing from popular culture. Yes, he’s a dick, but he’s kind of the glue that binds all these people together and frankly that’s probably why you will watch beyond episode 1.


 This pours a clear red with a huge pink head. The aroma is a hint of cherry, and a bit of funk with some acid in the back end. The head sticks around for a while, then fades out. Bright sour notes, with notes of sweet and tart cherries coming through. Lactic acid is the
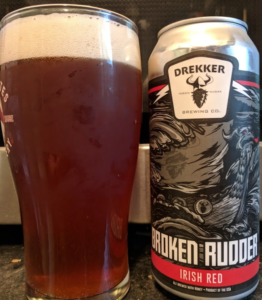
 Aroma is moderate peanut butter, pours an opaque black with a thin ring of tan head and some dusting on top of the pint. Almost no carbonation present (though this may be due to the can and shipping), flavor is mildly sweet with a touch of roast, and a finish of peanut butter. I’d like to try this one properly carbonated. Overall 3.25/5.00*
 Pours an opaque orange-yellow, with a thin white head. Bright aroma, with hints of citrus, clove, and chamomile. Nice carbonation levels, with a moderate body. Flavor starts a bit sweet with a touch of creamy wheat. It finishes with a nice spice and floral finish. Overall
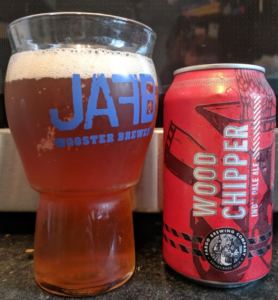 Aroma is of pine, with some floral notes. Pours a clear amber with a white head. This is definitely on the hop forward side, with just a touch of sweet malt notes coming through with a kiss of caramel before pine, pith, and bitterness come through. The bitterness lingers for a while, with some earth noticeable in the finish. A bit light in body, but overall a solid IPA. Overall 3.75/5.00
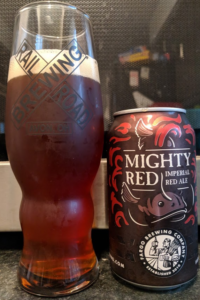 Pours a clear reddish-amber with a thin white head. Aroma starts off with caramel, and then fades to piney hops. Mild hop presence then the aroma would indicate, Nice caramel notes, a touch of roast, and then a mild earthy bitter finish. Moderate body, and nicely inviting. Not sure it really reaches Imperial levels (at only 6.6%), but a solid Red. Overall 3.50/5.00
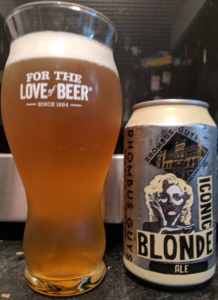 Pours a clear, pale straw with a white head. The aroma is a touch of grain, with a bit of something sharp behind it. Light bodied, just a touch of malt sweetness, and a bit of floral hop notes. Crisp and refreshing on a hot day. This is a very solid blonde ale. Just the thing to reach for when you just want a clean, cold beer. Overall 3.75/5.00
 A mild sour aroma starts off, with a touch of strawberry lurking behind the tartness. The beer pours a hazy pinkish-straw with a full white head. Bright sour flavor, with both the rhubarb and strawberry coming through. There’s enough lively carbonation to lift the flavor off the palate and keep the beer light and refreshing. Overall a very good fruited sour.
 First is “


