Time to move on to the next part of brewing: bittering agents. The oldest known bittering agents were herb blends (the most famous being gruit), the modern bittering agent of choice is hops. The herbal beers are still being made today (but not a lot of it) by some of the American craft brewers looking to revive old styles and flavors. There’s lots of options for brewing with herbs instead of hops, here’s an article that talks about the various herbs, and how to use them.
We’re in the modern age now, which in the beer making world means almost a thousand years of history. So that means hops are the primary bittering agent. The bittering component of the hops is known as Alpha Acids, and any hops you buy from the homebrew shop will have an AA% on them. These get measured in a final beer by a scale called IBU (International Bittering Units). IBU’s aren’t the final determination in how bitter a beer tastes though, as that will depend on the residual (or non-fermentable) sugars left in the beer.
If you’re looking to replicate a recipe exactly, the AA% will be important to you. Most recipes will have the variety of hops, listed with an AAU number. That number is just the AA% times the weight in ounces. So, for an AAU of 30, you would need two ounces of 15 AA% hops.
Hops add a lot more flavors then just bitterness, and these flavors can lend themselves to different styles. One way of classifying hops is by the most frequent use for them:
Bittering – These are hops that are being used primarily for their AA% and to bitter the beer, they will be added at the beginning of the boil, and be boiled for 45 minutes or more. This will drive out most of the flavor and aromatic components of the hop.
Flavor – These are hops that are used with 30 – 15 minutes or so of time remaining in the boil. These will add some flavor, but most of the aroma notes from the hops will be driven off.
Aroma – These are hops added towards the end of the boil, or even after the boil has ended (either in a whirlpool or through dry hopping). These will add little to no bitterness, but will retain all of their aroma and flavor notes.
Another type of hops are the Noble hops. This is a special category of four different varieties of hops (Hallertau, Saaz, Spalt, and Tettnang). The term just came into being in the past couple of decades, and the hops from their original regions are generally in high demand. These classifications are more of guidelines, as any hop can be a bittering hop if enough of it is used, and some bittering hops have some very good flavor and aroma notes. Hops can have a wide variety of flavors, with the most common being: earthy, pine, citrus, spice, grapefruit, and tropical fruit.
Another use for hops is dry hopping. This is when hops are added to the beer after the yeast has been pitched, and will add no bitterness, but will add tons of aroma. There are even some beers being released now called 0 IBU beers where all of the hops are added at the beers flameout, or used as dry hops.
New and experimental hops are being cultivated every year for new characteristics, such as disease resistance, flavor, and high alpha acid percentage. These are generally released in small batches to breweries and home brew shops. At this point they’ll generally have letters and/or a number to identify them, only getting a name when they go into wide scale production.
If you say you don’t like hops, it can help to learn the varieties so you can learn which ones you don’t like. There are also several hops that can add negative qualities to beer if used with too heavy of a hand (garlic, catty, vegetal, etc.). Good brewers will avoid this, but not all breweries use good brewers.
At this point, you may have two batches of mead, a batch of wine, a batch of cider, and a batch of beer fermenting away in your basement. So, let’s take a step away from making something this week and start going over the main ingredients in beer.
First, what is malt? Malting is a process to soften the outer husk of a grain, and allow access to enzymes that break down starches into sugars. This process has several steps which are:
Germination – The grains are mixed into water in a dark room to begin the germination process.
Kilning – At this point the grain is dried and heated. The heating will change the quality of the grain making different types of malt (we’ll get to those in a bit)
Cleanup – Now they want to break off the little dried out rootlets that have sprouted, test the malt to check the quality and the specs of this batch.
Many grains can be malted (including corn, wheat, rice, and oats), but barley is the main one for beer. Malts can be broken down into a couple of broad families:
Base Malts [Diastatic Malt] – These malts have enough diastatic power (measurement of the amount of enzymes present in the malts) to convert the starches in themselves and a certain amount of other malts. The main ones used in beer are referred to as 2-row and 6-row (based on the structure of the head of barley) with many regional ones being used for specialty beers (Marris Otter – British, Munich – German, Pils – Pilsners). These can add biscuit and bready notes to the beer.
Crystal/Caramel Malts – While the process to make Crystal and Caramel malts is different, the end result is very similar and at the homebrew level the two terms are generally used interchangeable. These are malts that have been roasted and to force the sugars to be modified into a non-fermentable state. These are referred to by their Lovibond rating (this is a measure of the color, the higher the number, the darker). These malts will add body, some caramel notes, some sweetness, and (for the darker ones) some roasted notes.
Specialty Malts – These are used in small amounts for specific characteristics they can impart to the beer. Carapils is a popular one that’s said to increase head retention and body, smoked malts have been smoked and add that flavor, chocolate malt will add chocolate notes, roasted barley is non-malted and will add a dark color and roasted flavors. Technically all Crystal/Caramel malts could be considered specialty malts as well.
A beer recipe will generally have between 50-75% of the grist (crushed malts) made up of base malts, with the rest being crystal/caramel or specialty malts. You can also make a beer with nothing but base malts or just a single base malt. The vast majority of the time, you can also freely swap between base malts (although it will change the flavor) in a recipe, unless it’s using a large amount of specialty malts or adjuncts.
Now that I’ve mentioned adjuncts, I should probably explain them. When talking about an adjunct in the brewing world, you’re referring to anything that isn’t malted barley (or wheat in some cases), hops, water, and yeast. So rice, corn, oats, and rye are all adjuncts, as are Candi syrup, table sugar, or fruit juice. Spices, vegetables, fruits, and herbs also qualify. Do adjuncts make a beer bad? No, forget the Reinheitsgebot. It was passed to protect the income of nobility who were making wheat beers. It sets price controls!
So why use adjuncts? The main reason is for different qualities that the grain and sugar additions can make. You want that creamy mouthfeel of an oatmeal stout? You need to use some oats. Want to make a milk stout? You’ll need to include some lactose (milk sugar). The other is flavor, there’s nothing wrong with a good fruit beer, or a nice spiced porter. According to a couple of books I’ve read, some of the Belgian breweries (if you drink good beer, you’ve probably had their stuff) use flour as an adjunct in the mash. And you can’t say the Belgians don’t make good beer.
Yes, at long last we’ve stepped through the various ways of making alcohol and have made it to the hardest to make. Beer. Over the next couple of installments, I’ll be going a bit more in depth on the ingredients used to make beer, but let’s get started with the equipment you’ll need to make a simple extract batch.
To begin with, the first thing we’ll need is a brew kettle. Unlike most other types of fermentation, beer requires being brought up to a boil for a time in order to sterilize it, use the alpha acids in the hops, and to help get a clear beer. Any kettle can work for a brew kettle, as long as it’s large. Most will also have a spigot put into them to allow you to get your wort (unfermented sweet barley water) into a fermentor more easily. Now, most beer recipes for homebrewing are written for a 5 gallon batch, that means if you want to do what’s called a full boil (the full volume of beer is boiled at once), you’ll need at least an 8.5 gallon kettle. Why the extra 3.5 gallons? Well, first you really don’t want a kettle full of boiling liquid full to the brim. Second, you’ll be boiling off water as you get the wort up to a boil, and during the time it’s boiling.
Then, you’ll need a wort chiller. While wort chillers are technically optional, you’d be hard pressed to find someone telling you they aren’t a worthy investment. You can make your own fairly easily as long as you have access to copper (or stainless steel) tubing, a way to bend it, and a way to get hose attachments on to it. Wort chillers are used to bring that boiling pot of wort down to a temperature where it’s safer to move it between vessels, and bring it down to a temperature where you can pitch your yeast.
But Nephilium, I’ve got this 4 gallon pot, and SWMBO (She Who Must Be Obeyed) has said that I can just put an ice bath in the tub to chill my beer. If you can’t do the full boil, you’ll be doing what’s called a partial boil. This means you’ll be boiling a partial amount of your total volume, then topping it off with water. Since the top off water doesn’t have to be boiling it will help with the cooling process. In general, if your tap water is safe to drink, you can just add it directly in for the top off, although that has a risk of infection. If you want to be safer, boil the water once, let it cool, and put it into a sanitized fermentor a day or so before.
Finally, we’ll talk about the two different basic types of malt extract. You can buy it either in a liquid form (LME) or in a dry form (DME). The liquid form will have the consistency of syrup, is slightly easier to mix into hot water, but will spoil faster and is harder to do measurements of. The dry form will have the consistency of powdered sugar, which means it’ll very easily coat things with a sticky mess, but can be kept around much longer as long as it’s kept in an air tight package and away from humidity.
So let’s go with a recipe. This is for a basic Saison, a style that is more descriptive than prescriptive. It is a traditional style brewed in France and Belgium at the time of the harvest, and was used to pay workers in the fields. I’d recommend following the recipe as written once, but then you can adjust it by adding rose hips and lavender, tart cherries, currants, peach juice, or whatever you would like.
Base Saison: 90 minute boil; Final volume 5 gallons
Ingredients:
2 lb. Wheat Dry Malt Extract
3 lb. Pilsen Dry Malt Extract
3 lb. Extra Light Dry Malt Extract
2 oz. Saaz hops
1 package Saison yeast (make sure it’s not a bacterial blend), I’ve had great results with the White Labs WLP565.
~7.25 gallons water (your amount may differ based on different boil off amounts)
Note: If you can’t find DME, you can substitute LME for it, just up the amounts by about 10%.
Method:
Prepare all of your ingredients, you’ll be separating the hops into two amounts 1.5 oz and .5 oz. Get your water up to a boil, then we’ll be adding the malt extract. Turn off the heat, add in the extract and stir. Then stir some more. Make sure the extract is mixed into the water. Get the water back up to a boil, and once it starts boiling put in 1.5 oz of the Saaz hops, and start your timer. 70 minutes into the boil (20 minutes before you turn off the heat) add in the last .5 oz of hops, and your wort chiller (but don’t start the water flow, we want to sanitize it). When your timer runs out, turn off the heat, and turn on the water flow for your wort chiller. You’ll need to move the wort chiller around every once in a while to help chill it down. It’ll take 20-30 minutes at least to chill your wort. If you want to pull a sample to check your gravity, it should be at about 1.060. At that point, move it to your fermentor and pitch your yeast. Let it ferment for 3-4 weeks, as the Saison yeasts can take some time to finish off, and the beer should finish up at around 1.005 (or lower). Saison yeasts are fairly heat tolerant, so you don’t need to worry so much about fermentation temperatures, but just keep the beer stable. After it completes fermenting (remember, 2 checks at least three days apart with the same gravity reading) bottle it, let it condition, and enjoy it.
Give me yesterday’s bread, this day’s flesh, and last year’s cider. (B. Franklin)
Most Americans have no idea what cider really is or its place in American history. The founding fathers brought apple trees and presses from England to the colonies. Everyone drank cider – morning, noon, and night – including children who drank watered-down cider. Apple trees and cider-making followed the settlers to the west. Nearly every homestead produced apples and cider.
The industrial revolution was the beginning of the end for cider consumption in America. As the population moved into cites, it became difficult to distribute cider in large enough quantities to serve the population. German immigrants in the mid-1800s brought beer-making processes and technologies to America that allowed for large-scale production of lagers. City-dwellers became beer drinkers, and cider-drinking was relegated to the country bumpkins. Prohibition killed what was left of cider production in the America. Orchards across the country ripped out cider apple trees and replaced them with eating apples and culinary apples. Now that cider is making a resurgence, orchards are frantically replanting cider apple varieties, but they are not keeping up with demand.
So, what is the difference between eating apples, culinary apples, and cider apples. Modern eating apples are basically just bags of sugar water with enough acid to keep them from being cloyingly sweet. They are crunchy and extremely juicy, which is desirable in an eating apple. But these juicy apples, actually have fairly low concentrations of sugar in the juice (typically about 10% sugar by weight). And, they don’t have much in the way of distinctive flavors. When you ferment away the sugar, you are left with modest alcohol levels (5% ABV) and bland flavors. Culinary apples are used for cooking or baking. Both tend to be high in acid. This provides sharpness to balance the sugar that is added during cooking and baking. Culinary apples can be used to make cider as they increase the acid level in the final product.
Cider apples generally fall into four categories based upon the relative levels of acid and tannin in each variety. If you are a wine geek, you understand that acid and tannin provide the structure and determine the mouthfeel of a wine. Acid and tannin serve the same purpose in cider. Acid makes your mouth water and conveys crispness in the product. Tannin provides bitterness and astringency (makes your mouth feel dry and sticky).
The most common cider apples were developed in England and France starting in the 1600s and continuing into the 1800s. The flesh of these apples is course and chewy, but it releases juice better than a modern apple when being pressed. The apples tend to be drier (less juicy) than modern apples, but they have much higher concentrations of sugar. Cider apples have complex, earthy flavors that are more intense than modern apples. These flavors carry over into the final product.
Sweet apples. These apples produce juice with very high concentrations of sugar – upwards of 19% sugar by weight (Brix). If fermented to dryness, this will produce alcohol levels to nearly 11% ABV.
Sharp apples. These apples produce juice with very high concentrations of malic acid, but relatively low levels of tannin. Sharp cider apples are similar to culinary apples, and some varieties of apples are used for both purposes.
Bittersweet apples. These apples produce high levels of both sugar and tannin. These apples also provide the classic cider flavor in traditional English and French ciders.
Bittersharp apples. These apples product high levels of both acid and tannin.
True cider apples are commonly referred to as “spitters”. They are either so tart or so tannic that you spit them out if you take a bite. One book on cider making from the 1800s stated that the best cider apples were so harsh the neighbors wouldn’t steal them and the pigs wouldn’t eat them when they fell on the ground.
Generally, cider is made from a blend of all four types of cider apples with roughly 40% from sweet apples, 30% from sharp apples, 20% from bittersweet apples, and 10% from bittersharp apples. The primary purpose of the sweet apple is to provide sugar for making alcohol. The sharp apples provide the acid for crispness, and the two types of bitter apples provide the tannin which completes the mouthfeel of the cider. A well-made cider is dry, acidic, and tannic. It has more in common with a dry red wine than the alcoholic soda pop that dominates the market right now.
It is rare for a cider to be made from a single variety of apple, but it can be done. Single-variety apple ciders typically use some variety of bittersharp apple which has all the necessary ingredients to make a balanced finish product – high sugar levels, high acid, high tannin levels, and complex flavors. Any single-variety apple cider you see on the market will be from a bittersharp apple (e.g., Kingston Black).
So, what are the options for a home cidermaker:
Become really good friends with someone that grows cider apples and will share them with you instead of selling all of them into the commercial marketplace (or keeping all of them for themselves).
Plant your own trees and wait (I planted in 2014. I should be getting apples soon).
Make do with alternatives from your local orchard.
Learn to make cyser (apple mead – subject of a future article).
Seriously, don’t go there. The soft cider that you buy in the grocery store or at your local orchard is generally a blend of juices from modern eating apples. It is sweet and barely tart. If you ferment it, the sweet will be gone, and what is left will be bland.
The rest of this article is focused on option 3) above – making do with the apples you can find in your local orchard.
This means buying fresh apples, crushing the apples, and pressing out the juice. You need apples that provide complex flavors.
Focus on heirloom varieties, particularly classic apple-pie apples – varieties that originated 100 years ago or more. These apples will be in the neglected part of the orchard. No one wants these apples, but the owner of the orchard hasn’t pulled them out yet (it’s not really that bad, but it has some resemblance to reality). Old apple varieties tend to have rich earthy flavors that are clearly “apple”, but still “different” from anything you are used to. Modern eating apples are pale in comparison to heirlooms. The texture of these apples is weird. They do not crunch. They are chewy and even a bit rubbery. It is off-putting if you grew up on red delicious and have moved on to Galas or Honeycrisp.
The next apples you want are crabapples. Really. Every commercial orchard has crabapples. These apples produce vast amounts of pollen and are in bloom for a long time. Thus, they are valued as great pollinators in orchards. But orchards will grow crabs that are useful for other purposes as well – mostly for making jellies and jams. Some crab apples are sweet, but many are very high in acid.
The good news is you can make great cider without access to classic cider apples.
The bad news is that not all apples blend well together. The first year I got serious about making cider, I worked with 15 different varieties of apples. In the end, I made 6 different blends. Two were great (I kept those for myself); two were good (I gave those to good friends); and two were OK (those became party booze – make it sweet; put it in a keg; the drunks love it). A lot of experimentation is required. The best blend that I made included roughly equal parts of cider made from Whitney Crab (sweet yellow crabapple), Spartan (child of McIntosh, red with white flesh and wine-like flavor), Rhode Island Greening (one of the two oldest varieties in America, green with yellowish flesh, outstanding apple-pie apple), and Dolgo Crab (red with white flesh, shockingly sour, but actually has the highest sugar concentration of all the apples used that year).
To make things more complicated, apples harvest anywhere from early August to late October. The apples you most care about don’t harvest at the same time. Crabs typically harvest in early August and heirloom apple-pie apples harvest in October. This means you make cider from individual varieties and then blend them some time later.
Now to walk through the process of making of a single batch of Dolgo Crab Apple Cider.
You will need two crucial pieces of equipment – something to crush apples and something to press the juice out of the crushed apples. There are many different configurations of crushers and presses. Apple crushers have fingers that shred apples and grinders have blades that do the same. It’s a bad idea to run your hand through either one of them. Vertical basket presses are the lowest cost style of press to start with and come in two basic configurations – a grape/wine press or an apple/cider press. Either will do the job. They look similar but are different. The T-handled apple press can be used without nailing it to the ground. The wine press must be fixed in place or it will turn in circles as you crank on the handle (foreshadowing amusing photos in the upcoming wine article).
Apple Crusher in Home-Built Stand
Whether you use a crusher or a grinder, the basic process is to put apples in the hopper and turn the crank. I have a hand-cranked crusher. With a little ingenuity, this can be converted into a motorized crusher. The next one I buy, when the orchard is producing, will be motorized.
Dolgo Crab Apples in the Hopper
Dolgo crab apples are about the size of a large cherry. They run through the crusher with ease. The fingers on the crusher are quite small. So, any apple bigger than these crab apples needs to be cut into halves or quarters depending on how big they are. While this seems like extra work, it means you get a chance to examine each apple and discard any that show signs of spoilage.
Dolgo Crab Apples after Crushing
When you turn the crank, the fingers inside the crusher shred the apples. The shredded apples fall out of the bottom of the crusher and into a bucket. From here, the apples go into the press. There is one serious problem to contend with when using a vertical basket. The juice must flow from the apples in the middle of the basket to the outside where gaps between the slats allow juice to exit the basket. Unfortunately, crushed apples (and grapes for that matter) are basically slimy little pieces of fruit covered in sticky juice. When you squeeze two fruit pieces together, they form a water-tight seal. So, juice that is in the middle of the basket can’t get out. The solution to this problem is to mix rice hulls into the crushed fruit (all-grain brewers will be familiar with this trick). The rice hulls act like little straws providing channels between the pieces of fruit so that juice can flow between the pieces even under high pressure.
Standard Vertical Basket Apple Press
A couple of important notes. First, all apples oxidize; some faster than others. If you cut an apple in half and leave it on the counter, the exposed flesh will turn brown. If you crush and press fresh apples, the juice will turn brown as you watch. This is concerning to a beginning cidermaker, because, in almost all cases in brewing, oxidation is a bad thing. However, in cider, oxidation is a key part of the flavor profile of the finished product. And much of the browning will be reversed during fermentation thus yielding the classic yellow-gold color of cider. Note that heat also produces browning (ask the food geeks at Glibs about the Maillard reaction). So, pasteurization of apple juice can contribute to browning. But the browning due to pasteurization does not produce desirable flavors and will not be reversed during fermentation.
Second, I learned the hard way to line the wooden basked with screening material (I now buy screen door repair fabric at the hardware store). If you don’t line the basket, pulp and seed will be squeezed into the spaces between the wooden slats. This is a pain to clean up afterward.
Primary Fermentation
One of the nifty features of Dolgo crab apples is the red pigment in the skins will rub off on your hands. It is also highly soluble. This results in pink colored juice running out of the press. I sliced the skins off a dozen or so apples and put them into the primary to enhance the color. Normally, I add oak cubes to secondary fermentation, but for this batch, I added medium toast French oak cubes in the primary. The cider was fermented with an English ale yeast (Wyeast 1318 London III). Note the primary is a Rubbermaid Brute which has a loose-fitting lid. There is no need for an airtight seal during primary fermentation.
Secondary Fermentation
After a week or so in the primary, the cider was racked to a 6 ½ gallon glass carboy. An airtight seal is provided by a rubber bung with a S-shaped airlock. It appears that I carried over the oak cubes from the primary because a week really isn’t long enough exposure for cubes. This is the time when a bacterial culture is introduced to the product to perform malo-lactic fermentation – the conversion of malic acid to lactic acid (the acid found in milk). This fermentation takes two or three months.
At some point, this batch of Dolgo cider was mixed with other batches of cider. Fining agents were used to clarify the blended cider (I really like Super Kleer). After it cleared, it was bottle conditioned by adding 1 ounce of raw cane sugar per gallon of product and bottling in beer bottles. This resulted in a sparkling, semi-dry cider.
Sometimes I keg and force carbonate. This allows the cider to be back sweetened and stabilized with potassium sorbate. The resulting product can be semi-sweet or sweet depending upon the target audience for the kegged product (party booze generally needs to be sweet, because there aren’t enough educated cider drinkers out there).
There are other major issues to consider.
Brewers will generally work with three types of acid in fruits: citric acid from citrus fruits (and many types of berries); tartaric acid from grapes; and malic acid from apples (and also many types of berries and grapes). For any given acid concentration, malic acid has the harshest flavor and mouth feel. Lactic acid has a much smoother flavor and mouth feel. Converting the malic acid in cider to lactic acid makes the product softer and smoother even at high acid levels (this is commonly done in a lot of red wine styles as well). So, malo-lactic fermentation provides great benefits to cider, but it comes with a significant risk.
The bacteria that convert malic acid to lactic acid are highly susceptible to potassium metabisulfite (sulfite) which is used to protect against spoilage organisms like Brettanomyces. And Brett lives everywhere. It is on the skins of fresh fruit. When you crush and press fresh fruit to make cider or wine, it is in the juice. It is essential to add sulfite to the fresh juice to kill spoilage organisms at the start of fermentation. Sulfite also works to prevent or reverse oxidation. When you put small amounts of sulfite into highly oxidized apple juice, it will chemically interact with the oxygen and become neutralized (read a book on wine chemistry if you care about the details). Thus, the amount of free sulfite in the juice drops quickly (this is complicated and could be the topic on a stand-alone article).
The goal is to introduce enough sulfite into the fresh juice to kill the spoilage organisms present on the fresh fruit, but at a low enough rate that there will be no free sulfite left by the end of primary fermentation. You can then rack into a secondary, pitch malo-lactic bacteria, and wait for 2 or 3 months for the bacteria to work while hoping your sanitation was good enough so that you didn’t introduce any new spoilage organisms going from primary to secondary. And the mathematical formula for getting that right is – I have no idea.
My process, which has worked so far, is to prepare a 1-quart spray bottle with a solution of 1 tsp of sulfite and 1 tsp of citric acid (sulfite works best in high acid solutions). I press juice into a small bucket. When the small bucket is full, I pour it into a large bucket and spray the juice with a couple of squirts of sulfite solution. Then I cover the large bucket with a lid while I continue to press juice. Eventually, all the juice is poured into a primary fermenter which was sanitized by spraying it down with the same sulfite solution. This seems to get enough sulfite into the juice to prevent spoilage while not carrying enough sulfite into the secondary to inhibit malo-lactic fermentation. After a couple of months of malo-lactic fermentation, I add about ¼ tsp of sulfite to each carboy. This will prevent spoilage during long-term aging.
So we’ve made cider and wine, let’s move on to what is commonly claimed to be the oldest fermented beverage in the world, Mead. What is mead? Mead is a fermented beverage where the majority of the sugars are coming from honey. Honey is naturally antibiotic, and is unique in that it doesn’t spoil (while it will crystallize, it stays edible). So, since we want the yeast to survive, we’re going to need to water it down. There’s several different paths you can go to add water to the honey, each with different drawbacks:
Boiling – Get water up to boiling, then add in honey. This runs the risk of scorching the honey, as well as driving off aromatics, but will ensure that the honey is equally mixed into the water. You’ll also need a way to cool the must before putting it into a fermentor and pitching yeast.
Hot water – Get water up to ~160 F, and mix in the honey. This will help the honey dissolve, but will drive off some aromatics. This also may require some method of cooling before putting it in a fermentor and pitching yeast.
Cold water – Mix water with honey. This will require more mixing and more stirring to make sure the honey is fully dissolved, has the highest risk of infection (still not a high one), but preserves the honey aromatics the best.
You won’t need any new equipment for making mead, but you may need a couple of additional ingredients. Yeast nutrients and yeast energizer. Fruit (and barley) have the compounds that yeast need naturally occurring in them, honey does not. While you can make mead without yeast nutrients and energizer, using both will help the yeast do well and convert the sugars into alcohol. With the cost of honey, it’s well worth the extra couple of dollars to ensure a good ferment.
There’s an ongoing debate in most of the mead forums about the best way to use yeast nutrients, with everyone certain that their way is the best (sound familiar?). You can either add it all in at the beginning of fermentation, you can do step additions (add 25% at the beginning, then an additional 25% each following week).
For those who think there’s too many different styles in beer, there’s a large list of different types of mead. For those of you here, I’m guessing the most popular will be:
Braggot – A mead made with malted barley and honey
Capsicumel – A mead flavored with chili peppers
Cyser – A mead that users cider instead of water to dilute the honey
Hydromel – A light/low alcohol mead (think around 5% ABV)
Pyment – A mead that uses grape juice instead of water to dilute the honey
Sack mead – A strong mead with more honey then a standard mead (to get to ~15% ABV)
For your standard mead, plan on between 2.5-4 lbs.of honey per gallon. Adjust as you wish for higher/lower ABV, and based on if you’re using a fruit juice to dilute (which will have sugar of its own). Be aware of the different types of honey, and realize that they will have different flavors when the fermentation is done. I recommend starting with small batches until you find something you like, then ramping that up to a higher volume.
Now for the recipe of a mead I made that came out really well, and should be ready for your next Thanksgiving. Yes, I’m talking about the one in 2019, most meads do well with a lot of mellowing and aging on them. Since it’s a 1 gallon batch, I generally bottle this into about ten 375 ml bottles instead of risking only getting four and some change into 750 ml bottles (remember that there’s sediment you don’t want in your bottles).
Cranberry Mead (1 gallon batch):
1.5 lbs Cranberries – Reduced to juice (or just buy cranberry juice)
3.5 lbs honey
Water to top off to one gallon
Blend the cranberries (or buy juice) and run the resultant liquid through a filter. Mix that with 3.5 lbs. honey and top off with cold water to get to one gallon. Shake it up (which will both aerate it, and make sure that the honey is mixed in with everything else) until the honey is dissolved. Figure out what nutrient schedule you want to use, and pitch a white wine yeast. Fermentation will take at least a month, so be patient with this one. After fermentation is done, wait for it do drop clear (sediment will settle at the bottom of the carboy), then bottle it up.
Time to move up the level of difficulty to making something that has a couple more steps… wine. While you can harvest your own grapes, and crush them yourself, in the modern day it’s usually easier to buy a wine kit. You can find kits for making 1 gallon batches or 6 gallon batches. These kits will come with everything you need to make a batch of wine (including a dry yeast packet). The kits will come with a plastic bladder full of grape juice concentrate, which you’ll put into a bucket (or carboy), and mix with warm water to get up to your total volume. Then you stir, and stir some more, and keep stirring to make sure that everything is mixed well. Your kit may come with some packets of items to be added in at this time (wood chips are common), follow your kit instructions here. At this point, you can take a sample and measure your gravity (if you want to know the starting gravity), check the temperature (to make sure the yeast won’t die), and pitch the yeast.
After a couple of weeks, the primary fermentation is done. At this point we want to minimize contact with oxygen, so we’ll move it from the bucket into a 6 gallon carboy. Use a sanitized siphon to move it over, and add any additions that your wine kit say to add. Then put on an airlock, and let it sit for another couple of weeks. Once fermentation is done (check this with your hydrometer), the final gravity will generally be below 1.000.
Now, fermentation should be complete, but we’re not done yet. Next we need to clarify it and degas it. Yeast breaks down sugar into alcohol and CO2, depending on the ambient temperature, some amount of that CO2 will have been absorbed by your wine. Most styles of wine do not have carbonation, so we need to do something to get that gas out. You can either take up more stirring (over 5 minutes, go ahead, count it out) or you can use a degassing wand. These labor saving tools go into your drill, and make degassing much easier. For clarifying, your kit will most likely have a couple of packets that need to be added in a certain order. Follow the instructions (or if you’re really patient, you can wait and the wine will eventually drop clear) with your kit (side note for those who are vegetarian, keep in mind the clarifying agent is where you may find animal products).
Back to waiting for a couple of weeks (or as your kit says) for the clarifying agents to work their magic. Now, you just need to carefully siphon of the wine into bottles (without stirring up that layer of sediment at the bottom), and cork or cap them. If you corked them, stand them up for 3-4 days for the corks to seal, then you can store them on their side. At this point, you’re done and will have around 30 bottles of wine (assuming a 6 gallon batch and standard 750 mL bottles).
Sorry for the lack of recipes this time around. The only non-kit wine I’ve made is beyond the level that I’ve gotten to in these tales. But if you want to follow it, you can find it here.
There are many roads to success in brewing. I try to avoid telling people how they should brew. So, I talk about how I brew, and let others decide whether or not my methods have any value to them.
Generally speaking, the universal recipe for making alcohol is 1) dissolve sugar in water; 2) add yeast; 3) wait for the yeast to work; and then 4) wait some more for the resulting product to be palatable. That’s it. We’re done here.
Well, I suppose there are a few more things to chat about. Firstly, there are many ways to make or acquire sugar-water. You can dilute honey with water. You can extract juice from fruit. You can mash malted grain in hot water. You can combine all of those options. Secondly, you can select from different kinds of yeast to improve your odds of getting a pleasant flavor in the final product depending upon what your source of sugar was. Thirdly, you can add all sorts of other ingredients to alter the flavor of the product at various stages in the production of that product. These include flowers, spices, herbs, and charred/toasted wood. And we’re not going to talk about any of those things today (Nephilium is taking the lead on those topics).
Today, we are going to focus on step 3) waiting and step 4) waiting – otherwise known as fermentation and aging. Given the products I make, steps 3 and 4 are pretty much the same regardless of which primary fermentable sugar I am working with whether it be honey for making mead, fruit juice for making cider or wine, or malt for making sour ales. This is because I ferment everything at pretty much the same temperature and age everything for pretty much the same amount of time (at this point I only make sour ales which can benefit from months even years of aging, so no young hoppy beers from me). This means that I have lots of product sitting around in secondaries for long periods of time – typically 12 months (and sometimes up to 36 months) before I package it up. This takes space – lots of it. And it requires good climate control.
My brewing room is roughly 15 feet by 15 feet in size. Three of the walls are part of the poured concrete foundation for the house. The last wall is a standard stud wall that I built to isolate the brewing room from the rest of the basement. There is no ductwork bringing heating or cooling into the room. Other than the open doorway, there is no significant flow of air in to out of the room. So, the temperature in the room is extremely stable and there is basically no temperature change over any given 24-hour period (this is probably true for any given week).
The temperature in the room is effectively controlled by the temperature of the soil outside the foundation walls. The soil temperature lags the seasons by about 3 months. So, the coldest temperature in the brewing room is typically late March or early April when the temperature drops to about 62° F (although it got down to 58° F after one particularly brutal winter). Conversely, the warmest temperatures occur in late September or early October when the room reaches about 68° F.
That means I do all fermentation and aging between 62° and 68° degrees. I focus on cool, slow fermentation, and I think this works great for the things that I make – mead, cider, wine, and sour ales. However; this is not ideal for other types of products such as lagers that need to be fermented cooler or saisons that need to be fermented warmer. But I rarely drink those products, and I never make them. When I do want one, there are many fine drinking establishments in the area that can provide one at a reasonable price.
But a room with temperature control isn’t enough. We need structures – tables, counters, shelves – to store primaries and secondaries that are in use, primaries and secondaries that are not in use, tools, ingredients, and other assorted sundries. My room has built-in shelving around the entire room. Every linear foot of wall (excluding the door) has shelves.
The middle shelf is a bit higher that a standard kitchen counter. This is where the most of primaries and secondaries are stored during fermentation and aging. Occasionally, I work with primaries that are too big for the shelves (note the 44-gallon Rubbermaid Brute that I am starting a batch of pyment in – to be discussed in a future post.). The middle shelf is wide enough to hold a 9-gallon demijon (not shown in the picture). The corners can hold a 14-gallon demijon.
The bottom shelf is somewhat narrower than the middle shelf. This keeps me from banging my shins when I am lifting primaries and secondaries from the floor and then placing them onto the middle shelf or moving them from one place to another. I generally keep heavy stuff on the bottom shelf, like the cases of honey in lower left of this picture (six 5-lb jars per case). There is an upper shelf which is the same width as the middle shelf. I keep empty carboys and other not-so-heavy items up there.
I long ago lost track of how may primaries and secondaries I have. I sold off a dozen 6-gallon carboys to my brewing friends several years ago. I have since acquired both bigger and smaller containers to fill that hole in my heart.
To the best of my recollection, I have a dozen ½-gallon jugs; two dozen 1-gallon jugs; half a dozen 1.3-gallon demijons; half a dozen 2.6-gallon demijons; half a dozen 3-gallon carboys; a dozen 5-gallon carboys; a dozen 6-gallon carboys; a dozen 6.5-gallon carboys; three or four 9-gallon demijons; and three or four 14-gallon demijons.
I generally use plastic for primaries. I have converted 2.5-gallon and 6.5-gallon screw-top pails into primaries. Basically, you drill a ½ hole in the screw-top and install a replacement rubber grommet into the hole. This allows the use of a standard airlock. I have half a dozen of each of these sizes. I have about half a dozen standard 7.9-gallon wine pails from the home brew shop. And I use a lot of Rubbermaid Brute garbage cans. They are food grade plastic and come in a variety of colors. I use white so they are easier to see if they are clean. As far as Brutes go, I have 10-gallon, 20-gallon, 32-gallon, and 44-gallon pails.
I generally use the small containers (plastic primaries and glass secondaries) for experimental batches. I have done yeast trials and oak trials over the years to see how these affect the product. I also do sets of small batches to make samples for teaching classes. I use the mid-size containers for most of my brewing (5 to 6.5 gallons of finished product). I use the large containers for bulk production – usually wine – when I am working with fresh seasonal fruit – mostly local grapes.
I also use the large Brutes for blending products such as ciders made from 3 to 5 different varieties of apples. The apples get harvested at different times in the season (anywhere from early August to late October), so the initial fermentation is done for each variety separately. Later in the winter, multiple batches of single-variety cider will get blended in a large Brute and then pumped into mid-sized or large-sized glass secondaries (carboys or demijons) for additional aging before packaging.
In the beginning, when I started making mead, I was paranoid about using air-tight primaries and airlocks. All the homebrew books and brew shops tell you that you need them. Then I started making wine with some friends. When you make red wine, you open the primary two or three times every day to punch down the cap (to be covered in detail in future posts, but you are pushing the grapes skins down into the wine below). You learn pretty quickly that as long as the fermentation is going strong, all you need is a loose cover to keep the bugs and dirt out. I have been to pro wineries where wine was fermenting in steel tanks with a blue plastic tarp pulled over the top.
I continue to use air-tight primaries and airlocks when I am working with small to mid-sized batches. This allows me to lift and move the primaries without worrying about spilling. But when I work on large batches with lots of whole fruit, I use the Brutes with loose fitting lids. The key point is to rack into an airtight secondary when you’ve extracted what you want from the whole fruit and fermentation is slowing down. Note, that I recently acquired the 1.3-gallon and 2.6-gallon demijons (listed above) which have very wide openings so that I could do small experimental batches with whole fruit. This allows me to open the demijon and punch down the fruit during the initial fermentation and to reach in and clean the demijon after the product is racked to a secondary.
One of the tricky issues is deciding when fermentation is done. It seems like an easy thing to check. The airlock stops bubbling or the hydrometer reading stays the same for a while. But rubber bungs and airlocks don’t always maintain a perfect seal. So very slow fermentation may not move the bubbles in the airlock. And the specific gravity of the product may change by less then your ability to detect it on a standard hydrometer. So, I have discovered an alternate way to tell.
It’s not Done
It’s Still not Done.
It’s Finally Done.
The key is to watch the very top of the product in a clear carboy or jug. Even when it is fermenting very slowly (too slow to notice activity in the airlock), you can still see tiny little bubbles running up the outside of the carboy or jug and joining a ring of bubbles at the top. When there is a continuous ring of bubbles, the product is still fermenting quite a bit. When there are only a handful of bubbles, the product is nearly done. When there no bubbles, there is no fermentation going on in the product.
If you are making a carbonated beverage and are going to bottle condition or keg, a ring of bubbles on the top of the product is not a problem. In fact, it indicates you have healthy, active yeast to support bottle conditioning. But if you are going bottle still products in a standard bottle with a cork, you need to wait till it is finally done. If you are going to continue aging the product in a carboy or jug, you can replace the bung and airlock with an airtight screw cap or rubber carboy cap as appropriate for the type of container.
I try to rack my products a few times as possible. My general schedule is to leave the product in the primary fermenter for 2 to 4 weeks, depending up what it is and how strongly it is fermenting. After primary fermentation is complete, I will the rack into a secondary and leave the product alone for 2 to 4 months. It is during this time frame that I will do malo-lactic fermentation if the product requires it (typically for ciders or wine). This is also the time when I will use oak cubes if it is part of the plan for that product. After this, I will rack it into another secondary (or tertiary, since it the third container). Here it will sit for half a year or several years depending up what product it is. Note that there is no fermentation going at this stage. So, there is no dead yeast piling up on the bottom. Therefore, autolysis is not an issue, and I don’t worry about the product sitting on whatever sediment builds up during this phase of aging.
When aging is done, it is time to package the product. If you want a carbonated beverage, you can bottle condition (fermentation in a sealed bottle) or force carbonate in a keg. If you bottle condition, the product must be put into a bottle that is intended to handle the pressure – beer bottles or champagne bottles. Standard wine bottles can explode if fermentation occurs in the bottle. If you want a still product, it can be put into pretty much any kind of bottle and sealed with a cork, a cap, or a swing top. Specific information on different ways of packaging products will be provided in subsequent articles on cider, wine, mead, and beer.
Let’s move onto something simple and seasonal. Cider. Cider is pretty easy to make, it requires cider (or fruit juice) and yeast. To make hard cider, find cider you like to drink (find ones without any preservatives other than ascorbic acid), and add yeast (this will happen naturally if you let it sit in an area that’s about 65 F but it’ll taste better if you select the yeast and pitch it). I’d recommend buying a batch of yeast from your local homebrew store (it’ll cost you about $8 assuming average prices). Put the yeast into your cider, slap on a sanitized airlock (you remember we talked about both of these things, right?), and let it sit for a couple of weeks. Keep in mind that everything that touches your cider needs to be sanitized, unless you want to make sours, which will be a much longer and involved series of articles.
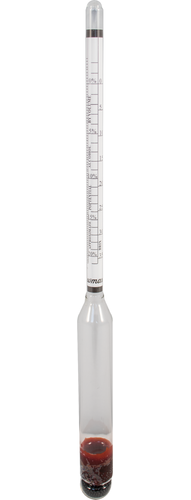
How will you know when it’s done? Time for the next pieces of homebrewing equipment you’ll need. A hydrometer and a wine thief. The wine thief will be used to pull a sample of your fermented cider to test it with the hydrometer (remember to sanitize it). The hydrometer is a device that is used to measure the specific gravity of a liquid. Pure water has a specific gravity of 1.00. Alcohol has a lower gravity (about 0.78), and sugar adds to the specific gravity of a liquid. So those OG and FG written on brewery stats, and on the sides of some of your bottles, are just a measurement of the Original Gravity (measure of how much sugar was in to start) and the Final Gravity (measure of the specific gravity after fermentation). Keep in mind that hydrometers are calibrated to be used at a specific temperature, and if your liquid is a different temperature, you’ll have to adjust that. There’s lots of calculators online to do that math for you. With both the OG and FG of your beverage, you can figure out the percentage of alcohol. If (and only if) you sanitized your hydrometer and sample tube, you can pour the sample but it does increase the risk of infection. Most people just drink the sample (or pour it out).
But back to finding out when your cider is done fermenting, what you want are two readings, at least three days apart with the same gravity reading. Do not bottle without verifying that fermentation is done. Bottle bombs are a real thing, and can be very dangerous. Do not assume fermentation is done because you don’t see any airlock activity or bubbling in the cider.
If you want it to be carbonated, then you’ll need to add sugar at this point (here is a decent calculator, but assume just under an ounce a gallon). Take your sugar, and mix it with boiling water. Then add it to the cider (stirring with a sanitized spoon) and then bottle it. To bottle, you’ll need a siphon (points at the equipment article), and a bottling wand. Bottling wands are a tube with a spring loaded stopper at the bottom. Push it down, liquid flows out. Lift it off the bottom, the bottom locks up. If you’re using swing tops, mix your sugar into your fermented cider (with a sanitized spoon or your siphon), and then bottle. If you need to cap or cork your bottles, I’d recommend filling them all before doing that, or use an orphan assistant for the capping/corking. After that, let them sit for about 3-4 weeks in a room that’s close to 65 F so they condition up (fancy term for letting the yeast eat the extra sugar to make carbonation). Then put them in the fridge and enjoy.
Keep in mind, if you like your first batch, you can easily modify your second batch. Add simple things like ginger, cinnamon, cloves, or whatever. The longer you let the cider sit on the spices, the more flavor it’ll pick up. For your first attempt, I’d recommend no more than 1 tbsp. per gallon, it’s always easier to add more spice, or let it sit on the spices longer, but you can’t easily take the flavor out.
It appears a lot of you degenerates are interested in making your own alcohol (or rather, using yeast to do it for you). Thankfully, this is legal in the US (as long as you’re not making more than 100 gallons). I’m going to start with the basic equipment you’ll need and some starting tips:
Cleanser – Cleanser is needed to clean up all of your items that will be used in the process. You can buy PBW (Powdered Brewery Wash) or any of the knock offs. Personally, I generally use OxyClean free for my cleaning needs.
Sanitizer – Here, I recommend StarSan. While you can use bleach or other household products, StarSan is cheap, effective, non-toxic, and no rinse. Sanitization is a critical item, everything that touches your beverage needs to be sanitized. This will keep the risk of infection low.
Fermentor – This is where the magic happens. You can use food grade buckets (7 gallons) or carboys (glass or plastic). You can find fermentors in almost any size you want, but the standard sizes in the US are 1 gallon, 3 gallon, 5 gallon, or 7 gallons.
A siphon – This will be used to move beverages between containers and minimize oxidation.
An Airlock – There’s two basic styles, a three piece and an s-shaped one. I prefer the s-shaped ones, but if anything gets inside of it, they’re impossible to clean. Thankfully, they’re cheap. These allow gas to escape the fermentor while preventing outside air (and bugs) from getting in.
Empty bottles – You can buy them, or save up from your other ones. If you’re planning on capping, realize that you can’t use screw top bottles. If you like Grolsch, the swing top bottles will mean you don’t need the last item on the list.
Capper/Corker – Depending on what you want to make, and how you want to serve it. You’ll need to either cap or cork the bottles at the end (yes, you can cork beers, and cap wines if you wish).
Keep in mind the difference between clean and sanitized. Items need to be cleaned before they can be sanitized, and cleaned items can still cause infections. Anything that comes in contact with your must/wort (unfermented wine/cider/beer) needs to be sanitized. Don’t skimp on this step, follow the instructions on your sanitizer, and understand it.
Keep notes. Write down everything. Almost every brewer has a tale about this really great beer/mead they made where they made a mistake part way through the process, and it made the best beverage they ever had… but they forgot what they changed in the process, and haven’t been able to reproduce it.
Relax. People have been accidently making wine and beer long before they knew what they were doing. The worst you’ll do is make a batch that doesn’t taste good that you’ll have to dump.
Don’t expect to save money right away. This is a hobby with large upfront costs. If you keep doing it, you’ll eventually be making beer/wine whatever for cheap, assuming your time costs nothing.
It seems a bit of a waste to talk about fermentation without giving a recipe or project, so here’s a great starter recipe:
3.5 lbs honey (clover or a blend)
1 large orange
1 small handful of raisins
1 stick of cinnamon
1-2 whole cloves
1 teaspoon Fleishmanns bread yeast
Water to fill to a gallon.
Wash the orange, and cut into eighths. Clean your 1 gallon carboy (glass jug) and dissolve the honey in warm water. Once it’s dissolved, put it into the carboy, along with the orange (push it right on through the opening), the raisins, the cinnamon, and the cloves. Fill up to about 3 inches from the top with cold water. Shake it up (with a lid on, or not, but it’ll go better for you with a lid). Once it’s all mixed up and at room temperature, add the yeast and put on an airlock (or a balloon with some holes in it). Stick it in a cupboard in the kitchen in the dark. After about a week, you can top it off with more tap water. Then just leave it alone for a couple of months, it will eventually drop clear (and the oranges will eventually sink as well). Once it’s clear, it’s done. Just siphon into bottles and cap or cork them.


 To begin with, the first thing we’ll need is a


 How will you know when it’s done? Time for the next pieces of homebrewing equipment you’ll need. A

 Joe’s Ancient Orange Mead