Author: Yusef drives a Kia

  • A Gem in my Backyard* – Icehouse Canyon

    A Gem in my Backyard* – Icehouse Canyon

    *There are many, this is one.

    I live in in Southern California, specifically in the Inland Empire, in a little city called Upland, 36 miles east of L.A. Nice place, I guess. I grew up hiking, playing and otherwise enjoying the San Bernardino Mountains since about 11, when my Mom took me up to Mt. Baldy, about 10 miles north of my house as the crow flies.

    There are many things to do in the local Mountains, hiking, skiing, driving, and camping, for a local kid it was heaven, and at 18 I finally climbed Mt. Baldy, and I saw Catalina Island 80 miles away. I could see all the way around it, I was that high.

    Anyway, one of the nicer trails goes from Icehouse Canyon, into the Cucamonga Wilderness, and if you go up high enough, at least as far as the Saddle, you might see big horn sheep. So, my son and I decided to take his cousin Brody up and show him the sights. An April storm had just passed and it seemed warm and dry enough, so off we go….

    As soon as we gained some altitude we encountered some nasty weather leftover from the storm, but nothing we weren’t ready for, so we pressed on, the whole hike turned dark and eerie, but that just added to the awesomeness we were shown.


    When we finally entered the Wilderness, we are treated to a stone that doesn’t belong here, Serpentine, again showing the suspect terrane of the San Bernardino Mountain Chain.

    Higher we went, and things were getting even more fogged in, but no Ice or excess rain so we kept going, we are City boys remember….

    We stopped at Columbine spring, the last water available, for a top off and some pics, then made our way to the saddle.


    This section could be in Scandinavia or something, fully socked in with swirling clouds and such.


    Once we arrived at the Saddle, we had a bite to eat. BTW look at our faces.


    So, Son wants to head East on the Etiwanda trail, OK. About 100 yards in we spot bighorn sheep!


    They look like giant dogs, that would kick your ass, so OF COURSE idiot Son tries to get as close as possible. I laugh and tell Brody, “I can’t wait ’til that thing kicks him off the side of the mountain,” but they left, and gave us something to remember them by…..

    The downhill was uneventful, ’til I got home and found a knee-sized blister on my knee. I was favoring my left leg going down, and rubbed it on my Dickies I suppose. Don’t let anyone fool you, SoCal has gems all over the place. You might find it hard to believe the pictures my Son took are so close to a metropolis, but there it is.

    Here’s the Gallery, please slideshow this one, there are so many pictures I just didn’t have space for, it is chronological down/up/ down.

  • The Little Mine: Kitbashing ideas

    My extended building project is a series of 2’x2’ dioramas, each with its own theme, add some bridges to join the sections, then let my granddaughters play on them. At the same time, I’m building a nice resume for my infant scenery business, more on that later. The scale is 28mm/ Heroic scale, but this is a bit different, the entire scenario is little people that mine gold and are protected by fairies. So far so good. I was asked to build a castle at the same time, so I did, but the further I went, the more the castle interfered with my view, so I dropped it from the scene. I’ll use it later.

    Here’s where I started. This is just drywall mud in a multilayered foil form, easy and cheap.


    Then I used the pieces to clad some foam to get this shape. A good start.


    Here is after a few washes, and some basic water layout. Not done yet!


    This is after a few water layouts and accents.


    I have an entire castle made, but I can’t see inside! I finally said, “Nope,” and dropped it for some palisade work I had laying around, and it looks like this.


    Much better view, and lots more things to add for coolness, like torches.


    A farm, with Grandma.


    GOLD! With miners.


    Next up are the details, more trimming, drybrushing etc. Enough for another episode, til then…


    Left to Right: Granddaughter #1, Granddaughter #2, Guardian Faeries, 3,4,5.


    And of course, the Gallery, with lots of great stuff this time.

    I’ll be starting up a business around my scenery work soon, so if you have ideas, or potential clients, lemme know. /Shameless Promotion

  • Desert Interlude: A small wargaming table


    I needed a break from gray and black, so I took a cue from HM’s Taliban WG figures (way cool stuff) and went to the desert. After doing a scatter piece in desert motif, I was hooked.


    Using a building I had done…


    I made a template and built a 2 story, with balcony.


    Then we go for the main board.


    I used the same stepped rock style as the scatter piece, and built up the corner of the base, then used drywall mud to fill and texture the entire thing, like this.


    Then we paint the entire base.


    I’ll let you go through the gallery for the steps, but cactus!

    War Gaming tables aren’t like dioramas, they are meant to be played on, so you lose a level of detail, but that’s fine, people have fun.


    Here’s the finished project, 2’x2’. The wife wants more 2’x2′ pieces for the granddaughters to play princess type stuff, so that’s my next task, until then, here’s the finished table. Cheers!

    Gallery

    Post Script: I will post the final Omaha Beach scene next.


  • D-Day, 1944 pt. 6/7 – A bunch of stuff – And Water!

    Catch up on all the Omaha Beach Diorama posts


    Part 6

    The Wife relates a tale. Recently I had drunken almost tears at my diorama accomplishments so far, and today she asked this question, “Why do you take such joy in all this death and destruction? Why the obsession with all the blood?”

    History is remembrance, it’s foolish to hide from it. History is to me a study of human nature, and I like to build stuff….

    I figured since I built a two tier bunker system I could do something interesting with ‘splosions,

    Like this:


    Closed


    Open

    Yes, there is a Flak 36/37 under there, burning…. I had to build a blast wall so the other 88s didn’t get wrecked. I have a pair for the other positions and still thinking naval gun…pricey.


    Man overboard! I finally got the men in the water, the White Glue dries clear and works with the water chemically, so don’t sweat that.


    I thought maybe this is too busy, but then I watched a few videos, and decided to make a bunch more water ‘splosions, the real deal was WAY worse than anything I can reproduce, at least in this lifetime, and the H beams in the surfline are a nice touch. 


    I’m finally getting a handle on the men (euphemism alert!). My German mortar team is done.


    And after a fiasco with a first group of Americans, I found some I can work with. Painting men is an ongoing process that never ends, whether you’re doing 7 colors or 4, it’s definitely the worst part of the entire project, but if you take it as a challenge, and work bit by bit, the results are worth the effort.


    How do I do stuff? Water ‘splosions need these ingredients. I see guys using a full blown caulking gun for this stuff, and to me it’s overkill, anyway. Take a stick of H beam that you have lying around, (you do have ¼” Styrene H beam , right?) cut it and slather clear silicone on generously, (Jesse may have some thoughts, but whatever) and then take the toothpick and drag the silicone ’til it looks jagged, then let it dry. Then dry brush white paint over the outside edges. Take a small brush full of paint and knock off 95% of the paint, then brush upwards, and you’re done.


    Smoke/Land ‘splosions. These are funny to me because it’s so damn easy. Here we take some steel wool and pull and puff it out, then spray it black. If you miss a spot it’s cool because it’s grey. Yippee! Then dry brush, in order: Chrome Yellow; Crimson Red; Mix for Orange; Black; Grey; Black; Mix Grey and Black. Ingredients above.


    Results


    We added a few 500 lb bomb craters, because, craters!

    Everything is in place for the water pour, so barring any bullcrap, our next installment will be WATER!


    Propaganda! I found the source of my previous posters and they do them in 1/72 scale, they are wonderful! Details, and great color. Bravo!

    Until next time, thanks for watching!

    Link to Gallery #6


    D-Day, 1944 pt. 7

    Water

    Drafted or volunteered, most of the men who were at Omaha were 18-20 year old kids, had never seen combat, and were told that 4/10 would die that day. The prevailing thought was, not me, the other guy, so gung ho they went to their deaths. There are entire squadrons of men who were flat out never heard from again, and no record of what happened to them. This is here, this is now, this is war.


    I work on several sub projects at once, it keeps me moving forward and breaks up the monotony, all moving towards the pour. like the new 500 lb bomb craters, and some new blast effects.


    And some finished Army Men! 5 German mortar teams.


    And a boatload of U.S. troops.

    I still need to flock the bases they stand on, but otherwise ready for the board. I decided on stands because they are so damn small they are hard to locate and stand with just glue.

    A few minutes later……


    The Pour

     I’m ready to go, no flecks of dirt, foam, cat hair, etc. I have my materials.  The syringe is to inject the food color/water mix. The tape and wax paper are to tent it from dust after the pour. 

    Realistic Water, probably need more. Toothpicks and plastic bits to move the water around. Light, lots of it. Cobra, but only one to calm myself. If I mess this up, the whole thing will be ruined.

    Let’s pour…

    Things worked out well, and with prep it turned out nice for the first pour. The stuff flowed like…water, and I’m glad I leveled the board or it would have been a disaster.


    And here’s good example of guys in water, and guys that are not yet in water, where I finished the first pour transition.


    And the tent FWIW. I’m told it’s a good idea.


    Now I wait at least 36-48 hours and then pour again What will I do to fill the  time?

    Gaaaahhhh! How about fix the leaks so you don’t lose 20% of your water? All it needed was some blue tape on the bottom seam. I didn’t catch that, derrr! Due to the contours most of the pour is intact and it won’t be affected at all.


    Two days later….

    After sealing leaks, I went for the second pour, and found two more leaks, which I promptly repaired and ended up with a pretty nice water base.

    Once I’m satisfied/broke, I’ll add the waves, ripples and surf effects with the water effects stuff from Woodland Scenics, then a dry coat of white caps and we should have some good water.

    This will dry clear, then, after some more waves and ripples, it dries clear, then dry brush (popular, ain’t it?) some white on top to create whitecaps, etc. I’m stopping here so I can at least post before I’m done, ’til next time.

    Gallery #7


  • D-Day, 1944 pt. 5 – The Atlantic Wall

    Catch up on all the Omaha Beach Diorama posts


    The Wall: Looking at some pictures and such, I saw a need to cover my bigger guns, add some blast wings and otherwise make the place looked lived in, as well as make a spot for all the German troops to fight from.

    The top ended up with 4 different sally ports, that required learning to make sandbags. I’m still working on a good technique, but these will do for now.

    Effects: Craters are fun, it takes 4 or mores washes, fills and paints to get ’em looking cool, but these will work well when it’s all said and done.

    Paint

    Wash #1


    Wash #2

    In Place


    Water ‘Splosions: We decided to make some smaller stuff to round out the water, they should look great in the water.

    Static Defenses: The barbed wire needed to be wrapped and painted before the Caltrops could be placed, but now the beach is finished, except for the details and sealing, which comes at the end.


    In my usual fashion, I design and build as I go along, and find my direction that way, this build is no exception. Half of the men I bought won’t be used, half the pieces won’t be used, and different pieces/men will be purchased to fill in the blanks, you get what you pay for I guess. My terrain is very standardized and honestly somewhat boring, very grey scale, but the results will be fine.It will take several months to finish this one, so… I’m thinking for my next one, a castle on the side of a mountain, with waterfalls in several tiers, in COLOR!


    Until next time.


    Part 5 Gallery

  • D-Day, 1944 pt. 4 – Modeling

    Catch up on all the Omaha Beach Diorama posts
     

    Things change when you build a diorama, and now that I’m on my second one, I have learned that they ain’t the same. Scale aside, this one has pieces embedded. I usually would show you a bunch of tanks and guns on my table, ready to display. This time I have to place men as part of the piece, as it were, then place all my dynamic guys after, with the pieces set (the pieces are all the boats, tanks and things on the table).

    I learned that D-Day occurred at low tide, so a nice bit of rip rap seemed to fit the bill.


    And I wanted a mixed sand look, so we take 10 parts sand color to 1 part black cinder and it comes out like this:

    A little more against the wall and we are done with the beach sand element of the project.


    Defenses: Trying to finalize the primary defenses is easy enough, some barbed wire and the dragon’s teeth, some boat preventers and we are looking good so far, but there are a few details yet to come in that regard.


    Army Men: I’m reaching saturation on the board. Have 221 men to paint, and with all the effects it’s going to get busy.

    They need 7 colors, and we paint the base, then bas relief the rest of them. In 1/35 I could paint masses of one color, for example, all the boots on one sprue tree, all the Kbars on another, and guns on a third, all in one pass. At 1/72 scale I get about 3 to 6 parts done before my eyes bug out, so it kinda sucks for production, but we carry on.

    These are the guys I need to finish now, everyone else can wait.

    Someone asked about tools. I have my main tools and supplies packed for the AZ move, so everything had to be bought from scratch on this project, and it looks like this:

    I am using acrylics as much as possible, and Hobby Lobby has a great selection, very cheap. All the scenery elements like the clump foliage used in the ‘splosions, the water, sand, etc. are Woodland Scenics. Dollar Tree supplies my white glue, toothpicks, foam board, rip rap, stir sticks and painters blue tape. I’ll show you how I do some cool things in a future post.

    Part 4 Gallery

    P.S. I’m cutting this episode short because a lot of things are happening, and I don’t want to get confused. Cheers!


  • D-Day, 1944 pt. 3 – Prepping for Water

    Catch up on all the Omaha Beach Diorama posts 


    We know the story, it’s D-Day, and white men will die, but what’s going on right here, right now, with this Company? I needed a way to get the Allies past the initial obstacles, and it needed to be legit, so why not a few large craters?

    Due to the tide, it’s already wearing away. At least 40% of the men are expected to make it to the wall. We shall see.

    Water: My undercoat turned out smashing IMO, it blends well from Midnite Blue to Light Grey, with a neat little surf line, ending in a dry sand beach head, check it out.


    There are still many details to come before I can pour the water such as…

    Army Men: Tedious is a polite way of putting it. Painting little boots and faces is hard on the eyes, but it must be done, so I do my best and carry on.


      Remember, at least 40% of the men I paint, I will kill, burn, drown, dismember, and otherwise mentally fuck up, before I can pour water.

    It’s good to have a selection of different types of troops, even if they aren’t “D-Day” troops, for example, I have some U.S. mountain troops that have some horses, the Germans used horses a lot so they get them. The U.S. guys leading them with bridles will end up in the water hanging on to ropes from the Higgins boats. Repurpose anything you want/can is my motto.


    The pieces (meaning all the machines, not the men) themselves are all cut into the board to sink them below the water undercoat and must be completely sealed before pouring the acrylic water, every nook and cranny has to be filled with tiny bits of foam and then layered with Elmers Glue. After that they must be sealed with water effects to create a nice blend with the water when it comes in.

    Water ‘Splosions: I have yet to do one, but the idea is quite simple, some clear silicone caulking on some sprue, drug out with a toothpick, but I’m going to try for some small arms fire bullets in the water stuff as well. We shall see….

    Effects: I have a few…this is just the beginning of my madness.

    Boom!


    This is going to be good!


    Gotta have Dragon’s Teeth 


    Where there’s smoke, there’s smoke


    For all you water guys, it will be a month before my first pour, be patient. I plan on at least 4-5 pours, each 1/8 of an inch at a time, to 1/2 inch depth total , but the results will be smashing, I tell’s ya!

    Until the next installment, here’s the latest album. Put on some WAR music and play it as a slideshow!


  • White Male Privilege, D-Day, 1944 pt. 2

    Note: Title by straffinrun

    Read Part 1

    Landscapes: They work like this, everything gets thrown out. You get all your men ready, lay out your guns, and then look at YT or Google images. Oh My. Even though the distance from the beach to the cliffs was only 35-50 yards, the Higgins drivers dropped the doors sometimes 500 hundred yards from the surf line, dumping men into 8 feet of water with 120 lb packs and gear; many drowned. Many who didn’t were killed by MG 42s coming from the cliffs above. Some, enough, made it to poor defensive positions. That’s where we are.

    I saw that a 20”x 30” diorama wasn’t going to work. So I bought a 4’x8’x 2” piece of foam board, and cut it to 24” x 60” which is 120 yards scale, enough for the Higgins Boats, sunken Sherman Tanks, a good long field of fire, and some good Atlantic wall stuff.

    Water is Tough to Model: You see, to make water work, you need to paint depth gradients, and carve out pits to install the boats, tanks, etc. at various depths, then pour ⅛” deep at a time. To get the proper effect, I did a practice run, and the results were good.

    The Base: I’m building my own “Atlantic Wall”, the online offerings are slim and everything I find, I can do better. I noticed my acrylic duct sealer finishes in a nice shade of grey, so I’ll try it for the base of the Landscape. I get to model mortar hits, on land and water, gunfire and 88 shells. This might be awesome. No, this is becoming awesome!

    Sand: It isn’t flat is it? I’m working with duct sealer to get an undulating, but still low sandy shore look, and then it will be mostly covered with a fine railroad ballast to make the sand.

    Then things changed, I decided the cliff was too tall/cumbersome, so I tossed it aside and built a lower bluff instead, one I can integrate into my Atlantic wall.

    So far I have had to learn:

    Blood in water;

    Water;

    Craters and explosions;

    Bunkers and cliffs;

    Sand dunes.

    I’m sure I’m not done learning.

    The Men: Are a Pain in the Ass! They are too small for my old eyes, and I don’t own an electron microscope, so the level of detail is a bummer compared to 1/35 scale. However, the action precludes the detail so it’s cool. I finally found a skin tone that works so I don’t have to mix batches anymore, still a long way to go…….

    36 faces, 36 minutes, and they all will become casualties.

    Link to the latest album, Part 2 and Part 1

  • A Slice of Omaha Beach: D-Day, 1944 pt. 1

    I think it was MikeS who said, “What next, Omaha?” It took about 10 seconds to say, “Why not?” Well, for one thing, 10,000 Allied casualties on the first day, It wasn’t a small battle, and a lot of shit happened all at once, kind of like war, anyway…

    I decided to work in 1/72 scale this time (a soldier is 1” high) due to the scale of battle, and I could get more men on the field that way. Next was deciding where I wanted to build. I chose a cliff that has a large bunker system full of artillery, and the Rangers are going to attack and scale the cliff, WooHoo! Uh, oh, how do you get there?

    Higgins Boats: Built on a design from a Loosiana Swamp Boy, low draft and easy landing, they carry 15 troops, and are swampy as all get out, but they get the job done, of course, until the Germans open up on you. We will get to that….

    Water: Yay! I get to spend a lot of time and money experimenting with surface water, you see, I need to have deep water, sunk/blown up Higgins Boats, and blood water up against the shore; mockups will be required.

    Army Men!: I have 47/87 finished, and another 30 on deck, tedious is too simple a term for this tiny ass BS, but it’s cool. I’m trying for at least 500+ men, 9 or 10 landing craft, multiple Shermans, and a very busy landscape.

    The Germans: I found a guy who 3D prints out various useful objects, very cool but he ships like a snail. We’ll go over the Germans next.

    ’til next time!

    WAR! What is it good for? Making dioramas!

    HUH!

    Check out all the photos here (so far)

  • Lozon, France: A WWII Diorama

    In the beginning, it was just a few figures to paint as the Crew of my B-25 Mitchell R/C plane, which is about 54” wingspan, so maybe 1/35 scale figures, so off I go to buy men, glue and paint. Some background: I have built models all my life, from shitty to glorious, and one of my customers is the owner of the hobby shop I have shopped at for 35 years, Pegasus Hobbies. So I knew where to go and what to buy, then I got home…

    I finished my guys and put them in my plane and brainstormed, “what if this plane did an emergency landing, and caught a Tiger on a field out of fuel, pinning it with its massive amount of .50 caliber guns? So I bought a 70$ Russian Tiger Tank model, I’m not cheap, and it was a sweet build, I ended up modding it several times as you will see.

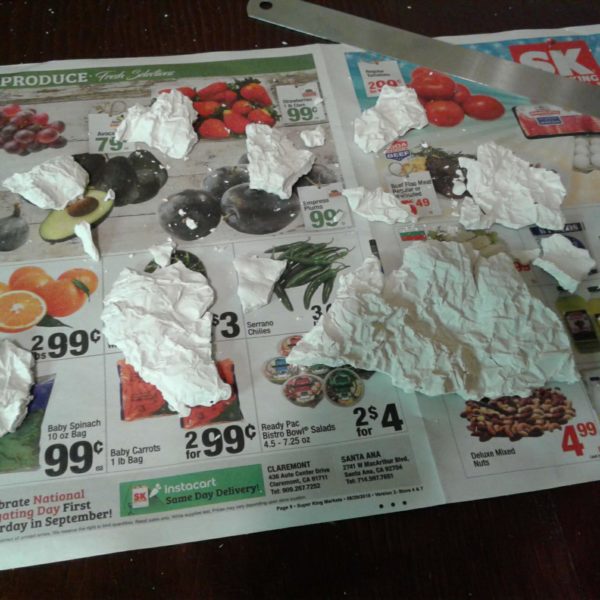
    I needed landscaping and looked around and found some cheap shapes at the 99 cent store, and papier-mâché of course, but coverage? It was right then I knew I needed a plan, this was going to grow, I wasn’t sure just how big, yet. After a bit of research I found Woodland Scenics, which makes all kinds of very cool things such as bare trees, shrubbery, loose grass, dirt, sand, just an abundance of ideas, and with that in mind I decided what to do.

    The Bocage

    Actually means little boxes in French, however, from the wiki, in English bocage refers to a terrain of mixed woodland and pasture, with fields and winding country lanes sunken between narrow low ridges and banks surmounted by tall thick hedgerows that break the wind but also limit visibility. It is the sort of landscape found in England in Devon.

    “The 1934 Nouveau Petit Larousse defined bocage as ‘a bosquet, a little wood, an agreeably shady wood’ and a bosquet as a little wood, a clump of trees’. By 2006, the Petit Larousse definition had become ‘(Norman word) Region where the fields and meadows are enclosed by earth banks carrying hedges or rows of trees and where the habitation is generally dispersed in farms and hamlets.”

    In WWII, The Bocage would play havoc with the Allied Advance, so I went with Operation Cobra, and an Allied advanced scout finding a full blown German repair base.

    Caught unawares, they get shot up bad, and call for help, then it all unfolds…

    My son got involved when he saw the decals, especially for the men themselves, and he did some fantastic work under lamps and magnifiers. He had a go at painting, but he fucked up so badly, I made him do a complete repaint, which he did flawlessly…and said, never again. Now it was my job.

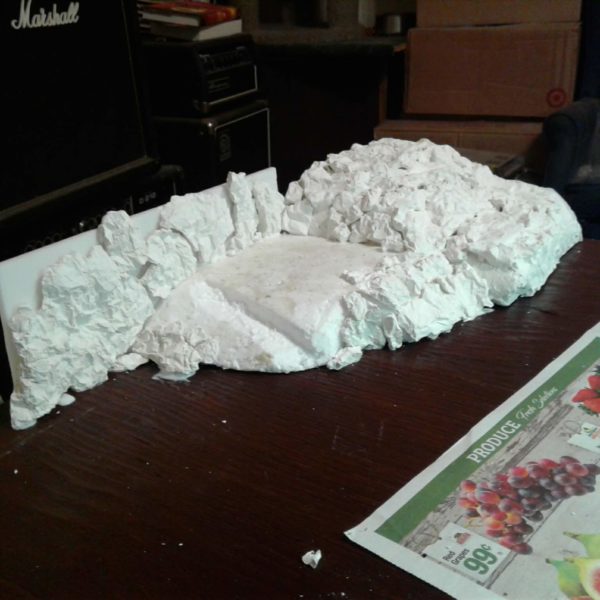
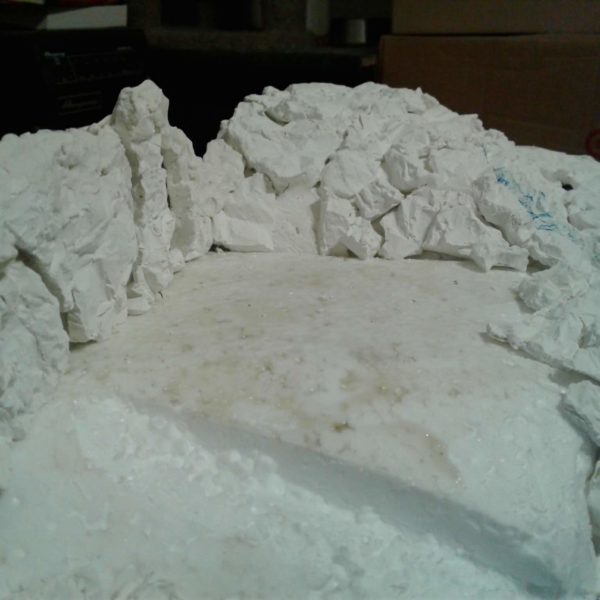
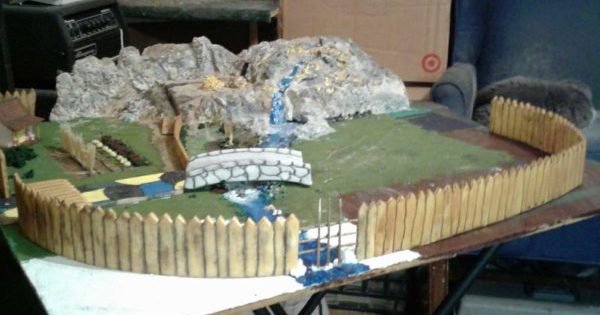
    The Bocage needed to be at least 15 feet scale in places, so I glued down some shapes and began gluing shrub pieces, it took an hour to finish an inch, granted, I added hidey holes and things, but it was 30 inches long. There was also the Bocage tunnels; they were fun because I needed to keep them open some just to see the guys running through them.

    Details: At this point, it’s midsummer, so when I come home from work, I just want to cool off, and paint…really what I began to do is run several jobs at once, spray big pieces, paint men, assemble, landscape, repeat, for 6 months. And the farther we got in the project, the more detail was necessary. I did 240 men total, and I spent 2 hours on each one, and I could have done better (and lost my mind).

    By this time we are done with this panel, 30”x 50”and stow it in the garage ’til next year.

    We spent a lot of time watching historical docs on YouTube, focusing on what they really looked like, camo, lifestyle, all that we could find. I scoured the Internet looking for new figures for the next phase, and bought just about every German and American 1/35 scale figures you can, then set up the next section.

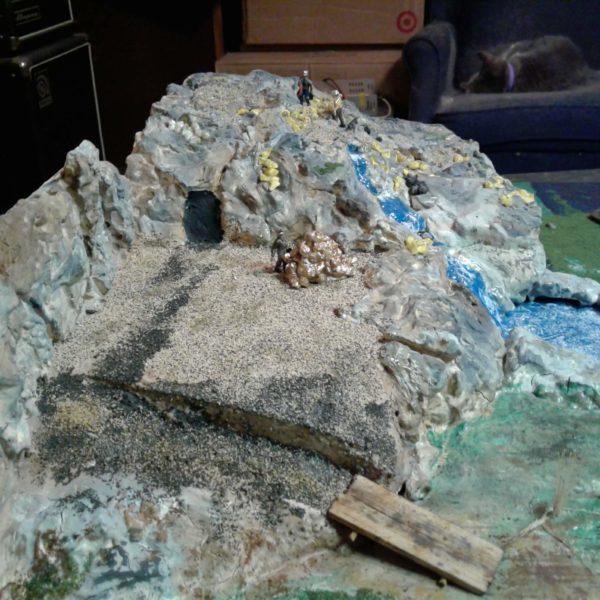
    The Base: the following Spring, I started filling the section I had built over the winter, this needed a bit more thought being quite busy. So what does a Base need?

    (click to enlarge images)

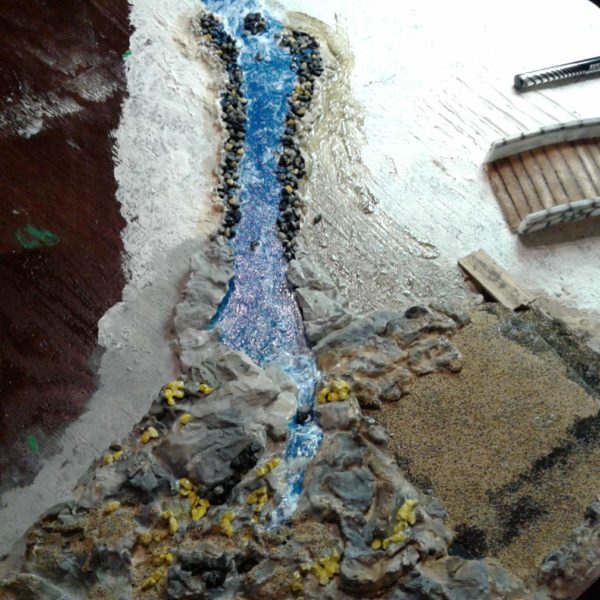
    The Storyline: Nazi fanatic Commandant throws everything at the force attacking, simple, it’s a caught off guard scenario, kinda like reality. There are culverts, ditches, a prime mover, wounded men, a pig sty, and my son made sure that every piece was the right division for the time and area, including 240 helmet insignias! I painted my men in groups, and mixed up the uniform colors for each one, while staying accurate. I lost about 200 pictures when my W7 machine died, but there’s a lot of neat stuff to check out.

    I had a great time doing this project, it took 2 years and about 1400 hours between my son and me, and I think $1500 or so, but spread out.

    Armory: US
    M3 Lee
    M3 Stuart
    Sherman
    Jeep

    Armory: Germany
    3-Flak 36/37
    2-20mm AA guns
    3-75 mm guns
    Tiger1
    Panther
    Hetzer
    PZ4 H
    2- 75mm AT guns
    2- Hanomag troop carriers
    1- 8 ton truck to move this shit
    1- Rail mounted PZ 4 turret

    As I thought I was finishing, several knowledgeable friends asked, “where’s the radio room, how about a shitter?” It just happens that there is a radio room with operators you can buy, and I found the most realistic copies of maps, and shrunk them down.

    I wanted a nice, expropriated office for my Commandant, and I found some nice period pieces cast in resin, so I set him up. I found 1/35 scale Nazi propaganda posters on Ebay. Sweet! I built his entire room, fireplace, desk, library, map table (with accurate maps), and a fraulein, again, custom paint.

    Paint: For all projects I use Testors, and Testors Model Master, and Tamiya Acrylics

    Landscape: Woodland Scenics, hands down. Use a white glue/water mix, spray and spread.

    Brands: Start with Tamiya, best bang for the buck, because quality counts, Ukraine has Szvezda, but there are many others. YMMV.

    At the end, things were looking good enough to find an actual place in France, and I found it! My Name, Lozon, France, not 3 miles from my diorama! Maybe closer!
    I made sure to setup street markers, etc but not Lozon sadly. Still cool, it’s a real place.

    I ended up very happy with the results, and it kept me busy for 2 summers. I know it’s amateurish, but hey I’m an amateur!

    View more photos:

    Gallery 1

    Gallery 2